
Made with Photo Impact 8

Made with Photo Impact 8
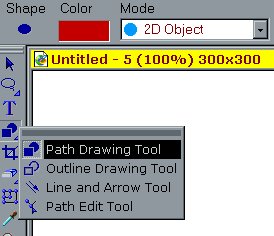 |
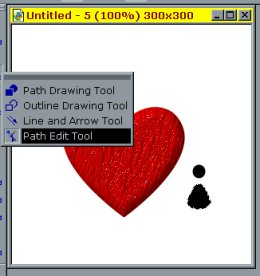
Open a new image 300 x 300
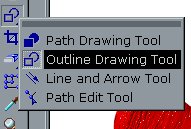
Go to Path Drawing Tool Set it to 3D round choose dark red color |
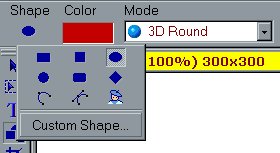 |
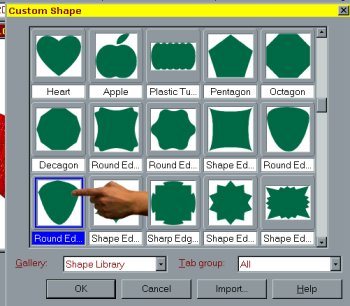
Go to Shape..choose custom shape. |
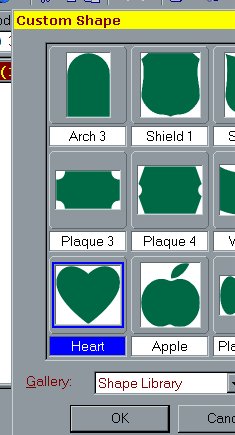 |
Choose the heart shape |
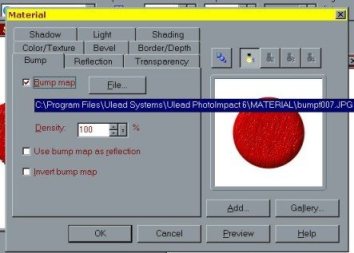 |
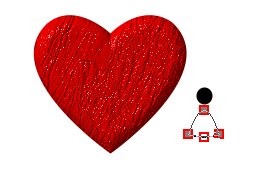
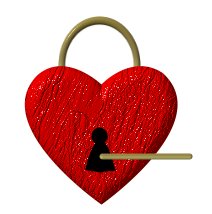
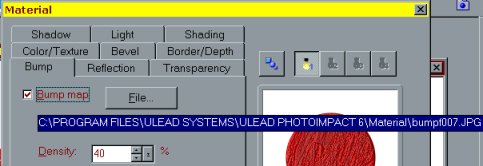
Click on Material at the top of your screen, on the right side..
Click on bump..click on file. .Go to your PI files ..(usually found under program files).. find the material folder..and find bump F007..select open..say ok. Now your heart has a nice texture. |
 |
Ok Let's make the keyhole.
Go to path drawing tool select color black change to 2D object Go to shape..choose circle..draw a small one. back to path drawing tool..shape....custom shape. Find the round edge 4. Make your shape |
 |
Lets turn our shape.
Go to edit..rotate and clip vertically Now while still active click on the edit path tool. Click on your image. |
 |
once the image is active..go up to the top where it says edit point..click on the minus sign .then click on the middle square of your image..tada!!! its straight across now!!! |
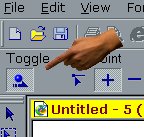 |
Now click on the toggle button to take it out of edit mode. |
 |
Line up the piece you made under your circle.
Click on the pick tool..Holding down the shift key.. click on the circle and the last piece you made..they will both be active now. Right click and merge as single object. Now drag over to your heart. |
 |
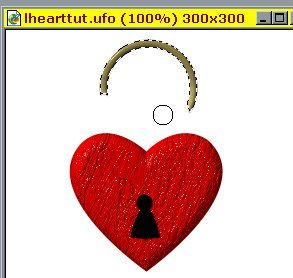
Now lets make our lock handle. Select outline drawing tool. 3D round
gradient gold 008 shape ...eclipse set width at 4 |
 |
Make your eclipse.
Select the object eraser tool.
|
 |
While eclipse is active..go to object..convert it from path to an image. |
 |
Take the eraser and erase a little less than 1/2 of the bottom.
Right click on the circular lock and click arrange..send to back. |
 |
Place on top of your heart so you do not see the opening. |
 |
Now lets make the key.
Go to Path Drawing Tool..shape..rounded rectangle.. 3D gradient gold 008 |
 |
Draw your rectangle horizontally.
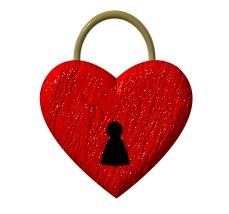
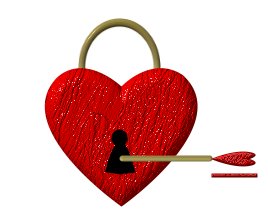
Your locked heart should now look like this. |
 |
Ok let's make the end of the key a heart. Go to Path Drawing Tool
3D..shape..custom shape..heart..selet a red color..Make a small heart. Go to Material again..click on Bump..check Bump file again..choose BumpF007.jpg Click shading..choose Metallic |
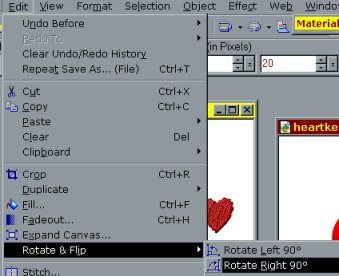 |
Go to edit ..Rotate and Flip..rotate right 90 degrees.
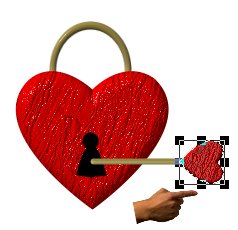
Place on the end of your key stem you made. Get it so the tip of the heart is just barely sitting over the stem end. (this is important for the animation) |
 |
Make your heart active..
Right click..duplicate....go to transform tool...Now you want to pull in the sides of your heart ..so put your curser on the bottom middle square and pull up..do the same on the top of the heart..with middle being moved in. Only take it in enough to be able to distinguish a difference between the size it was before. Now with your heart still active.....right click duplicate..transform again and repeat making the heart narrower again and the lock opening up more. Repeat once more..right click duplicating the heart.. making the heart narrower yet.. Our objective here is to make the heart narrower without changing its length. |
 |
Now make your top lock over heart active.we need to do the following.
Right click duplicate... Click on transform tool..rotate by 20 degrees counter clockwise until the opening is showing. Right click ..send to back This is your second image.. Your second image will remain active.....right click /duplicate..rotate again...send to back.... Do this til you have 5 of the top locks made and each time rotate 20
degrees,sending each of them to the back.
|
 |
Now go to path drawing tool..shape..rectangle.. Make a small narrow
rectangle the LENGTH of your key heart..It should maintain the material
from your heart..if not repeat that part over..getting the material the
same as the keyheart.
|
 |
Move the rectangle you made up in the hearts place.
And one last time using the transform tool..rotate the top lock open more. save as Now you should have 5 of the gold rings..made and rotated and sent to
the back each time..
Save this as a UFO
|
| 1.Now let's animate our heart. Go up to Switch in the top right corner..select Ulead Animator. | Select open an existing image.
|
|
|
On the right side you will see all of your pieces listed..find the white background..click on it..right click select delete object.. |
| Highlight your heart at the bottom..right click/properities..
.change the delay time to 25 |
Now right click your image and select duplicate..duplicate it so you now have 5 images. |
|
|
Click on the first image..
Go over to the right side where you images all are..Where the eye icons are you want to go through the pieces removing all but the first ones you made.You will see the pieces where you have the eye showing. |
| Go to your second frame and so on..clicking only on the eye icon of the pieces that you want to show.Eliminating the others from showing up. | .Once you have gotten all of the images gone over....you are ready
to finish up.
|
| Now do a preview of your locking heart..everything look ok? Then let's
save it.
If it looks like any of your pieces are not in quite the right location...you can click on edit..find the frame of the one you need to correct..click that piece and move it into position. |
Go up to file and choose optimization wizard.. make sure yes is checked
in all windows. Click finish..and save as...
You are all done! |