Pennsylvania Railroad Gondola from an Amesville Shops Kit
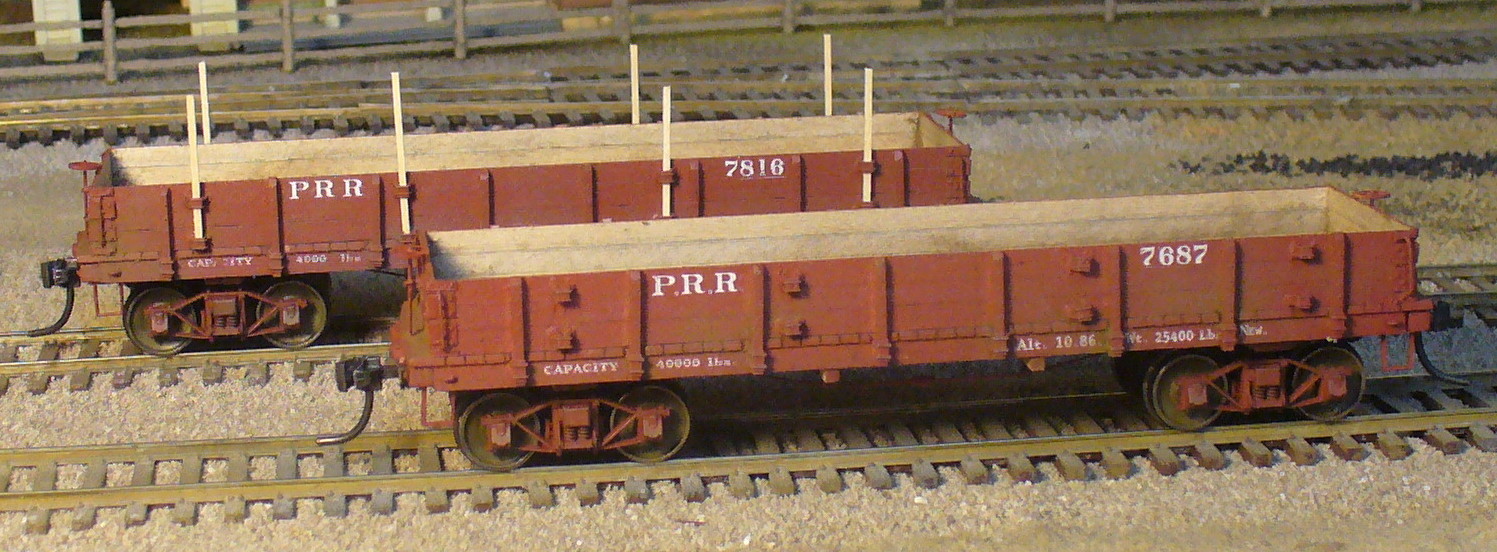
Craig Bisgeier has issued another fun-to-build laser kit of a useful prototype: an early Pennsylvania Railroad low side gondola with or without a drop bottom. Because most of the floor was flat and openings relatively small, the car could be used for just about any load such as coal or lumber that did not need to be covered. I ordered two of the kits and after perusing car diagrams and photos online decided to apply some modifications to build the somewhat later GE gondola. This car had three-board sides and ends, eight stakes per side, and four additional pairs of stake pockets on each side for long stakes used for high bulky loads such as lumber.
Construction
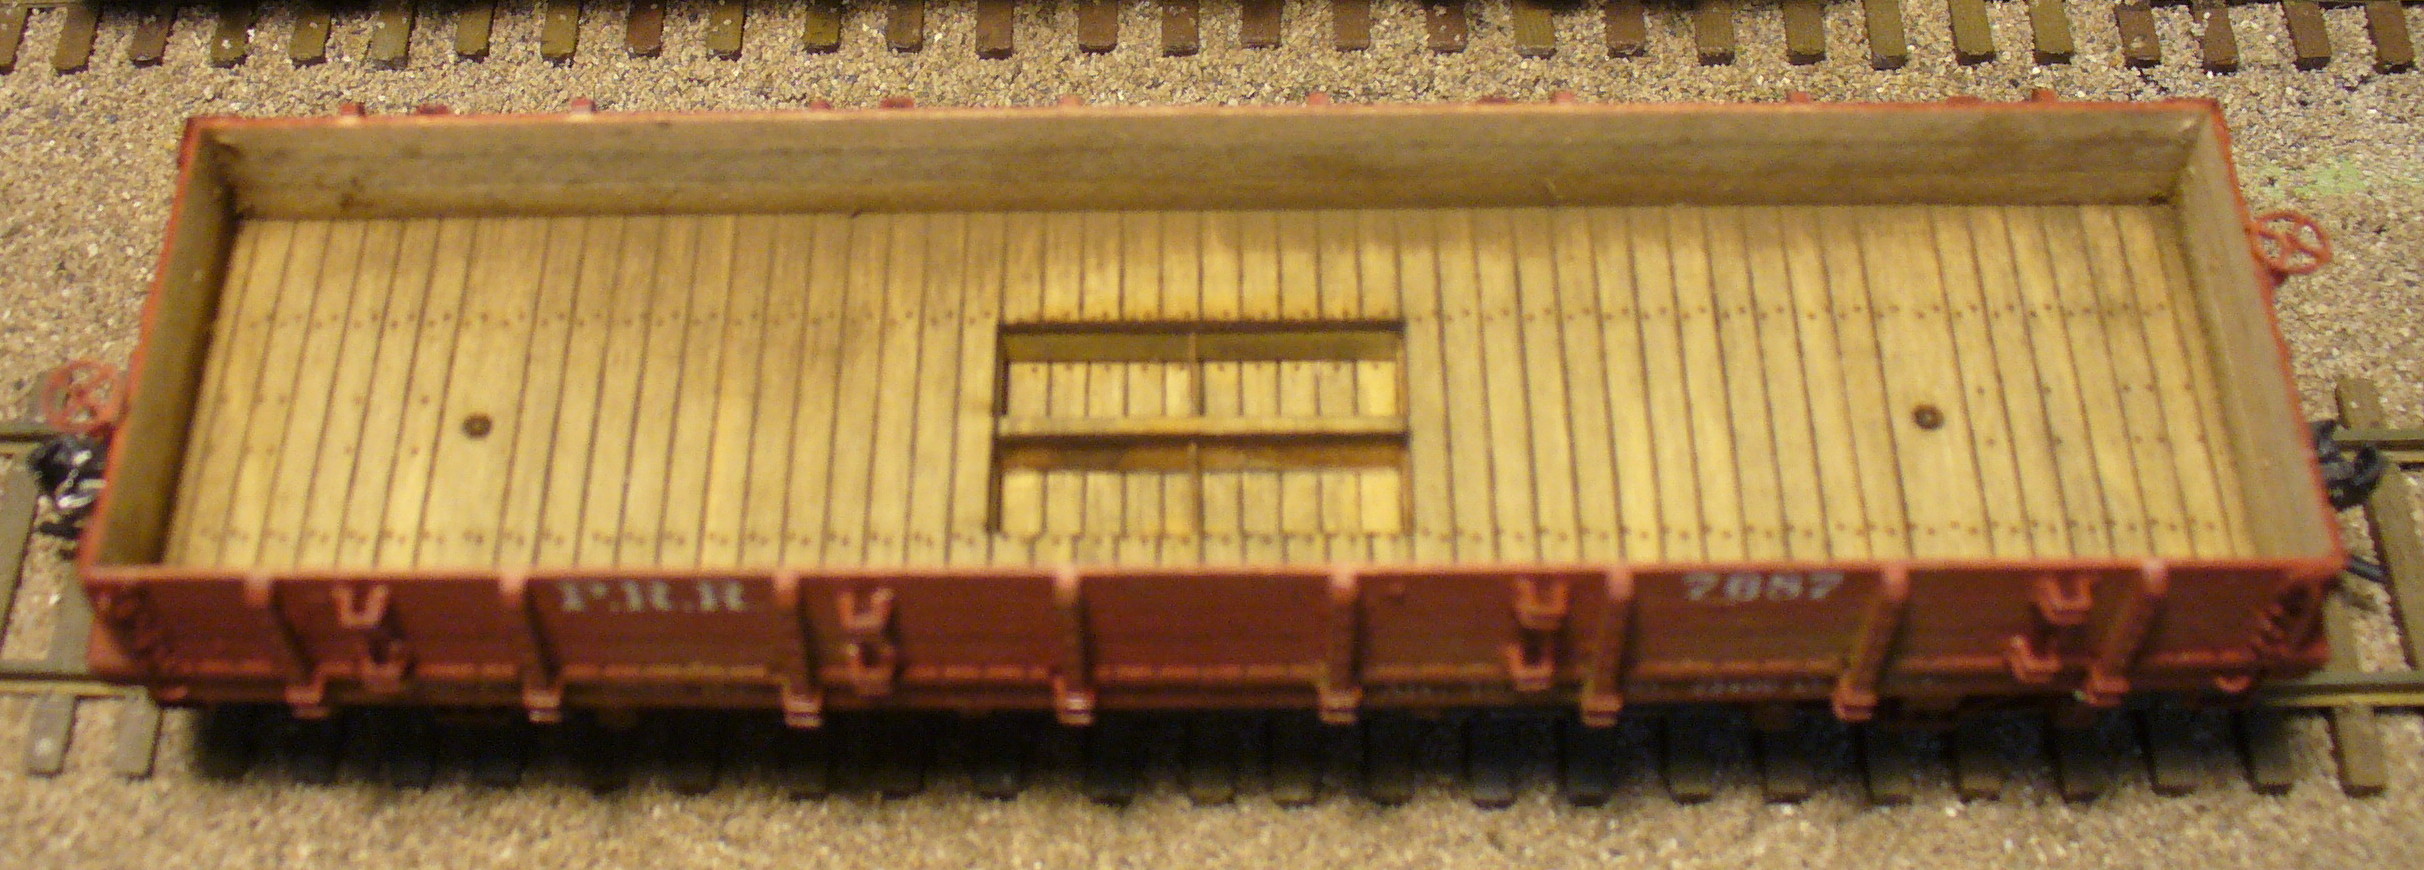
Like the PRR XB/XC boxcar kit offered previously, the kit went together easily with no problems that weren't my own creation. Our intrepid manufacturer has incorporated two brass bars in the underframe to provide weight. I had to trim the laser-cut wood frame to accommodate the weights but another approach would have been to cut a little off each bar. Because the sides of the bars are exposed in the drop bottom cars, the builder might want to paint them an appropriate color representing weather-beaten wood if not intending to paint the interior if the car. I didn't think of that in time. I weathered the deck and boards forming sides and ends a gray color, later masking off the inside of the car and the underframe before painting with my airbrush. I generally built the frame and deck following the kit instructions. I turned the sides over because I needed to space the stake pockets differently. I also added turnbuckles, appropriate for cars built in the 1880's and later and consistent with the car diagram.
There are places where extra care is needed for correct alignment of parts at major points. For instance, in gluing the deck to the frame the modeler has nothing but his own eye to make sure everything is centered, end to end, side to side. In building my two models, I was 75 per cent successful; in both cars I centered the deck so that it extended past the end beams about the same distance, but on one car the deck ended up a little to far to one side. Similarly, the builder must take care to center the box created by the ends and sides on the deck. Let's call these challenges than dislikes. After all, the modeler must have to exercise some care, a part of craftmanship.
Modifications
I made the following changes to the kit: 1. Replaced sides and ends with 2 by 10" boards (3 by 10 would have worked better and probably closer to the prototype.) 2. Used Grandt Line parts for the stakes, which had to be shortened. These parts include the pockets, stakes and molded-on bolts as a single unit. 3. Used corner braces from Grandt Line gondola car hardware set, cut into multiple parts. Cutting them into several parts, four per corner is optional, but in any case they would have to be shortened like the stakes. 4. Added eight stake pockets on each side. These were cut down from the Tichy pockets provided. 5. Installed a vertical grabiron at each end of the sides for a total of four. Each end had two horizontal grabirons, four in total. I made all these grabs about 21" in length using a home-made jig. 6. Added two iron straps about a foot apart centered on each end. I used material supplied in the kit. 7. Optional: nbw's near each end of end sills; short horizontal brace for brake wheels mounted on ends. I meant to add nbw's for end grabs but forgot.
Paint and Lettering
I used Scalecoat PRR Freight Car Red. I supplemented decals provided with some leftover numbers to match a series of what appear to be GE gondolas in equipment registers of the period I model.
Kitbashing Potential
The kit provides a good foundation for many variants appropriate to the period. Many gondolas built in the decades after the American Civil War had very low sides like the stock kit, sometimes only a single board high. It would be easy to cut down the laser cut sides in the kit or the modeler could substitute stripwood. Photos and equipment registers can provide guidance.
Many railroads built gondolas with auxiliary sets of stake pockets to accommodate longer stakes for bulky loads such as lumber. The arrangement that the PRR adopted with movable stakes permanently mounted to the sides might have been unusual so kitbashers would probably not want to use the sides provided. As always, consult photos of the car wanted. Obviously, the modeler could leave the sides off to make a so-called "platform car." Extreme kit bashing such as reducing the length of this car would have to do some work because of the brass weights but they could be shortened.
What I Like About This Kit
I don't think I've met a laser kit I didn't like. I really like the idea of the brass bars for weights, as well as the little triangular tabs that help the builder correctly align the needle beams and bolsters. I consider the undercarriage of a model car to be a compromise between fidelity to the prototype and the practicalities of building an HO model that is square and runs well. Our manufacturer seems to have found the right balance between fidelity and the practicalities of the HO world.
Conclusion
This is a fun, easy kit to build. I made things more complicated by using it as the starting point for a different PRR gondola. That this was pretty easy is testimony to how useful the kit is to the modeller of late 19th and early 20th century railroads. Extra care in some places will reward the builder with a fine model. My two models have been on my layout for several weeks now and I like them more every time I spot them.