B-25B Mitchell Medium Bomber
Building a Doolittle Raider
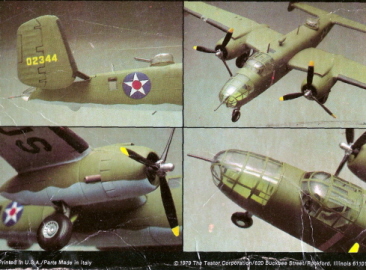
Years and years ago, someone
bought me the Testors/Italaeri 1/72 scale Mitchell B-25B, kit no. 861. It sat in
its box and got progressively more banged up through a series of moves, as you
can see from the photo of the box bottom.
When I finally got up the nerve to tackle my first airplane kit in 30-some years, I decided to build the model as one of the few Doolittle Tokyo Raiders that had any nose art or decoration on it - plane No. 8, piloted by Capt. Edward J. "Ski" York, which for some reason had the numeral 3 stenciled on each side of the nose (I never could find out why). Only six of the 16 Raiders had any nose art at all, unusual for military aircraft of that time period, but perhaps that was in keeping with the top secret nature of the mission.
York's aircraft was also the only Raider that made a normal, wheels down landing after bombing Tokyo in 1942 - in Russia! Plane No. 8 had been plagued with engine problems throughout the project, and the long overwater flight to Japan hadn't helped things. Short on fuel, York nevertheless continued his mission and dropped his bombs as briefed. But then, without enough fuel to make China, he turned north to Russia and landed on a small airfield near the port of Vladivostok, thinking he could gas up and fly on to China.
The Russians had other ideas. Presented with an almost-new version of America's best medium bomber (this was before Lend-Lease really got ramped up), the Russians impounded Army plane number 40-2242 and interned the crew for 13 months. The five men of plane No. 8 finally returned home in May 1943 after escaping through Persia with a number of other Allied airmen. 40-2242 was reportedly scrapped by the Russians around 1950.
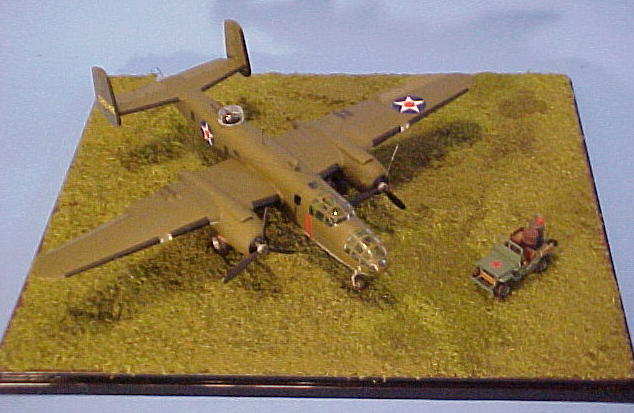
I settled on depicting my B-25B after it had landed in Russia - that would be my 'moment in time.' So deciding, I launched into the research phase, finding that - thankfully - there were quite a few photos of the Doolittle Raid planes, most of them taken when the planes were on the deck of the aircraft carrier Hornet prior to launching the raid. That gave me some good tips on these highly-modified airplanes.
And with the large glass areas in the cockpit and bombardier's compartments, it also gave me my first opportunity for scratchbuilding details such as throttles, instrument panels and all the other little dials, levers, switches and doo-dads that make up the inside of an airplane. I wasn't totally happy with the results, but hey, not bad for a first effort. The photos below have some additional information.
 |
 |
|
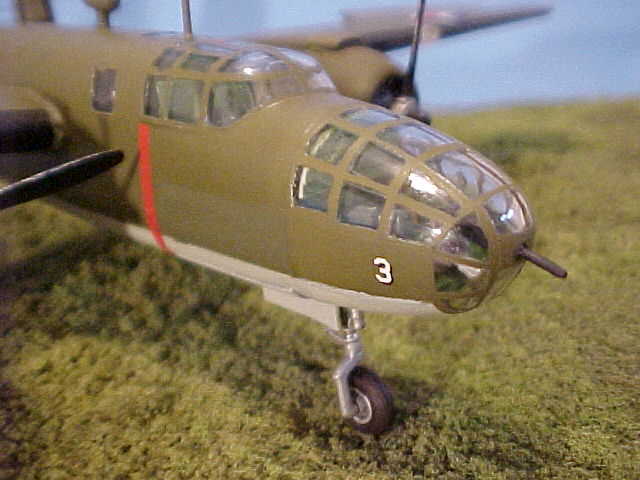
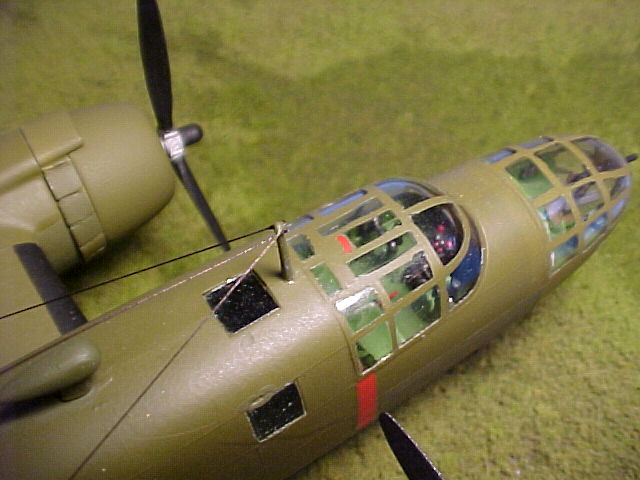
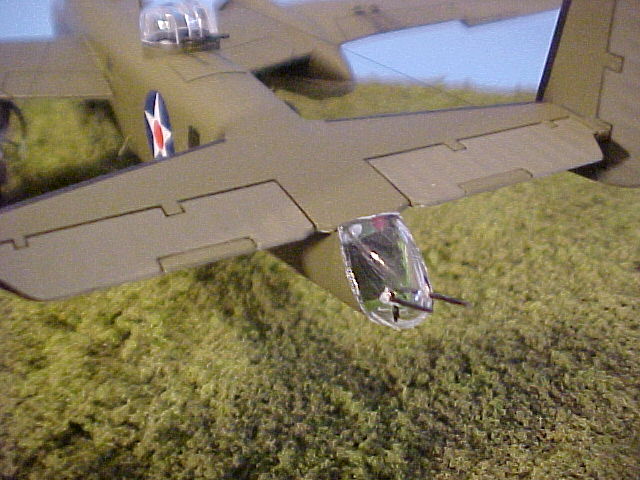
| Close-up of the bombardier's compartment. It was glued on after I painted the fuselage and unfortunately the clear plastic of the nose piece took the paint a different way, hence the lighter shade of olive drab. The kit-supplied .50-caliber nose gun was cut down to more closely resemble the .30-caliber machine gun that was mounted in the nose. You can vaguely see the silver blob that is the scratchbuilt bomb sight. | Overhead shot looking into the cockpit. You can see some of the details I picked out with paint. The throttle levers were made with stretched sprue, and the knobs on top were tiny blobs of thick super glue. I made seatbelts out of card stock but, ummmm, forgot to install them. The cockpit framing was masked with Bare Metal Foil, which was cut away from all non-glass areas before spray painting. Note the radio aerials, also made with finely stretched sprue. | |
 |
 |
|
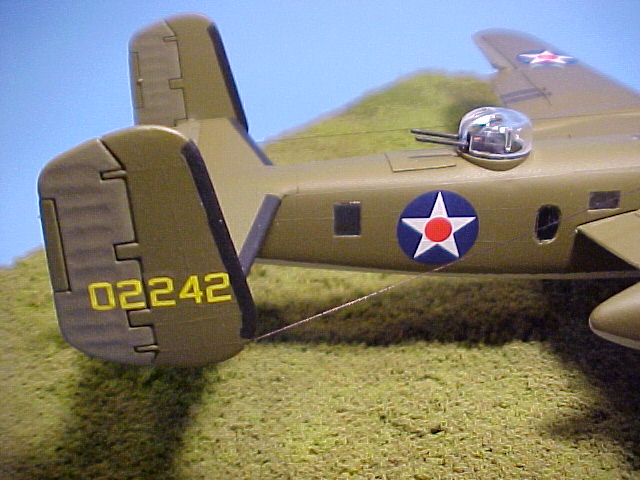
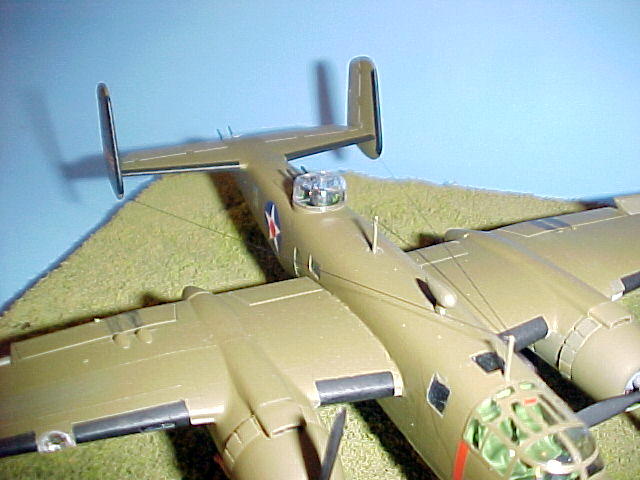
| Vertical stabilizers, showing the different shade of paint for the fabric-covered rudders. The serial numbers are incorrect. The Doolittle Raiders had oversized stenciled numbers. I could not for the life of me print out yellow numbers dark enough to look OK, so had to go with aftermarket decals of the right size but without the characteristic bar down the middle indicating stenciled numbers. Behind the top turret you can see the square blast shield that Plane No. 8 and most of the others added as additional armor. I used a piece of thin styrene from a single-serving jelly tray to make it. | Shot of the modified tail position. The Doolittle Raiders used two wooden broomsticks to simulate machine guns. I had to drill out holes on the solid clear tail cone for the guns, which I made out of stretched sprue so they would look different from the kit machine guns. The white and red formation lights are small blobs of superglue on a piece of styrene strip, glued to the top of the tail compartment. You can also see the different shade of olive drab on the fabric-covered horizontal stabilizers; also note that the trim tab in each is the darker shade because it is metal, not fabric. | |
 |
 |
|
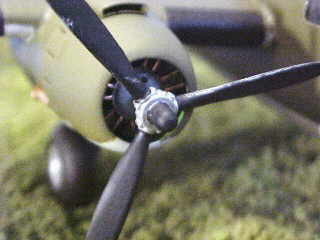
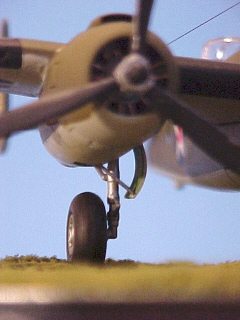
| I detailed the engines with bits of copper wire to make them stand out a little more. One important point, the Raider's propellers did not have yellow tips. This detail has tripped a lot of Raider modelers up. I drybrushed some aluminum paint along the leading edges to show the wear of the long flight. | Another little detail I added, the retracting struts for the main landing gear doors. This is a big part of the fun of modeling for me, finding all those little details to add. | |
 |
 |
|
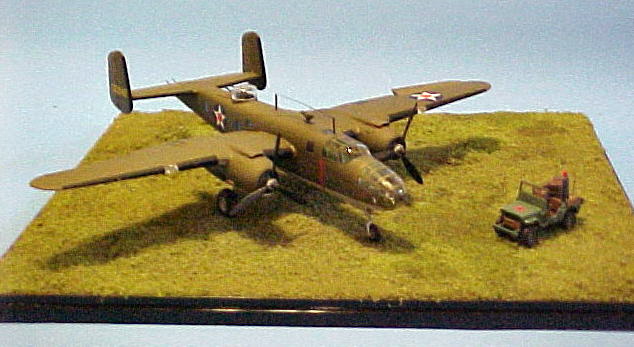
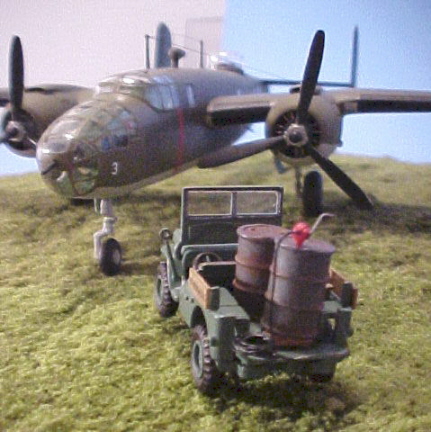
| Two overall shots of the completed diorama, showing York's B-25 just after landing in Russia. | This view shows the plastic base that I landscaped with railroad static grass held on with white glue. That was a hideous mess until I got the hang of it! | |
 |
 |
|
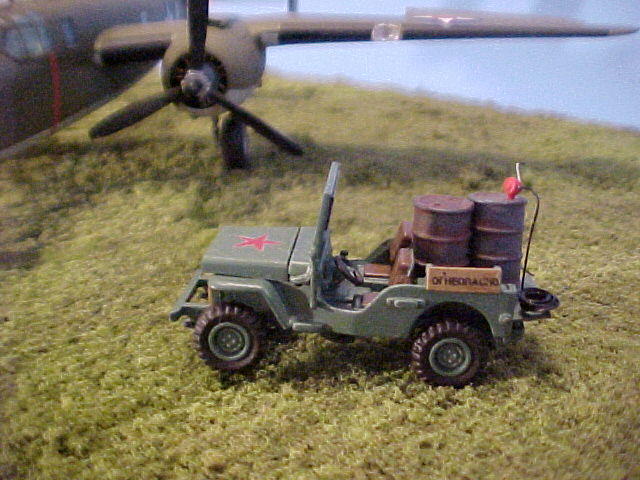
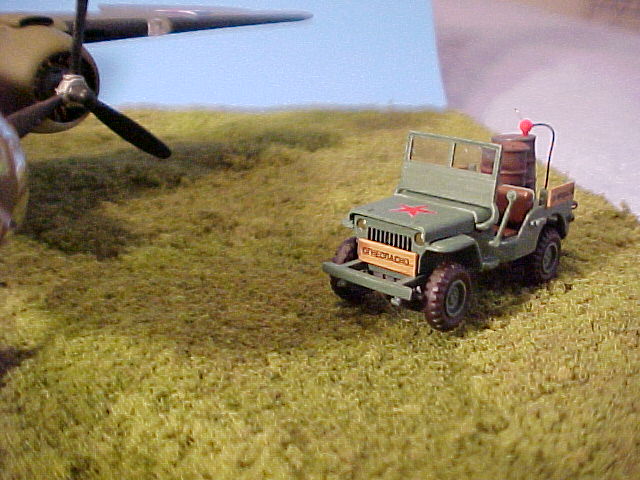
| Close-up of the "Russian" Willys Jeep. I'm not entirely sure they would have had Jeeps at this time via Lend-Lease, but I couldn't find Russian fuel trucks in 1/72 scale. I painted some styrene strip to look like wood and printed out decals that say the Russian equivalent of "No Smoking" to put on the front and sides. | I added two fuel drums to the back of the Jeep, weathered them heavily with Rustall, and scratch built a hand-cranked fuel pump using my Waldron miniature punch and die kit. The fuel hose is 30-gauge wire from Radio Shack, painted black, and the handle for the fuel pump is stretched sprue. | |
 |
 |
|
| Another shot of the Russian Jeep, from Academy kit no. 1310. I wanted people to scratch their heads and wonder why a white-starred American plane was next to a red-starred Jeep! Plus, it gave me another shade of green to add to things (Model Master Panzer Olivgrun, no. 2097, but who's gonna know?) | Sorry for the lighting on this one, but it shows the radio aerials to best advantage. The Doolittle Raiders used an unusual arrangement. One aerial ran between the two radio masts on top of the fuselage. A second aerial ran from the top of the front radio mast to the bottom of each vertical stabilizer. Another detail that has tripped a lot of Raider modelers up. |
After I had spent days agonizing over detailing the cockpit and bombardier's compartments with styrene, stretched sprue and little blobs of paint, when I had them fully assembled I realized you really can't see all that much through the thick clear plastic 'glass' ... oh, well!
Turning this model into a small display or diorama made the finished product a lot more interesting, I think. I am going to add some figures someday, as soon as I get up the nerve to tackle people that are only about an inch high.
Return to the Modeling Index Page
This page was last updated Feb. 10, 2007.