 halfway around
the world. Being the gullible sort, I said
I could build a model of the Big E as a memento. Little did I know ...
halfway around
the world. Being the gullible sort, I said
I could build a model of the Big E as a memento. Little did I know ...Nuclear-Powered Aircraft Carrier
Building the USS Enterprise,CVN-65
I have to stop telling people I build
models ... this time it was a friend whose daughter, a newly-minted U.S. Navy
ensign, was taking her first cruise, a six-month deployment on the USS
Enterprise that would eventually take her
halfway around
the world. Being the gullible sort, I said
I could build a model of the Big E as a memento. Little did I know ...
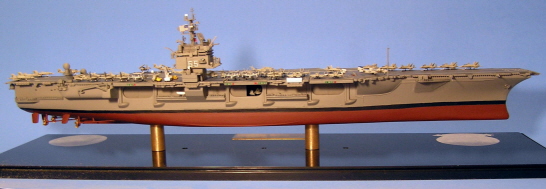
The Enterprise is the largest (well, longest) aircraft carrier in the world. It was also the first nuclear-powered aircraft carrier, and with its launching dating back to 1960, it is the oldest carrier in the Navy. Which means that in the ensuing four decades, the Navy has made a lot of changes to it, some big, some not so big - but all of which add up to a ship that looks a lot different than the 1970s vintage 1/720 scale Revell kit that I bought at the start of this odyssey...
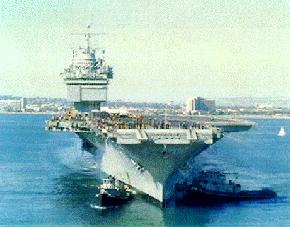
Look at these two photos. The first
shows the Enterprise shortly after her launch - note the distinctive
'beehive' on top of the island, which was studded with various sensors and
antennas and which made the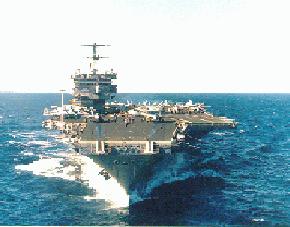 Enterprise unique. In the second photo, by the late 1990s the
'beehive' is gone, the mast has been changed and the whole
island profile is squatter and more businesslike. Unfortunately, the Revell-Germany
kit No. 05046 has the
Enterprise 'as built' as opposed to what she looks like now. Sigh ...
Enterprise unique. In the second photo, by the late 1990s the
'beehive' is gone, the mast has been changed and the whole
island profile is squatter and more businesslike. Unfortunately, the Revell-Germany
kit No. 05046 has the
Enterprise 'as built' as opposed to what she looks like now. Sigh ...
The first thing I noticed on opening the
box was that this thing was hugeeeeee, almost 19-inches long! The
second was that this kit is showing its age - the molding detail
is getting 'soft' after so many thousands of kits have been run through the
injection machine. The third was that Revell had gone for the optional
waterline or full-hull model, which meant there was going to be a lot of seam
filling, sanding, filing, swearing and sweating before this thing was done.
This time, instead of diving right into construction, I did the research first (sometimes I truly amaze myself). Since the Enterprise has been around for a long time, there are lots of photos on the web. The problem is, if the photo you're looking at is not from the time period you want to recreate, you get bad information. Conflicting information took awhile to sort out. The Navy News website was a Godsend, with a wealth of recent Big E pictures. Unfortunately, since the Navy likes to (understandably) focus on its people, I was reduced to staring at details in the background a lot of the time. Eventually, though, I thought I had a fairly good idea of what I needed to do. The big things were:
Remove the beehive from the top of the island, add a new deck to the top of it, and scratchbuild a new mast;
Add two sponsons (a nautical term for shelves) to the forward part of the hull, one on each side, to take new weapons that had been added;
Add a boat landing dock to the stern;
Scratchbuild the plethora of radars, antennas and sensors that cover the ship, and the platforms they go on.
Find the current aircraft, in the correct scale, to replace the awful lumps of plastic Revell provides (which are vintage 1960s-70s aircraft anyway);
Find a photoetch set that would give me the radar antennas, safety nets and a host of other little details too small for my fumbling fingers to create.
Not too bad, right? Sixth months later ...
 |
 |
|
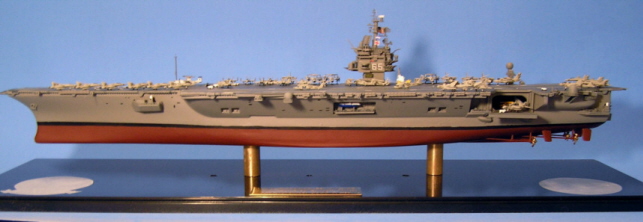
| Port side view of the completed model. | Starboard side view of the completed model. | |
 |
 |
|
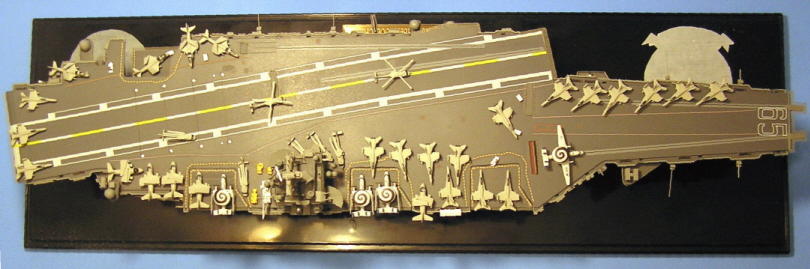
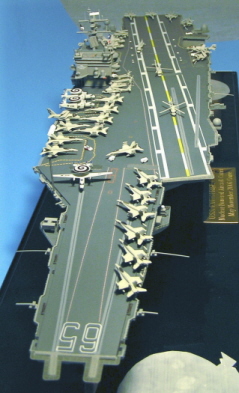
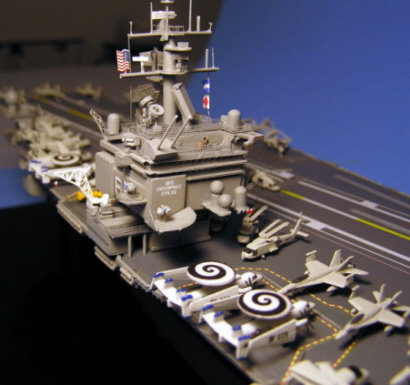
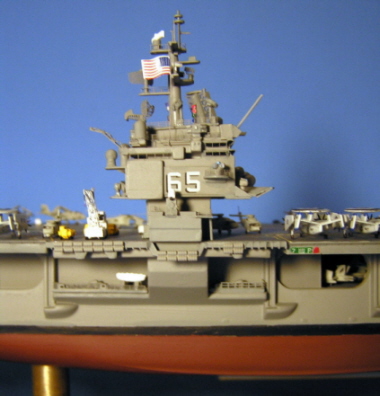
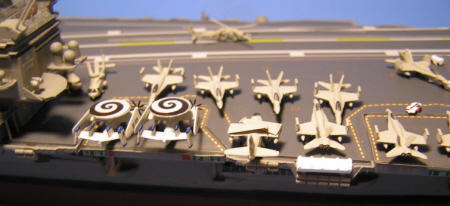
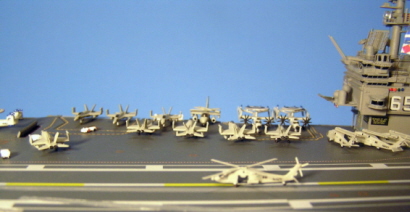
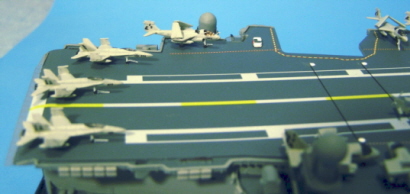
| Overall view of the flight deck, looking from the bow aft. There are a total of 37 aircraft on the deck, each one hand painted and decaled. All of the decals were either custom made or custom ordered. It was a devil of a job trying to get all the flight deck decals to line up straight! | Close-up of the island, showing the new top deck I had to add, along with all the scratchbuilt radars, sensors, etc. Look closely at the front of the bridge - there are two people there. The E2-C Hawkeyes have the distinctive spiral logo of VAW-123, "The Screwtops," on top of their radar domes. | |
|
 |
|
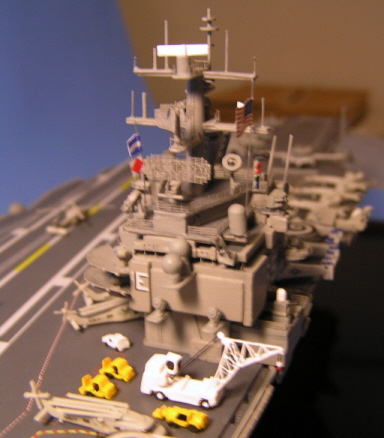
| Aft view of the rebuilt island, showing details of the scratchbuilt main mast, added scratchbuilt radar domes, and photoetch radars. Also note the white partially-scratchbuilt Tilley crane with photoetch arm. | Starboard side of the island, showing the scratchbuilt addition for the starboard CIWS weapon mount. | |
 |
 |
|
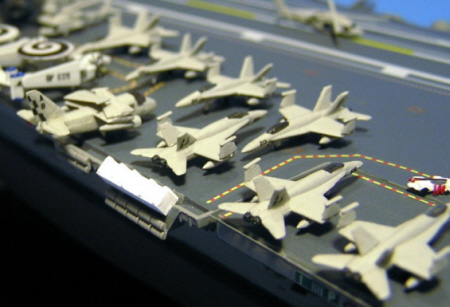
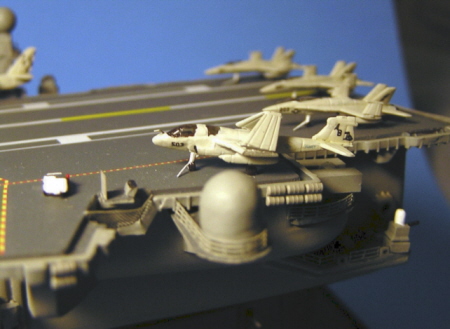
| Some of the aircraft on the forward flight deck, including E2-C Hawkeye radar planes, S3-B Viking sub hunters and F/A-18C Hornet fighter/bombers. The bright white box is the jettisonable storage locker for pyrotechnic devices. | Close-up of some of the Hornets, showing the cobra tail markings of VFA-86, the Sidewinders, and the checkerboard tail markings of VS-32 , the Maulers, on the Viking. All aircraft had correct individual modex numbers as well. | |
 |
 |
|
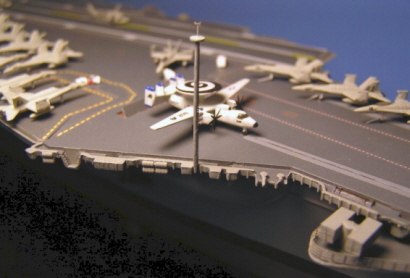
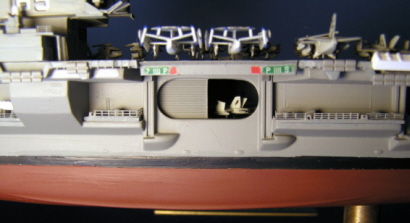
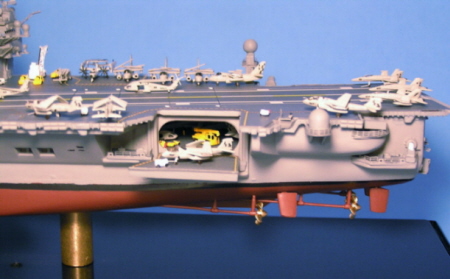
| Close-up of a Hawkeye ready to launch from No. 1 catapult. I had to buy two sets of White Ensign Model photoetch airplane bits to get enough 4-bladed propeller parts to make up the new 8-bladed props the Hawkeyes of VAW-123 had for this deployment. | Close-up of the starboard side, with the half-open hangar door and the tail of a Marine Hornet of VFMA-251, the Thunderbolts, peeking out. | |
 |
 |
|
| The scratchbuilt Sea Sparrow missile launcher on the scratchbuilt starboard forward sponson. | Planes on the forward flight deck, from the port side. I drilled out the center of some of the SH-60 helicopters so it would look like their doors were open. This one is in the plane guard position, ready to assist if there are any mishaps during launching operations. | |
 |
 |
|
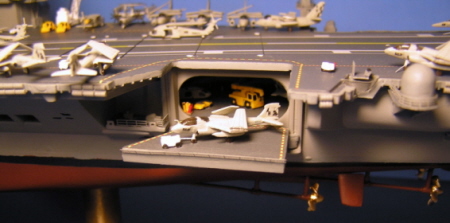
| Aft flight deck aircraft, and a look inside the port hangar, which I opened up and detailed inside. The radar dome on the port side behind the lowered elevator is made from a plastic jewelry bead and a section of soda straw. | Close-up of an EA-6B Prowler, showing my attempt to simulate the gold tinting of the canopies. Under the right light, it looks pretty convincing. Tail logo is for VAQ-137, the Rooks. Note the tiny photoetch refueling probe on the top of the nose. | |
 |
 |
|
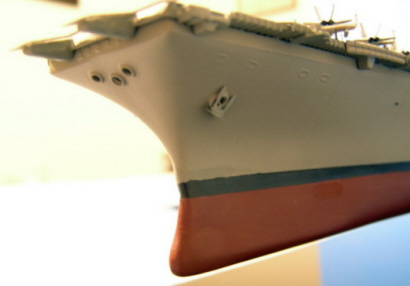
| The rear of the flight deck. Note the arresting wires and gear that I had to add, from stretched sprue and tiny disks of plastic made with my Waldron miniature punch and die set. | Close-up of the bow, showing the ridges around the hawse holes in the bow and for each anchor. I made those by forming rings of 26-gauge wire around the appropriately-sized drill bit, cutting it off, pounding each one flat and then carefully gluing it on. | |
 |
 |
|
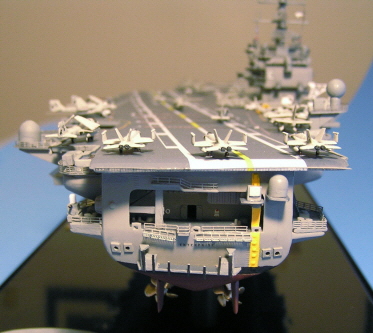
| Another close-up of the lowered elevator and a Prowler being towed out. Inside, you can see some of the vehicles and a hint of the Hornets lined up against the far wall. | The stern of the Enterprise, which required, among other things, adding the boat landing dock at the bottom, just above the propellers, the gangways, assorted radar domes, the yellow approach landing light system and the four openings for the Nixie torpedo decoy devices. | |
|
|
||
| One last shot, showing the arrangement of all the aircraft on the flight deck. I studied numerous pictures to try and get a realistic arrangement without having to build a huge number of aircraft. I think the final look is 'busy' enough without being excessively cluttered - you have all five kinds of aircraft represented, in various poses. You can also see all the sponsons I had to add, with the various weapons, radars and other sensors. The oddly-shaped white patches are where I was going to affix colored decals of the squadron patches for the Screwtops and Sidewinders ... but I could never get the decals to slide off the paper without folding into a wadded up mess, so had to bag that idea. | ||
Some final thoughts -
Scratchbuilding
The mast alone has 48 pieces, including the various photoetch radar screens, railings and other tiny bits. All on something not even 2-inches high! Seriously, though, building this model took my meager scratchbuilding abilities in directions they had never been before, and I didn't have anything remotely resembling blueprints.
Every modification I made was added via the time honored method of dry fit, sand/file/carve until it fits better, dry fit again, decide that, Yep, that looks about right, apply glue, and take a deep breath before sticking it in place. Fear can be a good thing when you're modeling close to the edge of your abilities.
The Air Wing
Talk about 'angels dancing on the head of a pin' - what's an aircraft carrier without airplanes, right? Even if they're so small you could fit two or three on a 25-cent piece ... and the Enterprise carries a lot of aircraft, like about 80. I decided early on that I wasn't going to be able to show the flight deck crammed with planes for two reasons: cost; and the extra gray hairs that building that many of the little guys would add to my head.
Even limiting myself that way, I ended up gluing together and hand painting 37 aircraft for the flight deck, and another dozen or so for inside the opened up hangars. Painting them wasn't so bad, even though it had to be done with a No. 2 brush and it was difficult to go around the clear plastic cockpit areas and end up with a clear canopy effect. What was truly maddening was the decals, hundreds of them, none of them very big. For example, each Hawkeye has 12 decals, from the Screwtop logo on top of the radar dome to the tiny NAVY on each side.
The following additions and modifications were made to the kit (I think this is all of them anyway):
HULL
FLIGHT DECK
ISLAND
AIRCRAFT
TRIVIA
Things used in construction included: round plastic beads from several different strings of costume jewelry, soda straws, plastic tube from a can of WD-40, brass rod, metal beads from a small beaded chain, wire from an old electric car motor, stretched plastic sprue from the model parts trees, the plastic card that a Vonage internet phone ad came on and 1 gram of weapons-grade uranium that will power the model for about 376 years*.
*I am KIDDING, so you guys at the Nuclear Regulatory Commission don't get all spastic on me, OK?
Return to the Modeling Index Page
This page was last updated July 6, 2007.