
Fokker D VII Fighter
I bought this little kit when I was in the
middle of a bunch of other things. It appealed to me for two reason: 1) Price,
only $5, and 2) The cool paint job on the boxtop. I know, I know ...
Before I started to build this Revell-Germany 1/72 scale Fokker D VII (kit no. 04177) I made myself some promises:
I would only use the paints I had on hand - no adding to my already extensive stash.
I would not buy any aftermarket decals, photoetch or resin detail sets. My experience to date has been that you can spend as much - or more - on the aftermarket stuff as you do on the model, which seemed silly with something this tiny and cheap.
I would limit myself to basic detailing. Thankfully, the D VII has only a minimal amount of rigging, but after doing even this little bit, I have no idea how the WW I model plane buffs keep their sanity.
I was going to have FUN!
Rather than doing a mass of research, I decided to do my Fokker as it was on the box art, painted in the colors of Hauptman Rudolph Berthold (44 victories), commander of Jasta II in 1918. Besides, I already had spray cans of flat red, white and blue on hand.
Berthold was an interesting guy. He joined the German infantry in 1912 and by 1913 had learned to fly. By 1916 he was in single-seat fighters. He crashed or was shot down a number of times, seriously wounded more than once, and earned a reputation for returning to duty before he was fully healed. I chose to model the D VII biplane that was his final airplane during World War I. His last action was on August 10, 1918, when he shot down two British DH-4 biplanes. Unfortunately he collided with one of his victims and his distinctive red and blue Fokker crashed into a house as he tried to make an emergency landing. He survived the war, only to be killed by a rioting German mob in 1920.
The little airplane went together quickly - there are only about 30 parts - and I concentrated on trying to fill and sand down seams, align parts and get everything squared up as opposed to lopsided looking. Quite the challenge to me, because I tend to get impatient and get ahead of myself, which in modeling can lead to anything from really stupid mistakes to total disasters. Only by taking my time was I able to get the top and bottom biplane wings to line up with the struts.
I did indulge in a little detailing: I drilled out the cooling vents in the machine gun covers with my No. 80 drill bit, drilled out the exhaust pipe, added the fuel filler pipe and brass cap to the left side of the engine cover, and did a little light rusting of the exhaust pipe and engine rocker arms. The pilot figure was a challenge in and of itself. I decided to simulate the glass in his goggles with tiny drops of Future floor polish, which gave a glass-like sheen but allowed the color underneath to show through. As the pictures below show, it turned out pretty well.
 |
 |
|
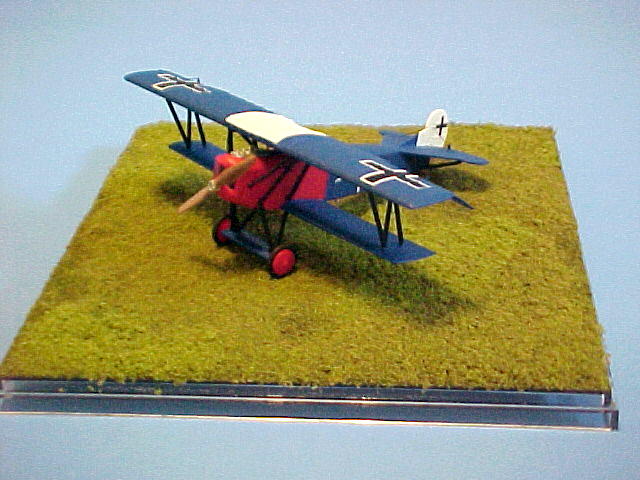
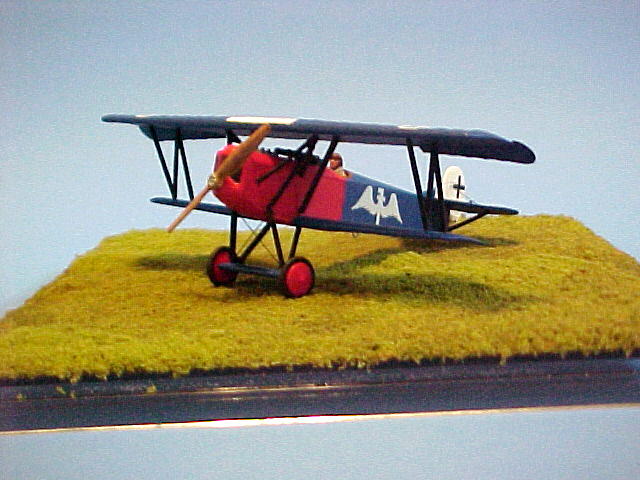
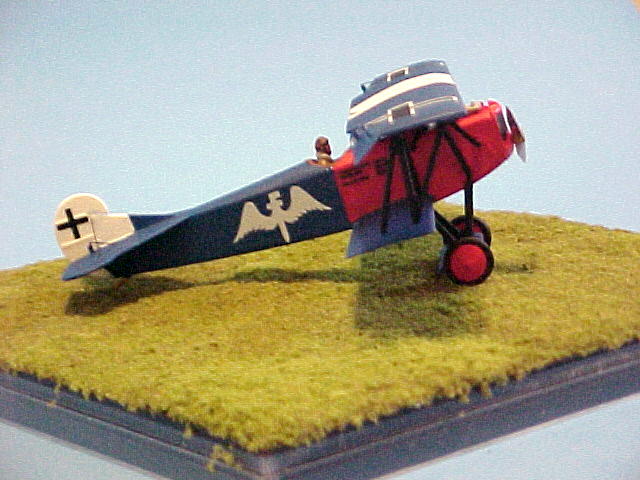
| An overall view of the finished model on the grass aerodrome, all ready for the next dogfight. | Front view of the completed model. | |
 |
 |
|
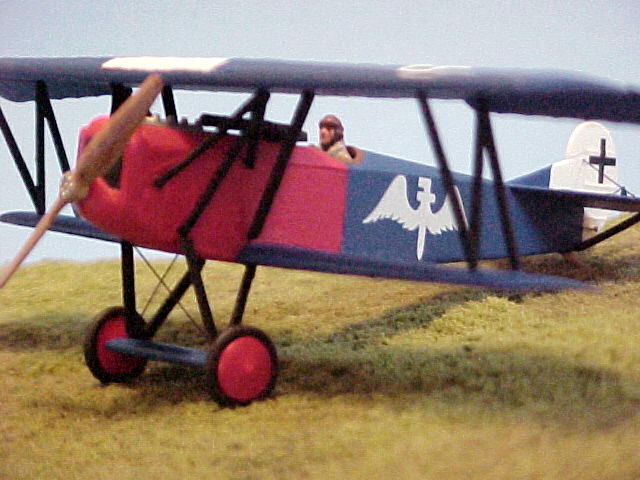
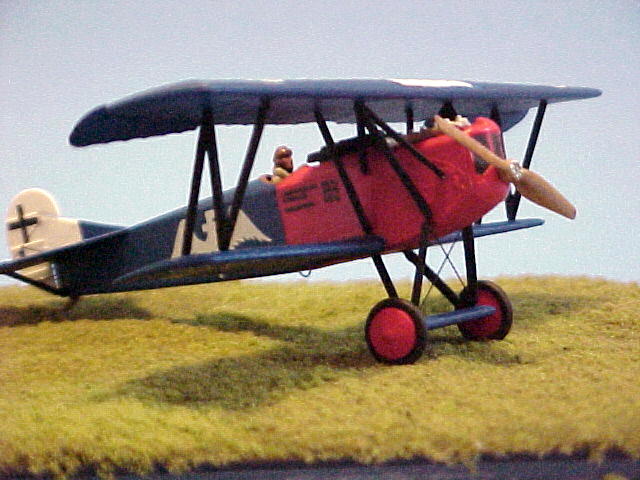
| Here you can see the pilot, and the rigging wires for the undercarriage. | I did drop the ailerons to make things more interesting, plus, that matched photos I found of D VIIs on the ground. | |
 |
 |
|
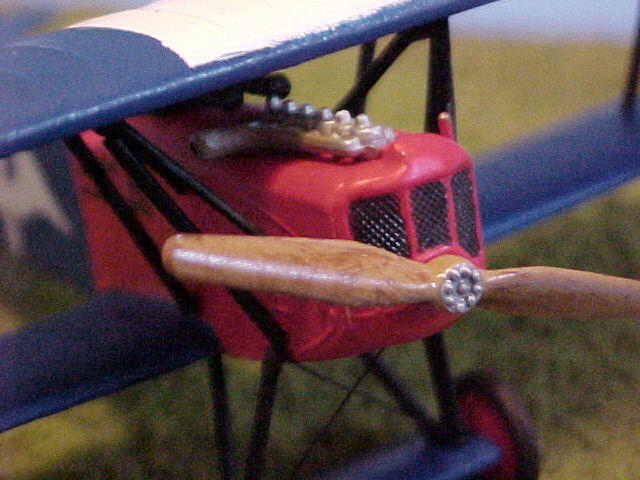
| Close-up of the radiator and propeller. I painted the propeller Model Master Wood, let it dry, then dry brushed it with Model Master Dark Tan to give a woodgrained effect. A coat of Future floor polish made it look, to me, like polished hardwood. The radiator grill was painted with thinned flat black acrylic paint. | Right side view, showing the distinctive white winged marking. | |
 |
 |
|
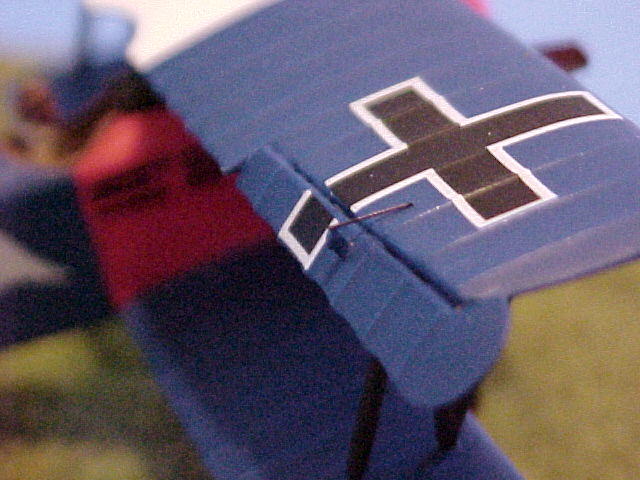
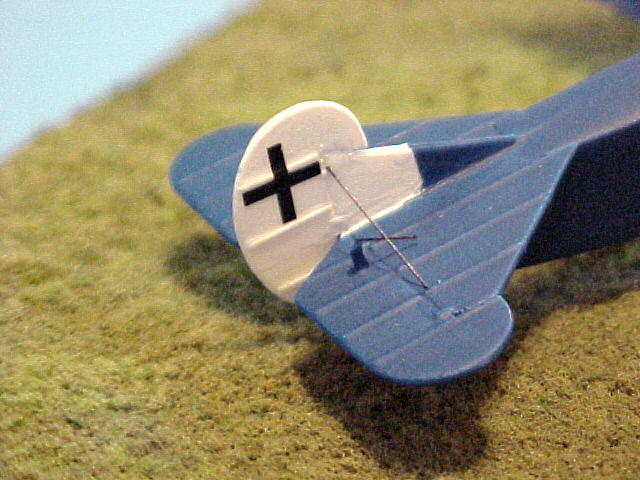
| About the only detailing I did, adding the control horns and wires, which are bits of styrene strip and stretched sprue. The upper national insignia decals were a challenge, since they were split by the ailerons. I ended up taping the parts together, holding the cut out decal in place and lightly marking where to cut it apart. Then it was just a matter of lining up the two bits. | Detailing of the rudder and stabilizers, with stretched sprue guy wires and control wires, colored with a permanent black Sharpie marker. I did not get all of the shapes for the control horns absolutely correct, as you can see here. But at this scale, from more than a foot away, who can tell? | |
 |
 |
|
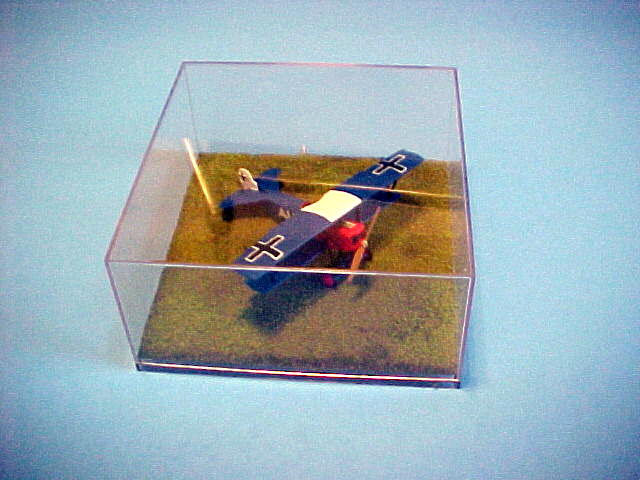
| I do think this needs another figure it in, to add some more life to the display. Gotta love those WW I paint jobs, though! | I used railroad static grass to make the turf base. A clear plastic display case from Academy/Minicraft tops things off and will protect the model from the dreaded dust bunnies. |
The one glaring omission for this model is the lozenge camouflage on all the underwing surfaces. The kit included decals with the black outlines of this complicated four-color scheme, but that would have meant hand painting something like 200 little blobs, with colors I did not have and did not want to mix, so ... executive decision time. No one was ever going to see the underside, so I bagged that step!
Overall this was a fun little project, and a nice change of pace from combat ships and larger airplanes. Putting it next to my B-25B makes you realize how fast technology changed in such a short time - nothing like global war to push the frontiers of technology ahead, I guess.
Would I ever do another WW I airplane, one with lots of guy wires and struts and such? Wellllllllllll ... maybe!
Return to the Modeling Index Page
This page was last updated May 21, 2006.