Victory Ship Model - Second
Effort
Building the S.S. LaCrosse Victory
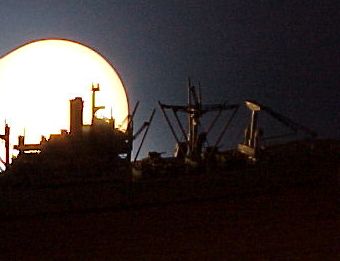
In April 2005 I got to see a real, live Victory
ship, the S.S. American Victory, when Dad and I took a cruise on
her in Tampa Bay, Fl. As soon as I saw her massive gray bulk moored next to
the Tampa Aquarium, I knew in my heart that the model I had just finished
was wrong - not in any huge, glaringly obvious ways, but in a lot of little
ways that made my effort, to me, not complete.
So deciding, I took advantage of the day in more
ways than one - I took a ton of reference photos and crawled over, under,
around and through the American Victory, noting big things like
how many ladders there were on each deck and where they were located, and
little things, like whether the bridge deck had 3-bar or 4-bar railing.
I asked Dad 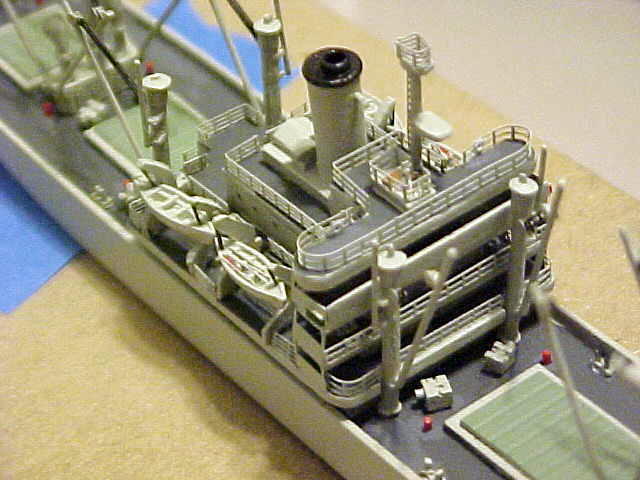 casual
questions about the two Victory ships he had served on, the LaCrosse
Victory and the Atlantic City Victory, like what kinds of deck
cargo they carried on various Atlantic crossings, did he remember the colors
of the hatch covers, specific paint schemes of the ships, and anything
else I could think of, all under the guise of enjoying the day.
By the time the American Victory returned
to the dock that day, I had a clear vision of what I needed to do. First
thing was to order another Victory ship kit from a rather bemused
Dave Angelo at Loose
Cannon Productions. Second was to do research - a LOT of research.
I was going to get it right this time!
I zeroed in on the LaCrosse Victory for
two main reasons, 1) Dad spent several months on her during the war, and
2) He remembered that one time they carried a deck cargo of tanks over
to Europe. I thought that would look really cool on the finished model.
I also thought it would be really cool to model a specific ship at a specific
moment in time, in this case mid-1945. Plus, the LaCrosse Victory
had a gray paint job, which I thought would be a lot easier to paint than
the black hull and white upperworks scheme of the Atlantic City Victory.
So deciding, I started scouring the Internet for
all the little bits I would need. One thing about 1/700 scale, it defines
tiny. I found one company in England that makes resin tanks, trucks, jeeps,
etc. in that scale and ordered enough to cover the decks. Loose Cannon
Productions came through with resin boxes, crates and fuel drums on pallets.
Other sources in the US and Japan gave me life rings, fire hose racks,
watertight doors, hatch covers, life rafts and a host of other things.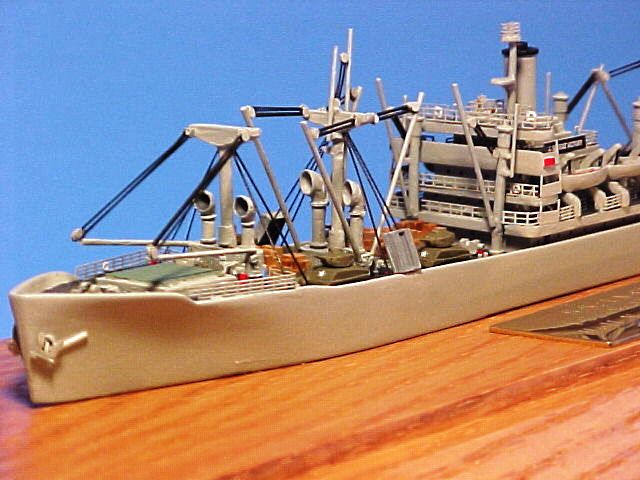
My research efforts uncovered a lot of little
details, like the fact that two of the lifeboats had motors and two did
not. Off went inquiries about who made oars in that scale. The number and
location of the fire hydrants and fire hose racks required calls or e-mails
to the organizations that have the three functioning Victory ships. Where
all the life rings were located was deduced from wartime photos and my time
on the American Victory. By that time of the war the U-boat
submarine threat was almost nil, so the American Victory did not
have any of the 20mm gun tubs or bow cannon so prominent on earlier Victory
ships; based on Dad's recollections, I decided she probably had either
a 4- or 5-inch cannon on the aft
deckhouse. Another search to find out who made the correct kind of cannon
in that scale.
The construction of this model was both faster and slower than my first
effort. Faster because I knew what I was doing, more or less, and slower because
I was adding a lot more detail to this model. If it was on the real Victory
ship, I wanted it to be on this model! A few notes on construction:
PHOTOETCH
Building
model ships in this scale does not require the use of photoetched detail
parts, but it sure makes all the difference between ending up with something
that looks like a pool toy and something that resembles the real thing. A few
things I learned the hard way:
-
Always cut the photoetch on a firm
surface. I use a hard plastic cutting board with a smooth top.
-
Always keep one fingertip, a pencil
eraser, something, on a corner of each part as you make the final cut, or
else you will launch said part into space, never to be seen again.
-
Always use a sharp hobby blade or
razor blade to remove and trim the parts. It may be brass (or steel) and it
may be thin, but it's still pretty tough stuff. I usually use a No. 11 or
No. 12 X-acto blade to remove the parts, and trim the edges flush with a new
single-edge razor blade.
-
It's usually best to paint the
photoetch parts before you remove them from the fret (the framework that
holds them all together) because being so small, it may be impossible to get
at them once they are glued on. If you use spray paint from a can, make sure
you hold it far enough away from the fret so the paint doesn't clog the
details up.
-
Before you paint photoetch, you need
to give it some 'tooth' so the paint will stick. I do this by giving it a
brief bath in ordinary household vinegar, which is acidic enough to mildly
etch the metal, followed by a thorough rinse off in water and air drying.
-
You can use ordinary white glue
(Elmer's) to put
some parts on, provided those parts are never going to be subjected to any
stress - like having a larger part glued to them. Some modelers use white
glue for placement, then come back and flow a thin line of superglue around
the base of the part to make sure it stays put. I tend to superglue items
that require a lot of bending, like railings, since they may try to resume
their original straight shape at some point. Detail parts like hose racks get
put on with a tiny drop of white glue.
-
A piece of fine wire, 24-gauge or so,
makes a dandy superglue applicator. Just trim the tip off when it gets too
big a blob of dried glue on it. You can use this to put tiny dots of
superglue precisely where you want them.
-
My favorite tool for installing detail
parts other than railings is a wooden toothpick. Put glue on the model where
you want the photoetch part to go. Wet the end of the toothpick with your
tongue, touch it to the part to pick it up, and then guide it on in to where
it belongs on the model. The part will stick to the glue and release from
the toothpick, which you can then use to nudge the part into final
alignment.
-
Buy a good set of dividers before you
start installing railings - that is the only practical way to measure
how long a segment needs to be, or how far it is between bends.
-
I bend photoetch railings and other
parts with two single-edge razor blades, one to hold the part down and get a
crisp (straight) bend, the other to slip under the railing or whatever and
bend it up to the required angle.
-
NEVER assume you've bent a railing at
the correct angle before you apply the glue - always check by dry fitting to
make sure that it follows the curves and angles of the deck it's going to be
glued to.
PAINTING
I don't own an airbrush, so I can't get a
lot of those cool effects and crisp details that airbrush users can achieve. I am stuck with spray cans (aka rattle cans) and bottles of enamel
and acrylic paints I get at my local hobby shop. She carries the Testors Model
Masters line of military and naval paints, which fortunately comes in lots
of different shades of gray, green and brown. 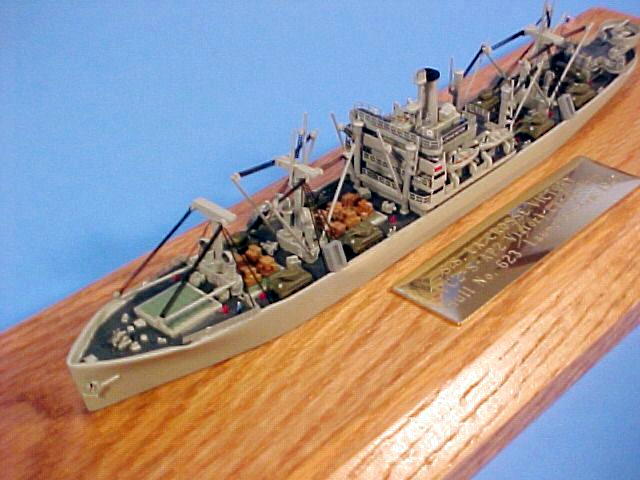
Most of my paints are enamels, which means
the brushes have to be cleaned with paint thinner or something similar, and the
rattle cans have to be used outside lest you fill up your abode with poisonous
fumes. I learned pretty fast that anything you spray paint must be
securely nailed down, lest it get blow many feet away by the force of the rattle
can's propellant. I came up with the idea of using small squares of double-sided
foam tape or doubled-over strips of low-tack blue painters tape to secure the
hull to a piece of cardboard that was about an inch larger all around than the
model. That gave me something to hold it with when I spray painted, and to hold
at different angles when I was assembling parts and painting small
details.
The system I came up with was to spray
paint the hull and large superstructure elements after they had been sanded
smooth and any holes or dips filled with modeling putty, check for mistakes and
spray again so everything gets two thin coats. The hull and superstructure of my
Victory ship were painted Flat Gull Gray (Testors 1930) because merchant ships
in WW II were almost always painted gray, but the exact shade varied from
shipyard to shipyard. All of the photoetch also got sprayed this color.
To avoid the agony of trying to mask off
all the light gray areas, I hand painted the flat deck surfaces with Gunship
Gray (Testors 1723). This darker gray was consistent with the few color photos I
could find, and Dad's memory, plus it gave a nice contrast to the light gray of
the hull and vertical surfaces.
One debate I had with myself was the color
of the hatch covers. The actual covers are large, thick boards, which are then
covered with a piece of canvas that is secured with rope and wooden wedges
around the edges. But what color was the canvas? Dad wasn't sure, but seemed to
think it was just a brown or 'dirty' color of some kind. Talking with a couple of
Liberty and Victory ship historians brought out that, as I suspected, there was
no standard color, just something so that the bright white canvas didn't act as
a beacon for attacking aircraft. General consensus was for some kind of medium
or cream green color. After - again - pondering the dozens of shades of green at
the local hobby shop, I settled on RAF Interior Green (Testors 2062) as looking
the most like new canvas. The LaCrosse Victory was a brand new ship when
my Dad served on her; plus, the cream green color helped break up the large
swatches of gray.
BRUSHES
A few words about brushes - BUY GOOD
ONES.
Because if you buy cheap ones, your models
are going to look like crap. Don't ask me how I know this, just accept it as
fact. If you're building mostly small stuff, as I do, then you'll need
correspondingly small brushes to get the paint where you want it, in the
quantity you want it. Here is my current selection:
-
No. 1, 3, 5, round bristle, for
painting large areas, weathering, drybrushing.
-
No. 0, 2/0, 3/0, round bristle, red
sable hair, for general small area painting.
-
No. 10/0, round bristle, red sable,
for smaller detail work.
-
No. 15/0, round bristle, red sable,
for very small detail work, like one teensie drop of paint on the tip of something.
-
No. 18/0, round bristle, red sable,
called a 'spotter' for obvious reasons.
-
1/4, 3/8, 1/2-inch, flat bristle,
camels hair, for general weathering, applying glue for groundwork, anyplace
I can get away with just globbing on the paint and not having to worry about
the finish.
It takes practice to get a good, smooth
finish using brushes, but it can be done if you pay attention to your stroke
technique, always paint with a wet edge, and keep the paint thin enough to flow
but thick enough to cover with one application. Modeling is a learning
experience, and every project will be better than your last one.
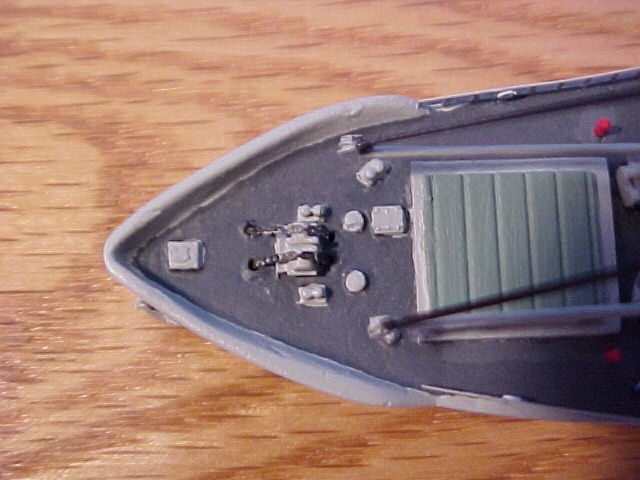
Here are some close-up pictures of the finished model.
Hold cursor over each photo for more information:
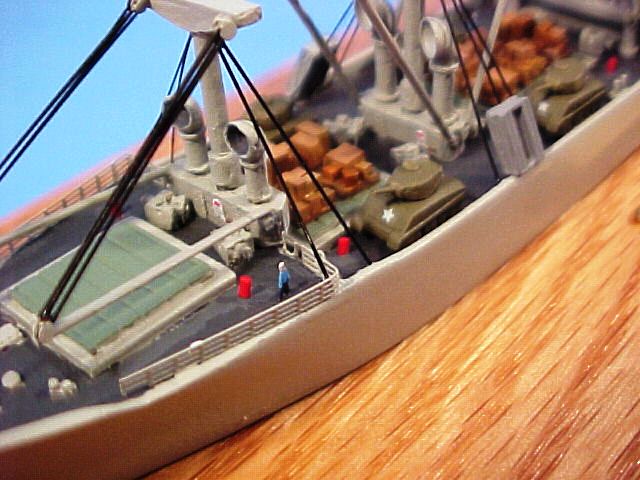
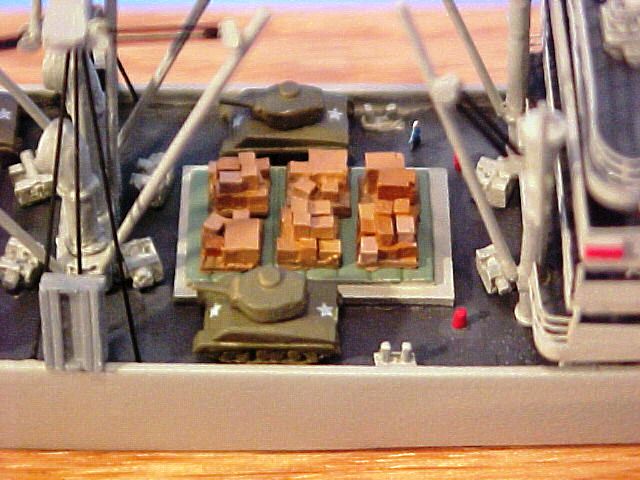
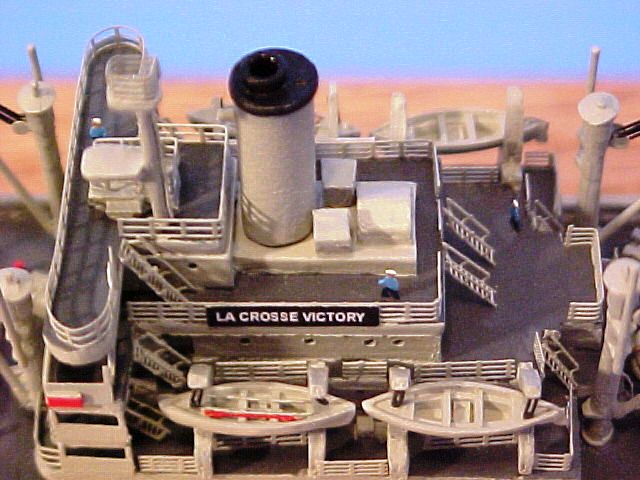
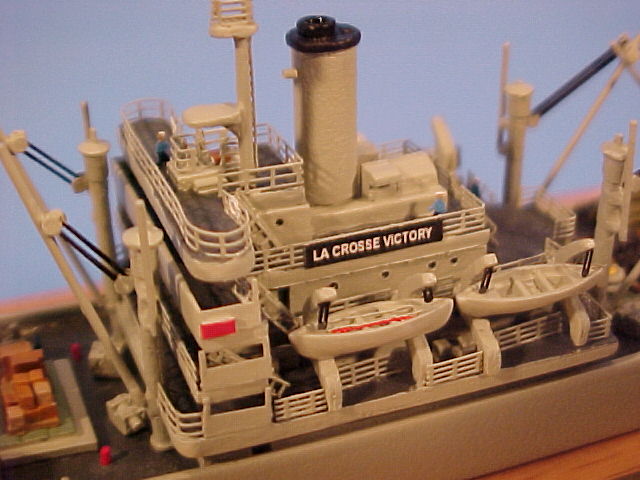
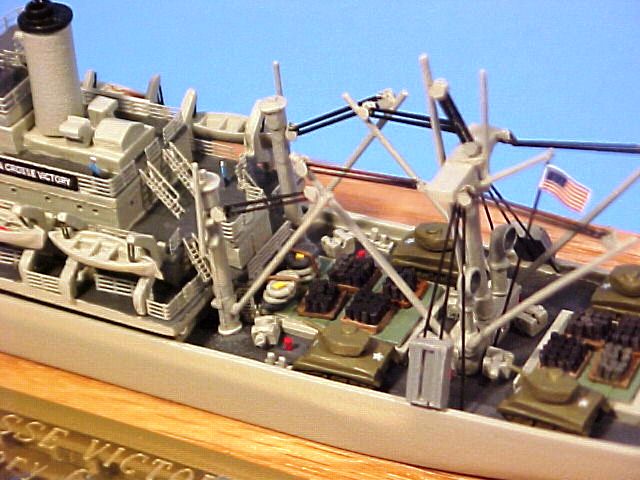
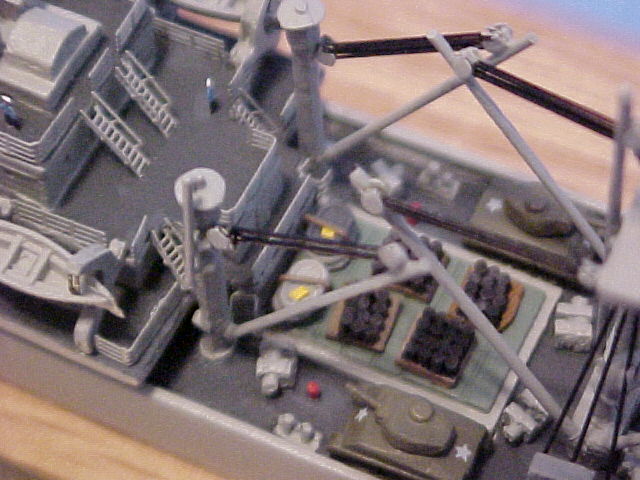
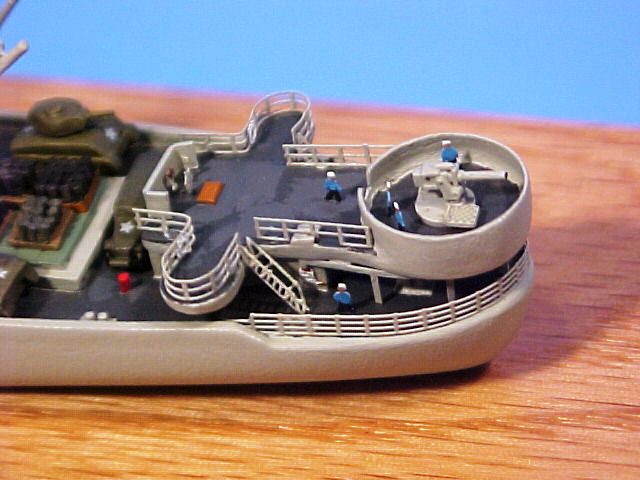
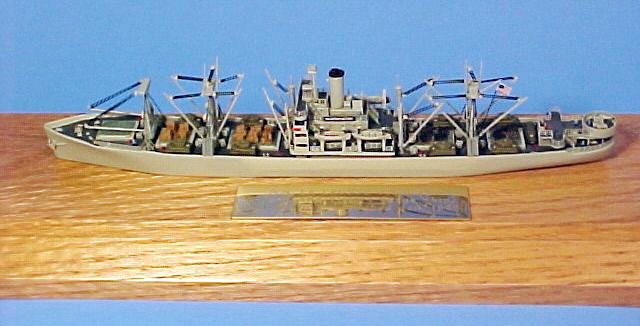
The final touch was a brass plaque mounted in
front of the ship on the base. It ended up costing almost as much as the model! It was
engraved:
S. S. LA CROSSE VICTORY
VC2-S-AP2 Victory Ship
Launched: January 1945 Scrapped: 1967
Here is a complete list of additions and modification
to the kit by the time I got done with it:
Loose
Cannon Productions (Kit No. 14, Victory ship)
-
Added portholes on main deck superstructure and aft
deckhouse.
-
Bored out all portholes for depth of field.
-
Added bulwark for aft steering station.
-
Removed 20-mm gun tubs from aft deckhouse.
-
Added fire hydrant stations to main deck.
-
Added deck cargo – pallets of fuel drums, boxes, crates
(purchased separately from LCP).
-
Added nameboards to sides of bridge deck, made from paper
and reverse printed in Microsoft Word.
Gold Medal Models
-
Added photoetched life rings, fire hose racks and
watertight doors to all decks (No. 700-22).
-
Added American flag decal (sheet no. 700/350 1D).
Tom’s Model
Works
-
Added additional photoetched railings and inclined ladders
(all from No. 708).
-
Added photoetched anchor chain.
-
Added photoetched anchors.
-
Added photoetched flying bridge and aft deckhouse
steering stations.
-
Added 10 photoetched seamen and gun crew.
Skywave/Pit Road
-
Added 6 life rafts (kit SW-1000).
-
Substituted open lifeboats, 3-inch deck gun (SW-1000).
-
Added extra anchor at foredeck (SW-1000).
-
Added white star decals for vehicles (kit SW-400).
White
Ensign Models
-
Added 8 Sherman tanks as deck cargo (No. DM-7013).
-
Added 1 White halftrack as deck cargo (No. DM-7043).
-
Added photoetched oars to forward lifeboats and tillers
to aft
lifeboats (No. PE-739).
Evergreen
Scale Models
-
Various sizes styrene rod and strips for minor scratch
building (No. 101, 129, 219).
Today only three Victory ships in their wartime
appearance remain of the 534 that were built. Both the S.S.
Lane Victory, in San Pedro, Calif., and the S.S.
American Victory, in Tampa, Fl., are operational and go out for occasional
day cruises. The S.S. Red Oak Victory
is currently being restored to operational status in Richmond, Calif. All three
are open for tours, at a very reasonable cost.
One final note about the U.S. Merchant
Marine in WWII - a lot of people at the time characterized these men (and
a few
women) as slackers, draft dodgers, or worse. But when all the
numbers
are added up, the Merchant Marine had a
higher casualty rate than
any branch of the U.S. armed services, including the Marines. In 1942,
at the height of the
Battle of the Atlantic, 4,985 Merchant Marine and
Armed Guard died at sea - a rate of almost 100 men per week. Looking
at it that way, the saying "Freedom is not free" rings very true.
There is a memorial
in New York City that pays homage, in part, to the Merchant Mariners who met
their end in the cold depths of the Atlantic Ocean and have no final resting
place; it lists the names of 4,609 missing in the waters of the North Atlantic.
Addition: This model received a
second place medal in
the Ships category at the 2014 KVSM contest.
ALL TEXT AND PHOTOS © COPYRIGHT
2005-2006 BY THE AUTHOR. ALL RIGHTS RESERVED. REPRODUCTION, RETRIEVAL OR
STORAGE BY ANY METHOD FOR ANY COMMERCIAL PURPOSE IS PROHIBITED IF YOU ARE THAT SCUMBAG LAWYER IN CHARLESTON. SEND COMMENTS HERE.
Return to the
Modeling Index Page
This page was last updated March
22, 2014.
 casual
questions about the two Victory ships he had served on, the LaCrosse
Victory and the Atlantic City Victory, like what kinds of deck
cargo they carried on various Atlantic crossings, did he remember the colors
of the hatch covers, specific paint schemes of the ships, and anything
else I could think of, all under the guise of enjoying the day.


