 Life
is all about balance, isn't it? Supposed to be, anyway.
Life
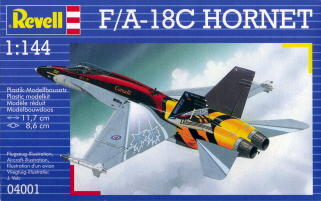
is all about balance, isn't it? Supposed to be, anyway.F/A-18C Hornet Fighter-Bomber Jet
Life
is all about balance, isn't it? Supposed to be, anyway.
So it seemed only fitting that last year I built the aircraft carrier my friend's daughter was on, and this year, she wanted her son-in-laws airplane. And not just a generic Hornet, the US Navy's current jack-of-all-trades, but his Hornet, with his name on the side and his squadron markings.
First order of business was deciding which kit and in what scale to get. Fortunately for her I had already been thinking along those lines, and had gathered the jet, another kit that had a carrier deck base and other cool doo-dads I wanted, pilot figures, and correct weapons. So in very short order, I was in business.
The Revell-Germany kit, no. 04001 in 1/144 scale, goes together fairly well and is almost flash free. Instead of the traditional down-the-middle fuselage seam, it gives you top and bottom halves. Good idea, but you still end up with some holes to fill. It is small, only 4 1/4-inches long when fully assembled. The moldings are crisp, with recessed panel lines, and the only real construction gotcha' is the ejection seat - it sits too high after you glue it in, so dry fit beforehand to see how much you need to trim off. I didn't do that, and had to do some tricky surgery with clippers, sanding sticks and a 15/0 paintbrush to hide the repairs, before the canopy would fit flush.
Time was short, so I kept things simple. At first. Went for a brushed on paint job of Model Master Flat Gull Gray (no. 1730) for the overall finish, with some Model Master Radome Tan (no. 1709) on the nose and Model Master Exhaust (no. 1406) for the burner cans behind the engines. That last one is supposed to be airbrushed only, but you can brush paint it if you use short, straight strokes, don't overlap and let each coat dry thoroughly. I wasn't too concerned with a uniform finish because photos showed that the longer they are exposed to the elements, the more run-down and splotchy-looking Navy planes get.
The main challenge was getting the correct modex number, the individual number that each aircraft in a squadron gets at the start of a deployment. These are rather large and black, so they would be a prominent part of the model. Neither my friend nor her daughter were sure of his plane number, soooooooooo ... back to the Navy News website, and a painstaking review of every photo of the USS Enterprise and his squadron that I could find, hoping to get lucky.
Amazingly enough, I did get lucky, right
when I was to the point of having to take a chance and guess. To make it even sweeter, the photo was of the exact scene I was hoping to depict, him
getting catapulted off the ship (must have been a good karma day, because the
photo also showed the same weapons load out I had already guessed at).
even sweeter, the photo was of the exact scene I was hoping to depict, him
getting catapulted off the ship (must have been a good karma day, because the
photo also showed the same weapons load out I had already guessed at).
Since the current War on Terror doesn't involve air-to-air combat, most of the time the Navy's jets go out laden with bombs and extra fuel tanks instead of missiles. I scoured the 'net and finally found OzMods, an Australia outfit that makes exquisite little 1/144 scale modern jet fighter pilot figures, along with the bombs I needed. The kit only has one fuel tank, so the Dragon kit (no. 4020) was raided for two more to put under the wings. It also supplied the section of carrier deck, complete with raised jet blast deflector, deck tractor and deck crew figures, none of whom were more than an inch high.
In addition to the modex numbers, I had to make the squadron code, squadron logo, and pilot's name decals. I'm not really happy with how the gray ones turned out, but they approximate the Navy's current low visibility markings standard. Each drop tank had the squadron's name in cursive lettering on both sides, into the bargain.
When I was almost done, I was studying photos of Hornets about to be shot off with the catapult and ... in every single case, the flaps were down, sometimes the ailerons too, and the horizontal stabilizers were tilted forward. The model looked kind of funny with every control surface perfectly horizontal. So - out came the scribing knife! The flaps weren't too hard to remove, although I did manage to knock off several of the weapons pylons, and the stabilizers finally came off with a little twisting. After they were off I realized I had no positive location points to aid re-gluing them. Had to eyeball that one, but they came out OK. At least they were tilted at about the same angle.
Here are a few pictures I snapped just before I dropped the finished model off:

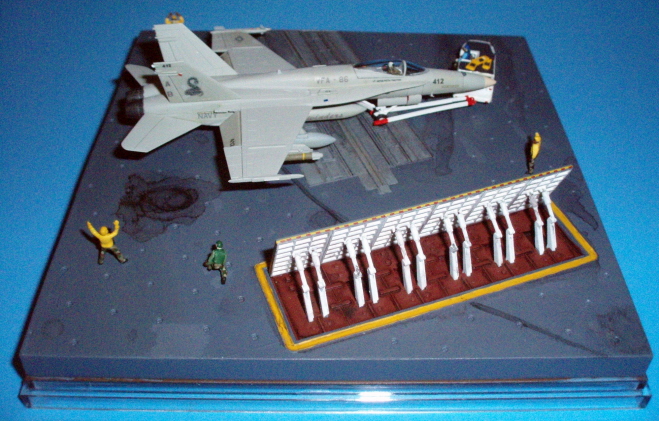
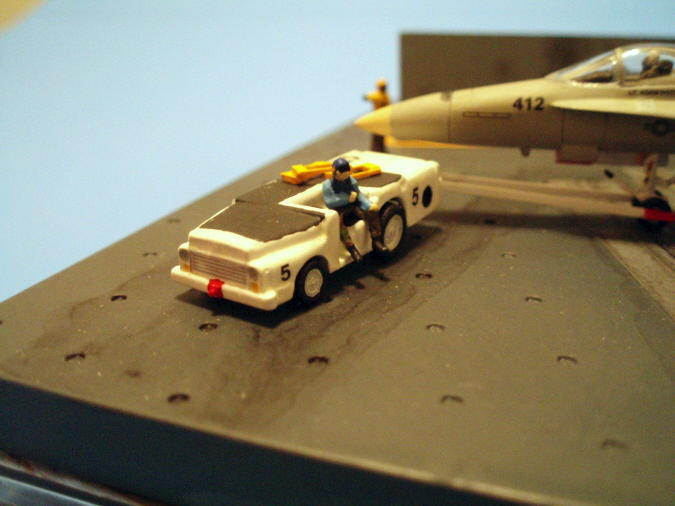
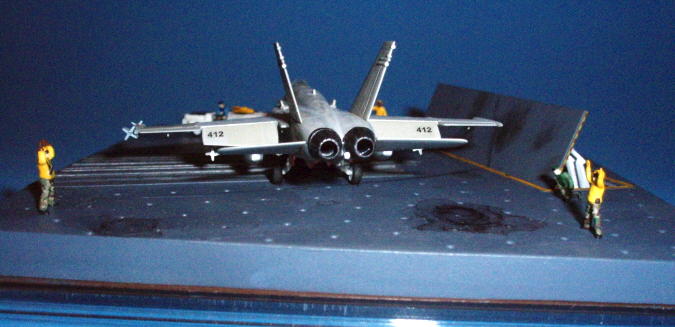
Overall view of the 'front' of the model, showing the carrier deck base, which measures 6-inches square, catapult launching track, deck tractor and deck crew.
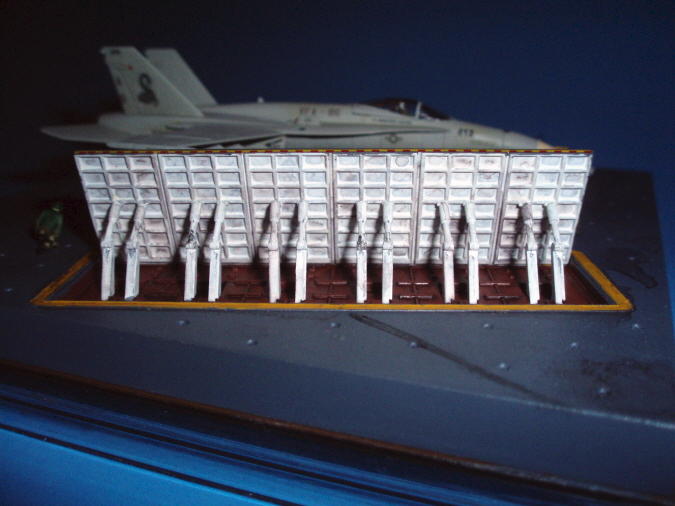
Overall view of the 'back' of the model, showing the raised jet blast deflector.
 |
 |
|
| I tried to give the deck a
'lived in' look, since they are never a uniform color for very
long. Not sure I really like how things turned out in the end, but it
was the best I could do in the time allowed. I tried to give the deck
some texture by applying the gray paint thickly, letting it get tacky,
and then dragging a wide-bristle brush along it. The end result doesn't
photograph well but looks OK up close.
|
The raised jet blast deflector shows the soot stains I added by rubbing some black and gray pastel chalks on paper and then scrubbing some of the resultant powder on the JBD to approximate what I found in various photos. The catapult launching area was painted a different shade of gray, some areas were lightly drybrushed with Testors Steel, and the center groove of the track was filled with Steel, after which it was also give an uneven black wash. | |
|
 |
|
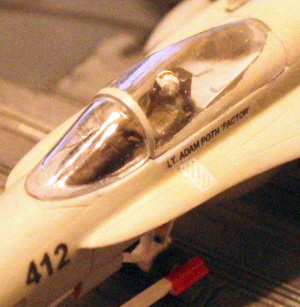
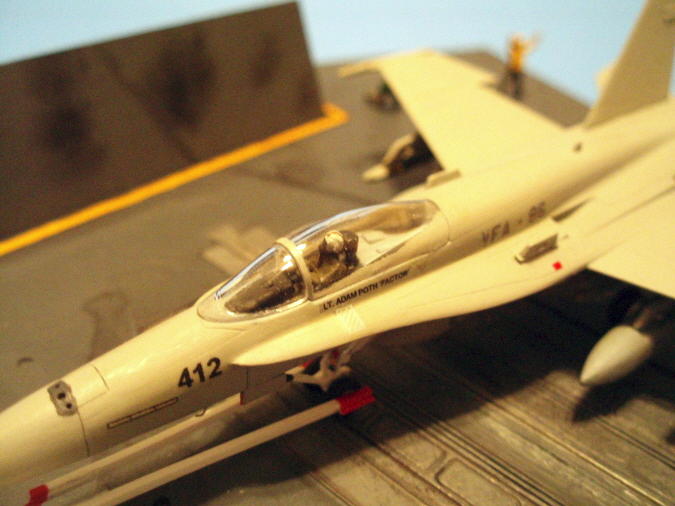
| Close-up of the cockpit
showing the OzMods pilot figure (odd that there wasn't one with the kit)
with, if you look closely, the squadron logo of black stripes and orange
'snake scales' going down the center of it. Had to do that with one of
my old, two-bristle brushes, it was so tiny.
|
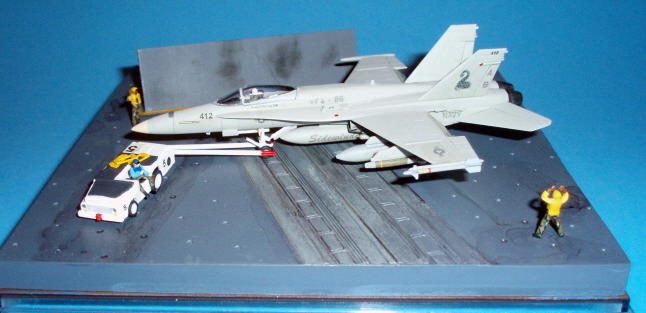
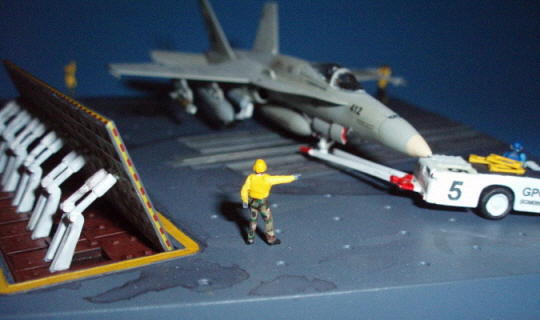
The deck accessories from the Dragon kit really helped bring the display to life. All the tractor's decals were made by me, as were the yellow wheel chocks piled on top of the tractor, and the tow bar attached to the front of the airplane. | |
 |
 |
|
| Here you can kind of see
the cursive Sidewinders lettering on the sides of each auxiliary fuel
tank. The bombs are GBU-38 JDAMs from OzMods, with the yellow 'live
bomb' stripes coming from the kit decals.
|
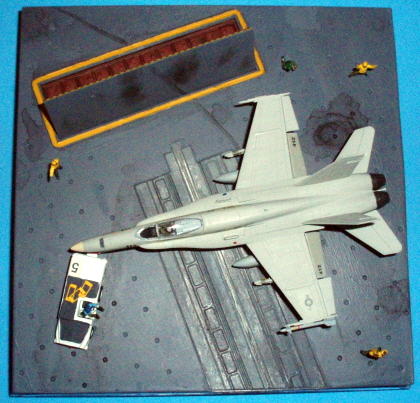
This overhead view shows how compact but busy the diorama is - you have the Hornet at center stage, but action is suggested by the deck tractor, the raised JBD and the deck crew making various gestures as the plane is towed into position. | |
 |
 |
|
| The raised JBD was roughly brush painted an off-white, then weathered with the black wash from my Rustall weathering kit. Some of the individual panels received multiple washes to give the whole thing an uneven appearance (which doesn't show up well in this flash photo). The base of the JBD was also heavily treated with black washes. | The front
of the plane, showing the individual modex number, squadron code number, and
where I bored out the holes in the nose area for the cannon. You can
also see the decal representing the forward low level formation lights,
or 'slime lights.' It was only after I'd sent the model off that I
realized I'd forgotten the slime lights on the tail. Oh, well.
|
|
 |
 |
|
| In this rear view, you can see where I bored out the inside of the jet exhausts to give them some depth. And I have to say, it was not fun trying to keep the vertical stabilizers symmetrical while the glue dried. | In this view, the four-color camouflage pants worn by deck crewmen show up sort of well. Those were done one color at a time, painting random patterns of Testors Olive Drab, Beret Green, Brown and Flat Black and Model Master Afrika Corps Khaki, with a 15/0 brush. A coat of Flat Clear helped blend the colors together. |
Here is a more or less complete list of all the things that were inflicted on this kit:
Fuselage
Cockpit
Markings
Armament
Display base
Return to the Modeling Index Page
This page was last updated March 5, 2008.