 during World War II. It turned into quite the little nightmare by the time all was
said
and done (a lot of the 'said' part was four-letter words).
during World War II. It turned into quite the little nightmare by the time all was
said
and done (a lot of the 'said' part was four-letter words).G4M1 'Betty' Torpedo Bomber
This started out as a small project, part
of my quest to build every type of aircraft that served in the Aleutian Theater
during World War II. It turned into quite the little nightmare by the time all was
said
and done (a lot of the 'said' part was four-letter words).
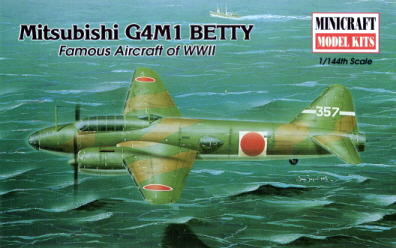
The Mitsubishi G4M1, code named 'Betty' by the Allies, was the Imperial Japanese Navy's workhorse torpedo and aerial bomber during World War II. IJN pilots called it the 'Hamaki,' or Cigar, for the fat round shape of the fuselage. Allied fighter pilots called it something else, because the Betty's complete lack of armor or self-sealing fuel tanks gave it a propensity to burst into flames when hit - the 'One Shot Lighter.'
I opted for 1/144 scale due to space and
cost considerations (should have known something was up when it was on sale for $2 at Squadron). At first glance the Minicraft kit looks nice,
adequately detailed for this small scale, 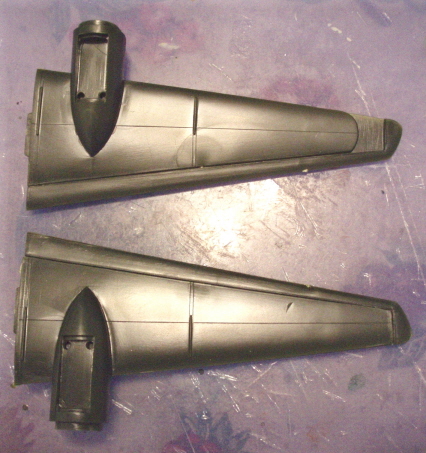 albeit with a
very basic cockpit and
no crew figures among the 33 parts. Closer examination disclosed a soft, hard to work with dark
green plastic; several incompletely-molded parts; clear parts that were both
cloudy and with only the merest suggestions of canopy
lines; and numerous fit
issues. Kit No. 14409 is one of their earliest 1/144-scale airplane model efforts - and it shows. More recent kits have generally gotten
good reviews. Still, it looks like a Betty (when held at arm's length), so I
plowed ahead.
albeit with a
very basic cockpit and
no crew figures among the 33 parts. Closer examination disclosed a soft, hard to work with dark
green plastic; several incompletely-molded parts; clear parts that were both
cloudy and with only the merest suggestions of canopy
lines; and numerous fit
issues. Kit No. 14409 is one of their earliest 1/144-scale airplane model efforts - and it shows. More recent kits have generally gotten
good reviews. Still, it looks like a Betty (when held at arm's length), so I
plowed ahead.
The first thing tackled was the many small, molded-in windows, including the bomb aimer's triangular panel underneath the nose. I wanted to open them up and replace them with Testors Clear Parts Cement, which gives an adequate clear-looking window in this scale and makes for a much more realistic model. My trusty pin vice and several bits, mainly the No. 78, allowed me to ream out the smaller windows around the tail (although few remained squared up when I was finished). The long narrow windows in the nose were a problem - I found it impossible to keep a straight line while moving the drill bit up and down to saw through the plastic. Dim memories of an old car modeler's trick led me to a solution - ordinary sewing thread. Drill a hole in each corner of the window, feed the thread through one hole, pull it rapidly back and forth with both hands and viola! A relatively clean, straight cut. Did I mention that this kit has 24 small windows, and two large side ones I also opened up?
Based on a cut-away drawing and photos of
other modeler's larger-scale Betty builds, I tried to jazz up the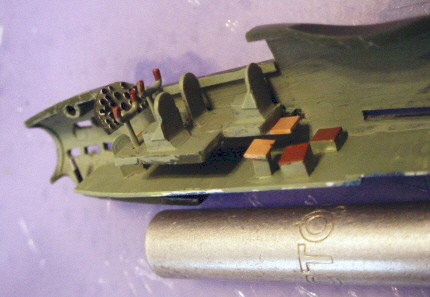 nose and cockpit areas, adding a bomb bay floor; seats, tables and whatnot for
the bombardier, navigator, radio operator and rear gunner; control wheels; and an instrument
panel (dials made with my 0.018-, 0.028- and 0.038-inch Waldron sub-miniature punches,
painted gloss black and attached to the panel with white glue). At this
scale, however, I'm not sure the end result was worth it because *mumbles* you
can't see most of it when the fuselage is closed up.
nose and cockpit areas, adding a bomb bay floor; seats, tables and whatnot for
the bombardier, navigator, radio operator and rear gunner; control wheels; and an instrument
panel (dials made with my 0.018-, 0.028- and 0.038-inch Waldron sub-miniature punches,
painted gloss black and attached to the panel with white glue). At this
scale, however, I'm not sure the end result was worth it because *mumbles* you
can't see most of it when the fuselage is closed up.
The model was missing a few other things that had to be fabricated - radio masts, engine exhaust stacks, navigation lights, flap hinges, main gear oleo cuffs and, of course, a Type 91 aerial torpedo. I mean, come on, this is a torpedo bomber!
When the dust settled, I hoped that it would look like a reasonable approximation of a Betty with the 12th Air Fleet Unit, based in Paramushiro, Kurile Islands, in 1942 as it prepared to go out on a mission.
Paints
I cheated a bit on the paint ... OK, I cheated a lot! I already had IJN Green (Model Master No. 2116) from my Kimikawa Maru seaplane tender build, but I didn't want another monochrome green bomber on the shelf, so I decided to camouflage this one as it would have appeared in early to mid-1942, before the IJN/IJA dictated that all airplane wing leading edges be painted bright yellow for identification purposes . There seemed to be a lot of disagreement about what shade of brown to use so I took the easy way out and used Model Master Leather, No. 1736, a mid-range reddish brown. The undersides are not IJN Sky Gray ... because I thought my Model Master Light Gray, No. 1732, was close enough (and not much of it is visible anyway). The insides were painted RAF Interior Green, Model Master No. 2062, which saved me from buying IJN Interior Green. I was aiming for the well-worn look, and so was not concerned with exact 'factory fresh' color matches.
The other color I thought I got right besides the IJN Green was the interior of the bomb bay and wheel wells, which were sprayed with a cool-looking metallic blue lacquer as a corrosion inhibitor. Tamiya Metallic Blue, No. X-13, fit that bill nicely and looked great. Further research and postings on several message boards, however, disclosed that in all probability by 1942 both the bomb bay and the wheel wells were left natural aluminum with, at best, a coat of clear lacquer sprayed on. Oh, well. It looks cool, and no one's going to see it anyway!
Clear Parts
This kit's Achilles' heel. They are, in a word, BAD. The side and top gun blisters have a weird divot molded into the back side of them that gives the finished products an odd goggle-eyed look no matter what you do. And while the cockpit canopy lines are laughably thin, at least they're on the outside of the part, as opposed to being on the inside for the nose and tail cones. Several coats of Future acrylic floor polish helped dispel the part's fogginess, but I really had no idea what to do about painting the canopy lines.
In 1/72 scale I've used Bare Metal Foil to mask off canopy frames with good results, but using BMF assumes there are raised canopy frames to mask off - which was not the case here. Trying to paint the individual frames with a brush would yield imperfect results with my shaky hand (experimenting amply demonstrated this).
Next brainstorm was to paint pieces of 0.010 x 0.020-inch styrene strip (Evergreen No. 100) the appropriate colors and glue them down. This is the smallest size strip Evergreen makes. It kind of worked for the cockpit canopy but was a total failure for the curved gun blisters. So off all of that came.
Finally, in desperation, I tried a black fine line permanent marker I'd bought for coloring ship model rigging. At least it gave me a uniform line width, so I went to the craft store and bought Sharpie® permanent fine-tipped markers in brown and green to go over the black. Did it look good? Well ... no. But it was better than no canopy lines at all.
And after looking at one side gun blister mounted on the model, I ended up removing the marker lines on all the clear pieces and hand painting them with a 15/0 brush anyway. Hold the model at arm's length and it's not too obvious that none of the frame lines are the same width (detractors will be flogged with a wet noodle). On to the photos:
 |
 |
|
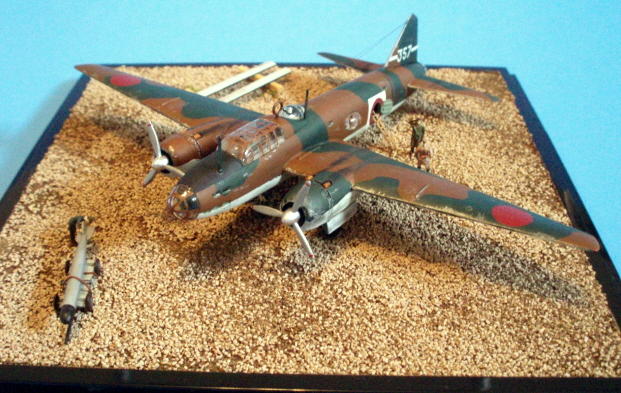
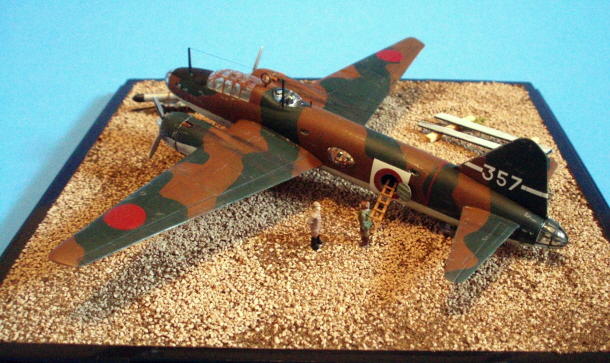
| Overall view of the 'front' of the display, showing (I hope)
a well-worn Betty getting ready to go out on an anti-shipping reconnaissance
mission from its base at Paramushiro, Kurile Islands, in 1942.
|
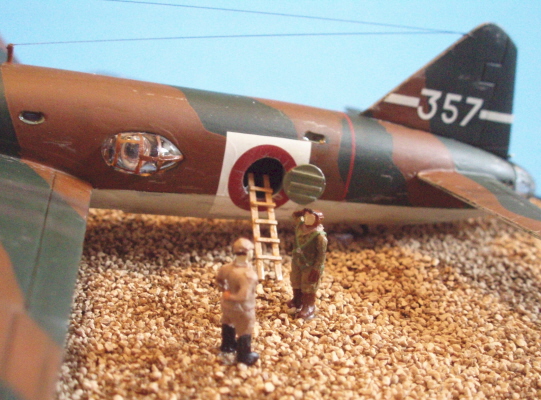
Left side of the model, showing the circular crew entrance hatch that was concentric with the port side hinomaru (national insignia). I scratchbuilt a ladder, which matched a few photos I found, although most of the crew apparently entered through the bomb bay. | |
 |
 |
|
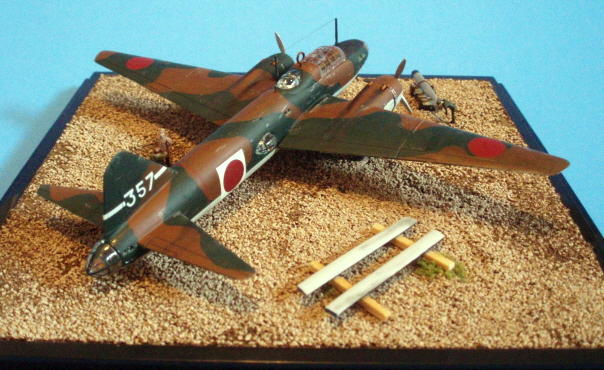
| A view from the rear, with the bomb bay doors I
removed put on a couple of pieces of timber to keep them out of the gravel
and mud. The Japanese were not lavish with their airfields, and had
nothing equivalent to the wonderful Pierced Steel Planking (Marsden Mat)
that enabled the US to construct runways virtually overnight under appalling
conditions.
|
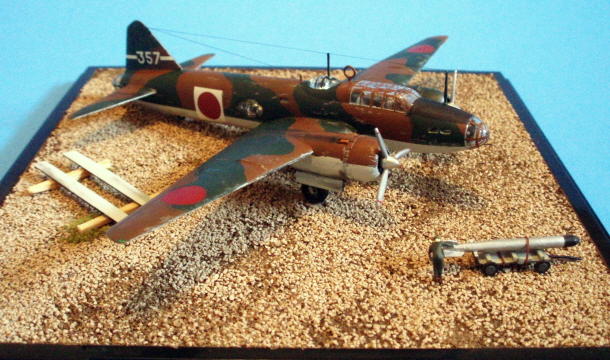
Right side view. Most of the photos I found showed a crowd of like 20 guys manhandling a torpedo under the bomb bay,
but ... No. 1, I didn't have than many 1/144 people, and No. 2, painting
just this small number is hard enough! The ground crew are technically
German NATO figures from Preiser, but I figured at this scale, one
coveralled figure pretty much looks like another. There also might have
been *mumbles* a few heads swapped among figures to get the proper billed field cap
look.
|
|
 |
 |
|
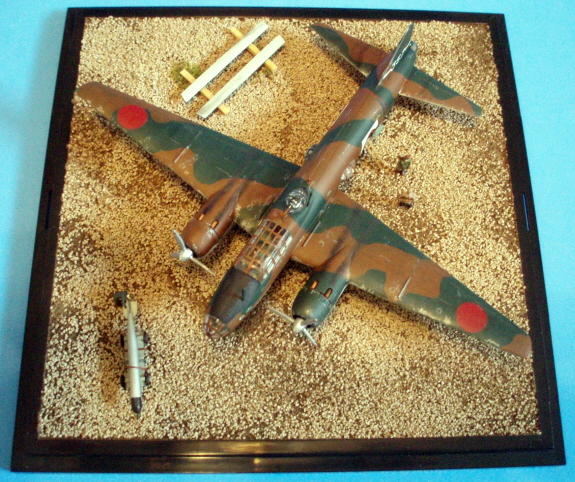
| Overhead view of the finished diorama, showing
the overall layout. You get a sense of impending action (at least I like
to think so) from the guys working under and around the aircraft, the
torpedo at the ready, some of the crew already in the cockpit and one
having a last word with an officer type before boarding. The hinomaru's on
top of the wings are incorrect - they should have a thin white outline,
but I had no way to cut a perfect circle in white decal paper with the
tools I have, and several attempts to create painting masks in the correct
diameter prompted me to give up on complete accuracy.
|
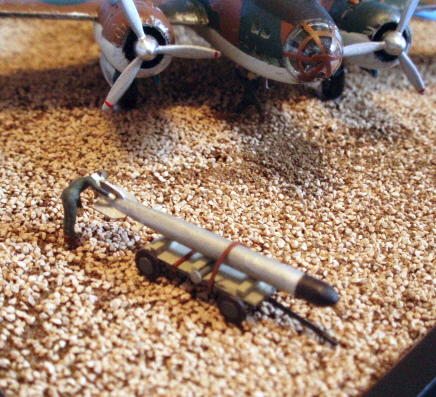
The scratchbuilt Type 91 Mod
2 aerial torpedo, on its scratchbuilt trolley. Dimensions for both
were gleaned from several sources. The ground crewman is examining the
little bronze props at the back of this potent engine of destruction. I
fudged a little on the fins - there are supposed to be eight, in three
different styles. After gluing four on, I decided that discretion was the
better part of historical accuracy.
|
|
 |
 |
|
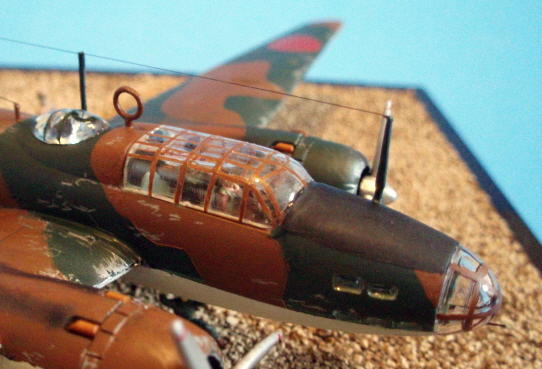
| Close-up of the Betty's expansive cockpit, with
lots and lots of glass. I ended up hand painting the frames, and it looks OK -
from a distance. You can see the pilot in the right-hand seat (contrary to
how the US did it) and kind of see the navigator standing behind him. The
front radio mast is leftover from my P-51 Mustang. Aerials are stretched
sprue, colored with a permanent black marker. Also note the square
windows, all of which were cut out and replaced with Testors clear parts
cement to simulate window glass.
|
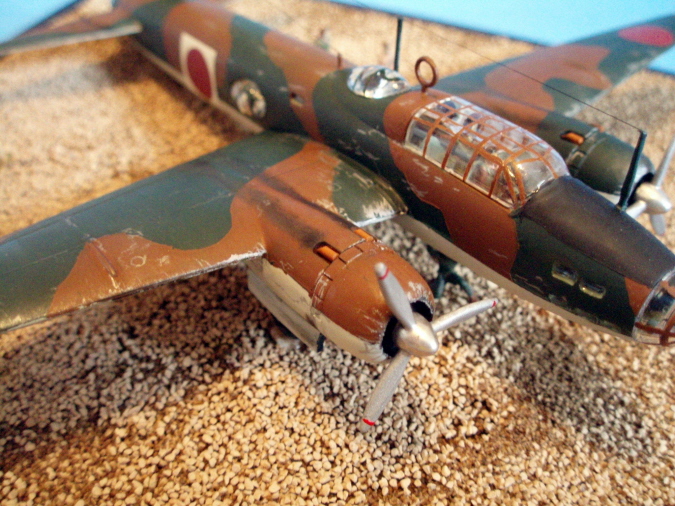
This shot shows the weathering to good advantage. I tried two new things - a Prismacolor metallic silver colored pencil for the 'chipped paint' along leading edges and around fuel filler caps and the like, and powdered pastel chalks for the exhaust streaks going back from the engines. I'm quite pleased with how both turned out, and the pencil gave me much better control about where the silver coloring went. | |
 |
 |
|
| A flash shot of the underside, mainly to show
off the cool-looking metallic blue lacquer that was sprayed into wheel
wells and the like as a corrosion inhibitor. There is one ground crewman
fooling around down there, and you can kind of see the hooks for the
torpedo sling behind him, and the blurred pitot tube in front.
|
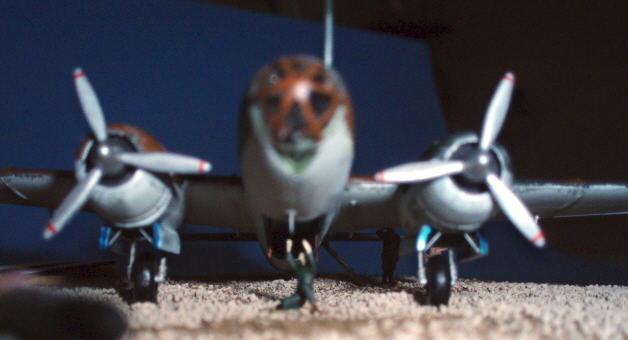
You have to wonder what's being said here ... the guy who is getting ready to go out and risk his butt is smartly saluting the at ease ground pounder who gets to stay safely behind. Here you can also see the left waist gun blister, and the awful divot that Minicraft molded into them. I tried filling one up with Future floor polish but it didn't really make any difference. |
Here is a list of all the atrocities I inflicted on this little model:
Fuselage
Cockpit/Interior
Markings
Display base
Addition: This model received a third place trophy in the Propeller Aircraft, 1/72 Scale and Smaller category at the 2009 KVSM contest.
Return to the Modeling Index Page
This page was last updated March 28, 2009.