Overview
|
Overview |
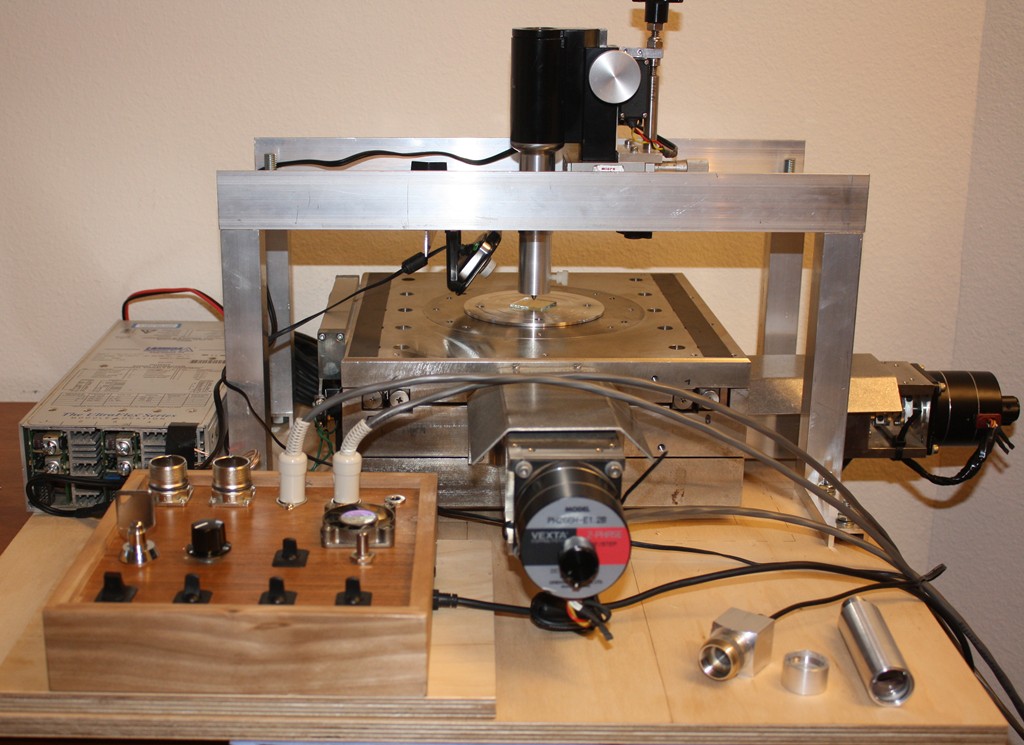
The machine is built around an x-y table I found on EBay, originally from the test lab of a defunct chip company in Silicon Valley. The steppers are 400 steps/revolution, 2mm travel per revolution with about 50mm of total travel on either axis. The x-y table weighs about 100 lbs. It has no backlash that I can detect. It has 10 micron resolution optical encoders on both axes. I don't (yet) have an interface or display for them.
Also shown in the first picture is a gantry above the table, a surplus power supply on the left, the control box on the left front and the laser head with associated optics on the right front. All of the electronics except the host computer live in the control box. The switches include a power switch and local or remote control of the laser and the steppers. The gantry also holds a cheap webcam that I hacked to focus really close. It is a nice way to see what's going on without sticking my head too close to the lasers.
The stepper controller is an Eggbot board from Sparkfun. The controller supports 16x microstepping mode, making each microstep = 2000/400/16 = about 0.3 microns. The controller worked out really well for this project and is one of the best choices I made. It connects to my computer through USB, it was set up out-of-the-box to control bipolar steppers, servos and had a pile of other inputs and outputs, all of which are accessible through commands to the USB interface. It can be directly controlled from Inkscape which means that I can import circuit boards or create freehand drawings and they can be immediately plotted. I have not had to do any PIC microcode so far.
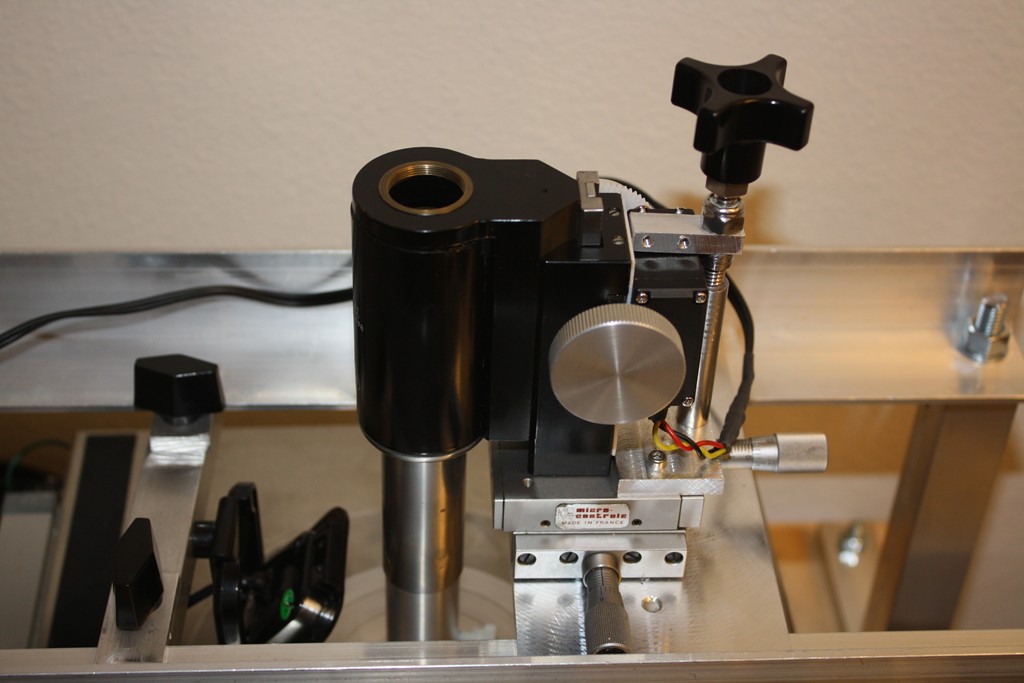
The head is an EBay Baush and Lomb microscope tube flipped upsided down. It sits on an x-y table adjusted by two micrometers for fine positioning. I can attach a blu-ray laser head to the top, or a home-built housing for a diamond stylus to the bottom, as the head is configured in the photos.
 Microscope Head |
The laser is controlled by a Flexmod P3 laser diode driver. The laser diode came from a PS3. I run it just above the turn-on threshold - about 35mw. That is plenty for my use - it will easily expose negative photoresist as fast as I can run the steppers. I can get about 200 micron (0.2mm) lines on a circuit board. That's fine for most circuit boards but is lousy resolution for lines on telescope reticles. I can probably do better with better lenses - mine came from Surplus Shack. This is an area that I am still working on.
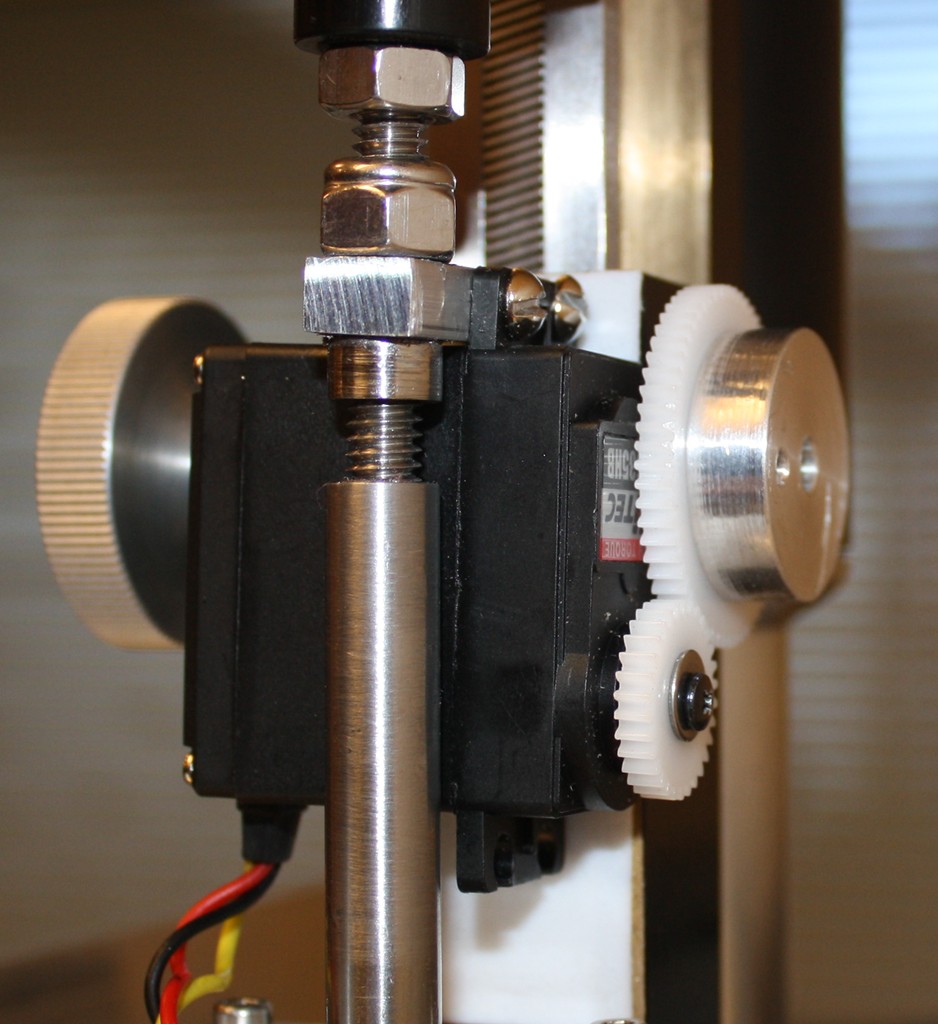
I picked up a "diamond drag engraving tool" on EBay for $16.00 and machined a housing that fits into the microscope head. The one I got was made by Bruce Diamond. With a bit of kerosene as lubrication and a really light touch I can get about 50 micron lines. That's getting good enough for a telescope reticle and does not require any nasty chemicals. In order to make that work I added a servo to one side of the microscope head. The Eggbot controller thinks it is the pen so it goes up and down at just the right time.
 Servo |
I have all of it pretty much working in a prototype sort of way. I blew up my laser diode taking it on and off of the head: static, I think, they are sensitive little guys. I have another that I pulled out of a PS3 laser sled ready to go along with a laser diode surge protector from Lasorb. I have several more ideas for the main objective lens. The obvious choice is to use the lens in the blu ray sled but it has a focal length of less than a millimeter so I need to come up with some sort of automation for the sled's focus motors. This is an area that will take some work.
On the diamond stylus front, I have been playing with making springs out of guitar string wire in order to get just the right tension. Even the weight of the 1 1/2" stylus makes it dig in too much. This shows lots of promise.