|
Spliced into the blue brake light wire
Take off the seat and locate the rear lights connector. It is located just in front of the rear fender
on the left side of the bike. Disonnect this connector and then locate the blue wire coming out of it. This blue
wire is the +12 line for the brake light. Cut this wire about an inch back from the connector. You will likely
have to remove some of the electrical tape from around the wire bundle.
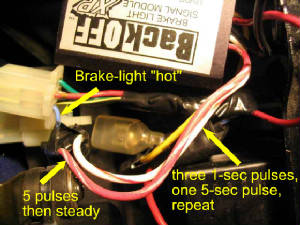
Select either the red w/white stripes (for 5 quick flashes followed by a steady light) or the white w/red
stripes (for a repeating pattern of three 1-sec pulses followed by a 5-sec pulse). Connect the selected wire to the
blue wire coming out of the connector.
I taped off the end of the yellow wire (the emergency flasher wire) to keep it from shorting out. I
figure it is a project for a later date.
Connect the black wire from the back-off unit to a ground point. I chose to connect it under the left-side bolt in
the cross-member under the seat. This cross-member runs across the top of the battery.
Connect the red wire from the back-off unit to the end of the blue wire coming from the front of the bike;
i.e., the one NOT coming out of the connector.
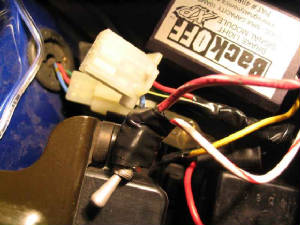
Switch-ing between the modes
Alternately, you can use a dual-pole switch and connect the center pole to the blue wire, and the red w/white
and white w/red wires to either of the two poles. This allows you to switch between the two modes.
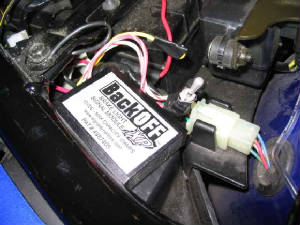
Location
The unit fits very nicely on the left-hand side sitting on top of the plastic housing that sits behind the left-side cover.
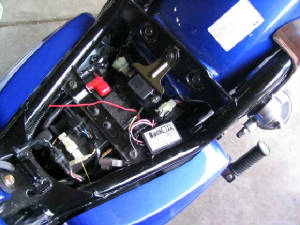
Finished
This gives another view of the location of the unit relative to the bike,
This unit works great. I have definitely seen a reduction in the number of cars that tailgate me
or that slide up too close at a stop light. Best money I ever spent towards making my bike safer.
Follow-up
One of these days I need to go in there and redo this job using heat shrink. I was out that day and
didn't want to wait. Electrical tape just doesn't look nearly as nice or professional.
|