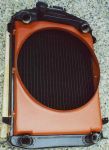
After reading some articles on making sheet metal parts using wooden hammer forms I decided to try and make a radiator shroud for my '32 Ford. The radiator is a recored original for a flathead V8 and the fan is engine driven. After taking lots of measurements I determined the shroud would be 16 1/4" wide by 22 1/4" high with a depth of 1 1/2". The hole for the fan would be about the same as the width and the center located about 10" down from the top edge.The hole would have a flange around it with a height of 3/4" at the bottom and 1 1/2" at the top. The edge of the flange will then cover half the width of the fan. Two forms were made; one for the hole and one for the body. The body form used 3/4" plywood for the base with 3/4" fir lumber to make it 1 1/2" thick. It was shaped with wood rasps and coarse sand paper using radius gauges cut from cardboard to get the edges the correct shape. The form for the hole also used 3/4" plywood for the base and six 2 X 4's were attached to it. I used a router with a home made circle cutter attachment to cut the hole and wood rasps to shape the edge radius. The hole was cut 16 1/2" in diameter. This turned out to be a good guess for allowing for spring back of the metal as the outside diameter of the shroud came out at 16 1/4". Click on the images to see a larger picture. Use the back button on your browser to return.

I used 22 guage steel sheet for the shroud which is listed as .0299" thick but all the material I could find was a few thousands over that. The material I ended up with measures .035" which worked OK but if it would have been closer to .0299" it would have been easier to form. It is a little tricky to weld the thinner it is however. After locating the center of the hole in the sheet and cutting it out with a jig saw I clamped it to the form and started hammering. At first I thought it wasn't going to take long as the flange began to take shape quickly but in order to form the metal closely to the form it took a lot of pounding. I used a variety of tools. What you need is something heavy with a radius to match the form so as to minimize the hammer marks.


The next step was to form the top and bottom edges. It was necessary to cut some notches for the corners and the areas shaped for clearance next to the hose connections.


Now all the gaps made by the notches were filled with patches and welded along with all the corner seams. The shroud is mounted to the radiator with six angle brackets fastened to the side frames of the radiator with 4-40 button head screws and 10-32 button head screws that screw in to nuts brazed to the inside of the shroud. After priming, and a little plastic filler to smooth out the welds and hammer marks, it was painted black. This last picture was in red primer and shows up better than the black.

I was very pleased with the shroud when it was finished, especially with this being the first try at using a hammer form. I did learn some things; one was making the width of the form too big. It was originally about 16 1/8" wide and I had to cut it down to 16" in order to make the shroud width come out to 16 1/4". Also I think it would have been better to form the top and sides first before cutting the hole and forming the flange. It made it difficult to form the sides near the center where the flange was already formed. If the flange was not there the sides could have been worked over the edge of the form by hand avoiding a lot of hammering and the fit to the radiator could have been checked and adjusted much easier.
Back to Index