|
Sighting the M-1 Garand
The Garand has a very simple but accurate sighting system. Sights are for the average person.
Below I'll try to explain how to zero at 100 yards simply. Most ranges in my area have targets at 25 and 100 yards but
a good range will extend longer out.
Each click of either elevation or windage changes the strike of the bullet approximately one inch on the target for every
100 yards of range, over its effective range.
Windage can be adjusted 16 clicks to the right or to the left of center
index, and elevation can be adjusted from 0 to 72 clicks.
Sighting-In
1. Windage zero.
Center your rear sight according to the index marks on the receiver and sight
base. Center the front sight in the dovetail. Under no-wind conditions, fire a group at 100 yards. If the group is not centered,
loosen the front sight and move it opposite to the direction of the group error. Repeat as necessary.
2. Elevation
For simple "Battle-Zero," Zero-in at 25 yards, then come up 1 click. This effectively zeros-in for 200 yards.
This
should result in groups centered on a 4" diameter from 0 to 400 yards.

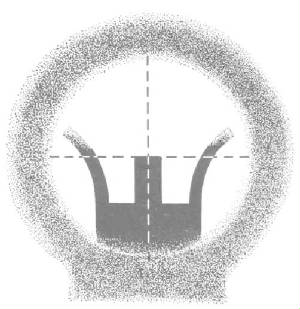
First lets look at the rear sight. You'll see two knobs these are your windage(see right above) and
elevation knobs(see left above). Windage is on the right side and the elevation on the left.
Just below the sights in the rear you will also see some marks on the receiver and rear sight. These are for the windage.
You'll see just above these lines a single long line on the sight this is the alignment line. You want both lines to line
up to start. This is center.
Second, we'll start by setting your first settings. Adjust your windage knob to center. Line
up the two lines on the rear of the sight and receiver to the middle line on the receiver. Then adjust your
elevation to the bottom adjustment. Then turn it up 7 or 8 clicks. This should put you on paper.
Start at the 25 yard range.
For this part you should bench fire your weapon to be accurate and hold the same sight picture. Look
though the rear sight aperture lining up the front sight with the target. Fire 3 rounds. This will give you an idea as
to the adjustments needed. If you have a good rifle and hold the same sight picture your rounds will be close together. Now
and then you'll get what is known as a flier. Noth to worry just use the closest two rounds together. This
is the starting point for you. You'll now need to move the bullet impacts to center if they are off. On standard garand sights
each click is 1 inch of movement at this distance. Now lets say you are 2 inches low and 2 inches right of center. Simply
move your sights 2 clicks up and 2 clicks right. Then fire 3 more rounds you should be on center or bulls eye on the target.
Lastly, move to the 100 yard range and fire three more rounds you should
be still on center.
If your lucky and have 200 yard range simply move your elevation knob up one click and you should
be on that that distance.
Have fun!
Alternate Method:
The starting point for windage zeroing your M1 or M14 is to get a "no-wind" windage zero. Center your rear sight according
to the index marks on the receiver and sight base. Center the front sight in its dovetail (loosen the Allen-head screw, of
course) as best you can by eye. Using a pencil, draw a witness mark on the sight & base. Fire a group at 100 yards (under
"no wind" conditions, of course!). If your group is not centered, loosen the front sight and move it opposite to the
direction you want the group to move. Continue to fire and adjust until your group is centered. You may, of course, have to
put a click or three on the windage if your front sight starts to overhang the sight base. If you find that your front sight
is "way too far" over, you may have a bent barrel or other problem; consult with Clint.
For elevation, start with eight clicks up from the bottom at 100 yards. Each click (either windage or elevation) with standard
sights is 1 MOA, so one click will move you one inch. Typically you'll come *down* one click at 200 yards. If you can, confirm
your zero at 200 yards; this will allow you to loosen the screw in the elevation knob and turn the knob so that the "2" mark
is opposite the index on the sight base.
A quick & dirty "battle zero" may be obtained by zeroing 1.25 in up from the point of aim (for .30-'06) at 25 yards.
This zero should allow its on man-sized targets form 0 to 400 yards.
If you have "National Match" sights, there are only two differences between Service and NM sights.
First, the windage clicks yield 1/2 MOA (1/2" per 100 yards), assuming you have an NM base and windage knob.
Second, the NM hooded aperture is on an eccentric, so that while the elevation knob still gives you 1 MOA (1 inch per 100
yards), rotating the aperture 180 degrees changes the elevation 1/2 MOA. See
Iron sights (M1 rifle): The rear sight can be adjusted to correct for a wind that is strong enough to blow a bullet
off its course, or simply to change the strike of the bullet to another spot on the target. The strike of the bullet can be
made higher or lower (elevation) or can be moved to the right or to the left (windage). The elevation and windage knobs make
audible clicks when they are turned, and each click changes the strike of the bullet approximately one inch on the target
for every 100 yards of range. For example, 2 clicks of either elevation or windage will move the strike of the bullet approximately
four inches on a target at a range of 200 yards. Windage can be adjusted 16 clicks to the right or to the left of center index,
and elevation can be adjusted from 0 to 72 clicks.
Zero and Battle-Sight for M1: Every rifle has certain characteristics that make the individual piece fire a little
high, a little low, a little to the right or the left. To be able to get consistent hits, the rear sight must be zeroed for
the various ranges, and the sight setting recorded. The data for the rifle's zero is easily kept in the accessory compartment
of the stock for ready reference. To move the mean point of impact up, raise the rear sight. To move the mean point of impact
to the right, move the sight to the right, and so on. Several rounds should be fired from a bench or sandbag rest from various
ranges to find and confirm the zero settings. The battle sight setting is the 300-yard zero, less two clicks. When two click
are subtracted from the zero elevation, it causes the rifle to be zeroed in at the point of aim. In other words, the location
of the shot group is moved from the center of the bull's eye to the lower edge. With this sight setting, a rifleman can hit
his point of aim at 300 yards and can engage man-sized targets at ranges from 0-400 yards by aiming at the center of mass.
To calibrate the rear sight to the battle sight setting you:
- Run the aperture all the way down and loosen the screw in the center of the elevating knob until you can turn the knob
forward.
- Turn the elevating knob forward until the 300-yard index line is opposite the index line on the receiver.
- Turn the elevating knob forward from this point to the number of click equal to the 300-yard zero in elevation, less two
clicks.
- Hold the elevating knob in position with your left hand and tighten the center screw, then run the aperture all the way
up and tighten the screw.
- Check your setting by turning the elevating knob back until the 300-yard index line is opposite the index line on the
receiver, then turn it as far forward as you can, counting the clicks. The number of clicks you can turn the elevating knob
forward should be equal to your battle sight setting.
To set the battle sight zero on the older type sight (with the locking nut) you:
- Set the 300-yard zero in elevation less two click. Lock the rear sight at this point by tightening the locking nut.
- Loosen the screw in the center of the elevating knob and turn the knob until the battle sight index line is opposite the
index line on the receiver.
- Tighten the screw in the center of the elevating knob.
- Check the settings.
|