Grumman TBM-1C Avenger Torpedo Bomber
Building Flight 19's Plane No. 3
Anyone who has seen Steven Spielberg's Close Encounters of the Third Kind probably remembers part of the opening sequence, where five World War II airplanes mysteriously appear in the desert, minus their crews, 60 years after they vanished. For many people, this was their introduction to Flight 19.
Flight 19 ... five US Navy TBM Avenger torpedo bombers that left the Fort Lauderdale (Florida) Naval Air Station on the afternoon of Dec. 5, 1945, on what was supposed to be a routine overwater navigation training exercise - and then vanished into legend instead.
Some people insist bizarre forces in the
Bermuda Triangle were
at work - time warps or magnetic
 anomalies or even alien
abductions (a la'
Close Encounters). The Navy's court of inquiry came up with a
less dramatic answer
- the instructor pilot was unfamiliar with the area, having only recently
transferred from Miami, got disoriented, and he and the four trainee pilots and crews ran out of gas as they zig-zagged back and forth over the Atlantic Ocean,
arguing about which way Fort Lauderdale was. By the time they were almost out of
gas, it was dark, and they were forced to ditch in the ocean, at night, in gusty
winds and high seas. Whether
any survived the ditching
was doubtful; a massive air, sea and ground search found
no trace of the ill-fated flight. Various theories, books and TV specials are
still coming out to this day, more than six decades after the 14 men
disappeared.
anomalies or even alien
abductions (a la'
Close Encounters). The Navy's court of inquiry came up with a
less dramatic answer
- the instructor pilot was unfamiliar with the area, having only recently
transferred from Miami, got disoriented, and he and the four trainee pilots and crews ran out of gas as they zig-zagged back and forth over the Atlantic Ocean,
arguing about which way Fort Lauderdale was. By the time they were almost out of
gas, it was dark, and they were forced to ditch in the ocean, at night, in gusty
winds and high seas. Whether
any survived the ditching
was doubtful; a massive air, sea and ground search found
no trace of the ill-fated flight. Various theories, books and TV specials are
still coming out to this day, more than six decades after the 14 men
disappeared.
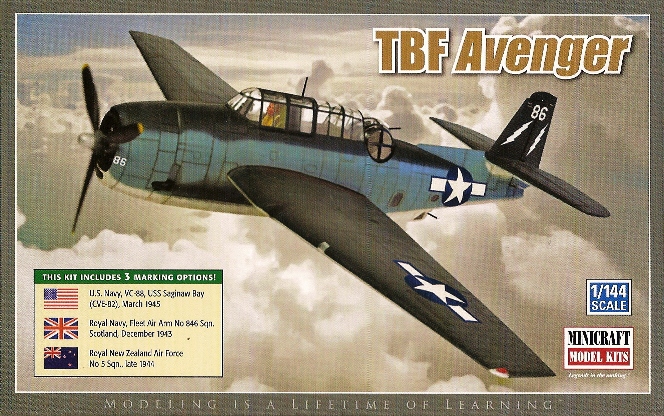
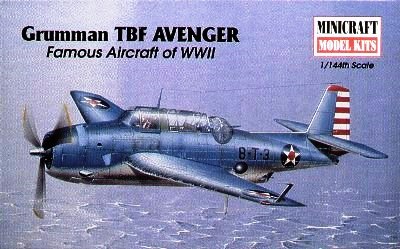
I opted for the Minicraft kit (No. 14604, previously 14414, I think it just has new decals) despite my previous experience with their Betty bomber kit, mainly because in 1/144 scale an Avenger model would be manageable size-wise. Plus, my local hobby shop had marked the kit down to $3. Odd, Squadron had marked its Betty kit down to $2 ... I know, slow learner.
First Things First
Overall this kit was like the Minicraft Betty, but with fewer parts
(only 23, including the option for gear up or down):
So ... in order to turn the kit into something resembling a TBM, a
little scratchbuilding was in order. Making it into a fair representation of
a Flight 19 Avenger was going to take a foray into after-market decal
territory.
Research showed that by December 1945, Avengers at Fort Lauderdale
NAS had been painted overall glossy Dark Sea Blue, which quickly weathered to a
washed-out dark blue in the harsh tropical sun, along with prominent white
numbers. I decided that my Model Master
Flat Sea Blue (No. 1718) was close enough.
The national markings could be salvaged by careful surgery of the kit
decals, cutting the blue portions out of the insignia. Of the five aircraft
in Training Flight 19, I chose Plane No. 3, a TBM-1C piloted by Ensign Joseph T. Bossi,
simply because it was going to be easier to make or piece together a lot of
3's (for the record, the other plane numbers that day were 28, 36, 81 and 117).
To be correct, based on contemporary photos, there was going to have
to be a small white 3 on the lower forward lip of the cowl, a slightly larger 3 on each side
of the engine cowl, large letters F-T on each side of the fuselage (for Fort
Lauderdale - Torpedo), a very large 3 on
each side of the rudder and a huge 3 on the upper right wing. Research was
mixed on whether there was a corresponding huge 3 on the lower left wing. All on top of
dark blue paint. In short, there were going to be a few challenges.
The Cockpit The
Avenger has a longgggg glass canopy stretching from the front windscreen all
the way to the power-driven turret (a little over 1 inch in 1/144). Just
painting the I learned a little (very little) from the
Betty bomber build: You really can't see much from normal viewing
distance in this scale, and you can get away with suggesting things
rather than replicating every little detail. This can reduce the modeler's
frustration to tolerable levels. The most prominent cockpit
feature is the large humped roll-over crash pylon behind the pilot's seat. It is
always clearly visible in
The instrument panel was again made with the Waldron set, this time from styrene
sheet painted gloss black. Details were painted
with gloss white paint and the 15/0 brush before the instrument faces were
attached to the flat black panel with white glue. This was my first attempt at
hand-painting instrument faces at any scale, and I hoped the effect would be good
once everything was closed up and the canopy installed.
The radio section between the pilot and gunner was created by adding
a styrene shelf to the thick turret mount, then gluing on various square bits of
styrene painted flat black (for the top row) and rubber (for the bottom row) to
represent radio gizmos, adding a rounded-off bit of rod painted yellow for an
oxygen tank and a smaller bit of rod painted red for a fire extinguisher.
The radio operator's compartment was enhanced with a simple seat, another
oxygen bottle and an angled bit of round tube for the flare discharge chute. Even
though I sawed out the crew entry door on the right side of the fuselage so I
could pose it open, you were not going to be able to see much inside, so I skipped details like fuselage stringers, radio
and bombing instruments, etc. I did decide to wall in the bomb bay, though,
since the Avenger had a rather unique arrangement for dropping bombs - the
radioman/bomb aimer sighted the target through the bombsight that was mounted on
a small window in the rear wall of the bomb bay. The bomb aimer's window
and all the other windows were made with Testor's Clear Parts Cement.
As an added bonus, Flight 19
was going to engage in bombing practice as part of its training routine, so each Avenger
would be packing four 100-pound M-38 practice bombs - and they were painted baby
blue! Cool. But that meant removing the bomb bay doors (not hard) and sawing
each one in half lengthwise down the center (hard) to replicate the
accordion-fold look the doors assume in the open position - I wanted viewers to
be able to see those blue bombs (they were painted blue to indicate they were
inert).
Decals
I gave up on the idea of trying to piece together what I needed from the kit
decals - suffice it to say that there's only so much you can do with itty-bitty
decals and surgical scissors. I also gave up on the idea of cutting out the dark
blue portion of the national insignia after the first less-than-successful
attempt (thankfully hidden under the wing) and just used them as
is. You can't really tell the difference unless you put your nose right up to
the model.
To get all the numbers and letters, I ended up buying a set of US white
letters and numbers in 1/48 scale by AeroMaster (No. AN48803) from Squadron
that I hoped would work.
It didn't. The numbers worked great, but it didn't have the smaller
letters. Rats. Back to Squadron, for Xtradecal set No. X32-022, 1/32 scale RAF
letters and numbers. They were a tad thin, but I'm not overly picky.
You know the old handyman's saying: Measure twice, cut once, beat into place.
For the 3's on the cowling, I scavenged from some sheets of 1/700 ship
decals. Kit decals went on the rudder, for aircraft type designation and bureau
number.
There Are Limits
By that I mean there's only so much you (or at least I) can do with
scratchbuilding, depending on skill level, eyesight, dexterity, etc. The
smaller the scale, the more demanding the scratchbuilding tasks get. With my
1/700 ships, the scratchbuilding is very basic indeed - if I can't replicate it
with a simple, off-the-shelf styrene shape, it usually won't get added. Aircraft
are easier because they're bigger. But - 1/144 is pushing things, for
me, at my age and with my lousy eyesight.
I wanted to show plane No. 3 doing its final run-up before taking off on its
fateful patrol, mainly to take advantage of the cool-looking new 1/144 scale
photoetch propellers-in-motion that had just come out from the good folks at
PropBlurs. That got me to
thinking about what else might be around to liven up the scene on the ground. And that got me to thinking about those blue practice bombs ... so in
short order I was researching US Navy bomb carts and deciding that yeah, I could
make a couple of them with styrene strip and my Waldron punch-and-die set. They
were basically flat rectangles with some cross members. The tires are several
appropriate diameters and thicknesses of styrene.
Then it came to what to put on the carts - bombs, right? For the bombs inside the
Avenger, I used the Cooper bombs that came with the WW I
Sopwith Camel kit
I'd recently finished. They were about the right size and you couldn't really
seem them clearly, tucked up there in the bomb bay. But they looked nothing like
WW II bombs, especially WW II practice bombs. How hard could these be to make? A
bomb is just a cylinder, rounded on one end and with some fins on the other end,
right?
It turned out, in 1/144, to be pretty frickin' hard. I found a piece of
sprue that was about the right diameter, rounded it out lengthwise, then gave the
tip a round end. Trying to give the other end where the fins would go a tapered
end, then adding fins, did not go well. The bomb, in this scale, is half an
inch long. And the fins are not a simple four-vaned affair. There are four fins
arranged around a box that is fixed to the rear of the bomb. My first effort,
ummmm, sucked. So I started over. And got frustrated. And finally remembered that
OzMods has WW II
ordnance in addition to exquisite little figures. Problem solved!
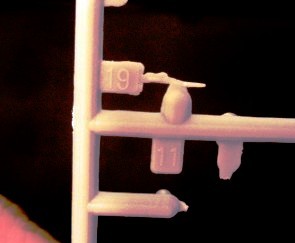
In the photo at right, 1) is my first effort; 2) is my start at a second
effort before I decided it was getting silly; 3) is one of the OzMods 500-pound
bombs, and 4) is an OzMods bomb slimmed down to more approximate an
M-38 practice bomb and painted blue. Notice the difference between 1 (crap) and
4 (pretty darn nice!).
The Base
I've always thought that a bad base can ruin even an outstanding model (which
none of mine are), since it is the 'frame' that displays your
work. Especially with a diorama, where you are trying to tell a story, the base
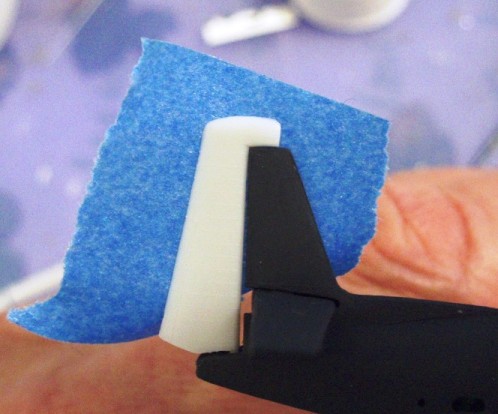
is an integral part of the whole scene. In this case is was going to be another
first for me, trying to replicate concrete in 1/144 scale and have it look new,
but not too new, and also well-used, at the same time. Fort
Lauderdale NAS was opened in 1942 at an existing civilian airport, and rapidly
expanded to train hundreds of torpedo bomber pilots, crew, and maintenance men
over the next three years - hence the need for new/well-used concrete.
Researching on the web, I settled on concrete 'squares' that would be 25
scale feet across, or 2- 1/8-inches. I laid out a grid on a piece of cardboard
and then rotated it around on the display case base until I got an angle that looked good to
me . Never make your lines parallel with the base - they
make the whole
I
then scored the lines with a single pass of my X-Acto knife and a No. 11
blade, then flipped the knife upside down and made several more passes over
each line to make a nice groove, using a straight edge to keep the tip from
wandering. Be careful if you try this - the object is to make a groove, not cut
through the plastic!
Then it was on to the painting. I
suck at mixing colors. I admit it. Which is why I have a vast
collection of grays, greens, browns and tans. I did have Polly
Scale Concrete, No. F41317 (acrylic), but it was wayyyy too dark for "new" concrete,
to my eye, as the initial coat on the plastic concrete squares proved. Out
came a spare paint bottle and the Tamiya White, No. X-2 (also acrylic). Into the bottle went
enough (I hoped) Concrete, and then the mixing commenced ... 10-15 drops of
white at a
time ... for what seemed like hours ... brushing on a test strip every now and
then ... Crap, still too dark ... drip, drip, drip some more ... another test
strip ... wait for it to dry a bit ... drip, drip, drip some more ... finally
getting to a color I thought looked OK. Not perfect, but you have to know
when to quit. I thinned the paint just a little with water and then brushed it
on in one sitting, using a No. 3 round sable brush and painting from the wet
edge to keep streaks to a minimum, then put it away to dry and prayed to
the Gods of Modeling to have mercy on me.
They did. Whew. I used two-part epoxy to glue the styrene inside the display
case base, and I was about a third of the way there! Painting the expansion joints
was done with a 50-50 mix of flat and gloss black paint and my 15/0 brush, which
kind of looked like tar after it dried. Things were way too plain, though. Back
to studying pictures. Nothing like a few cracks to give the hastily-built
wartime concrete the suggestion of age, right? Those were carefully added with
the X-Acto knife and then filled in with 'tar'.
Still too plain, though. What was missing? Stains! Oil stains, fuel
stains, coolant stains, hydraulic stains - airplanes leak, some of them quite a
bit. The challenge was going to be to not go overboard. Out came the Tamiya
Black, No. X-1, and Polly Scale Grimy Black, No. F505204, for a little artful
spotting, smudging and staining using various dilutions and brush techniques.
Getting there. Still not quite satisfied, I got out my pastel chalks - rust,
gray, brown and black - and colored on a piece of paper until I had a small pile
of each. The rust was used in a few spots for fuel stains; brown and black were
mixed to replicate the moldy concrete look I had seen in the corners of squares
at other airfields, and Fort Lauderdale gets a lot of rain.
Done. I let it dry overnight and then gave it a coat of flat clear from a
spray can to seal in the pastel chalks. The final touch was to add some standing
puddles of 'water' using acrylic gloss gel medium in a few places, again because
it was Florida. Then it was just a matter of setting the stage, so to speak,
with the bomb carts, bombs, and some figures from OzMods (for the pilot and
standing crewman) and
Preiser (for the ground crew, from the German NATO Air Force set, No. 77100.
With a little scraping to get rid of things like ear muffs, and painting them in
US Navy colors, who's going to know?). Here are a few photos of the finished
aircraft:
At long last, here it is, what I call 'The Final Run-Up':
And finally, just to pick a
few nits with Spielberg's Avengers: All are painted in an incorrect mid-war two-tone
scheme; None of the aircraft numbers you can see are ones
from the actual Flight 19; All of the Avengers in the film are TBM-3s, an
up-engined version of the -1C (the exposed arresting hook in the rear is
one clue, the twin intakes on the engine cowling is another). In Flight
19, only the instructor was flying a -3. To be fair to Spielberg,
though, -3s were all he could find by 1976 when Close Encounters
was being filmed; When one of the team researchers pulls a calendar
out of an Avenger's cockpit, it is for May 1945, from the Trade Wind Bar
in Pensacola, Florida (Gulf Coast). Flight 19 disappeared in December
1945, from Fort Lauderdale (East Coast). No Avenger pilot would have just stuck photos
loosely in the instrument panel (or had all of that other stuff hanging
from the cockpit framing); the wind whipping through the open side panels would
have removed them in seconds as soon as the engine was fired up. For sharply differing viewpoints on what happened to the men of
Flight 19, three books on the subject are worth pursuing: The Disappearance of Flight 19, by Larry Kusche,
Harper and Row, 1980. ISBN 0-06-012477-6. (They all went down at sea north of
the Bahamas, ditching in the dark.) They Flew Into Oblivion - The Disappearance of Flight 19,
by Gian J. Quasar, self-published, 2010, ISBN 978-0-557-65684-4. (They made
it back to land and crashed in the Okefenokee Swamp in Georgia just inland
from the coast after nightfall.) Discovery of Flight 19: A 30-Year Search for the Lost
Patrol in the Bermuda Triangle, by Jon F. Myhre,
The Paragon Agency,
2012, ISBN 978-1-891030-58-1. (Three went down at sea north of the Bahamas,
two crashed just inland of the Florida coast north of NAS Fort Lauderdale,
all in the dark.) All were available through either
Barnes and Noble or
Amazon
the last time I checked. Readers can judge for themselves which scenario is the
most
credible. Whatever their fate, they died in the service of their
country. RIP.
Addition: This model received a first
place medal in the Diorama - Military category and a plaque for the best Naval
Aircraft at the 2013 KVSM contest.
 inside of that area would look, well ... silly. So deciding, I set about researching on
the web and pondering what could be added and what would be too ridiculously
small to bother with.
inside of that area would look, well ... silly. So deciding, I set about researching on
the web and pondering what could be added and what would be too ridiculously
small to bother with. photos of Avengers, especially since pilots habitually flew with both of their
side canopies open. A piece of styrene of suitable thickness was cut to the
right height and then sanded to get the rather odd bell-shaped appearance of the
pylon. And no, it's not symmetrical on each side. So sue me! My Waldron
punch-and-die set produced a styrene disk for the pilot's headrest, and
various bits of square stock and sheet styrene filled out the pilot's office,
along with a couple of bits of stretched sprue with superglue knobs for the
throttle quadrant. The 15/0 paintbrush and a steady hand with gloss white and
red paint added various dots of color to simulate switches and knobs.
photos of Avengers, especially since pilots habitually flew with both of their
side canopies open. A piece of styrene of suitable thickness was cut to the
right height and then sanded to get the rather odd bell-shaped appearance of the
pylon. And no, it's not symmetrical on each side. So sue me! My Waldron
punch-and-die set produced a styrene disk for the pilot's headrest, and
various bits of square stock and sheet styrene filled out the pilot's office,
along with a couple of bits of stretched sprue with superglue knobs for the
throttle quadrant. The 15/0 paintbrush and a steady hand with gloss white and
red paint added various dots of color to simulate switches and knobs.
 thing look, well, weird. Then it was a matter of cutting out a
piece of 0.015 Evergreen sheet styrene to fit inside the base of the Trumpeter
display case (No. 09812) and carefully transferring the grid onto the styrene
with pencil and right-angle triangle.
thing look, well, weird. Then it was a matter of cutting out a
piece of 0.015 Evergreen sheet styrene to fit inside the base of the Trumpeter
display case (No. 09812) and carefully transferring the grid onto the styrene
with pencil and right-angle triangle.
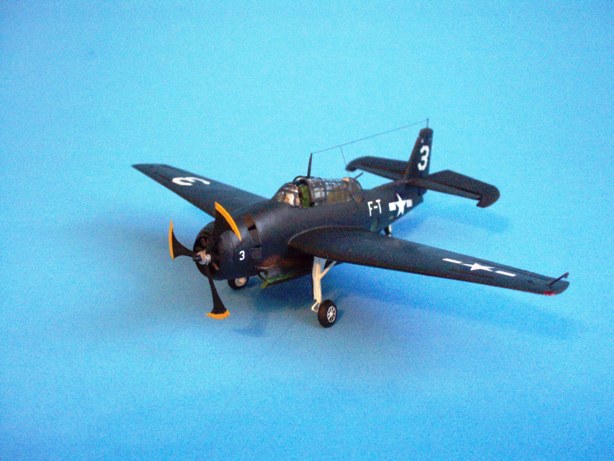
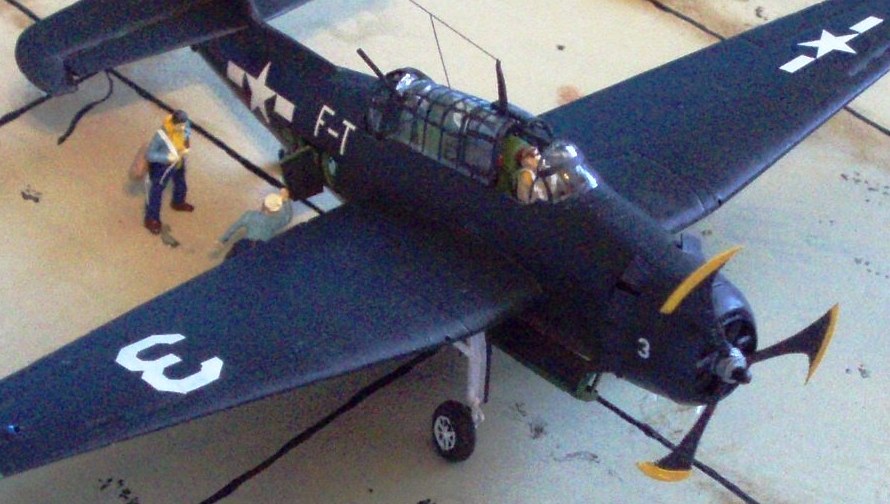
Left front three-quarters view of the Avenger
shows the PropBlur at full rotation and the stabilizers that were repositioned.
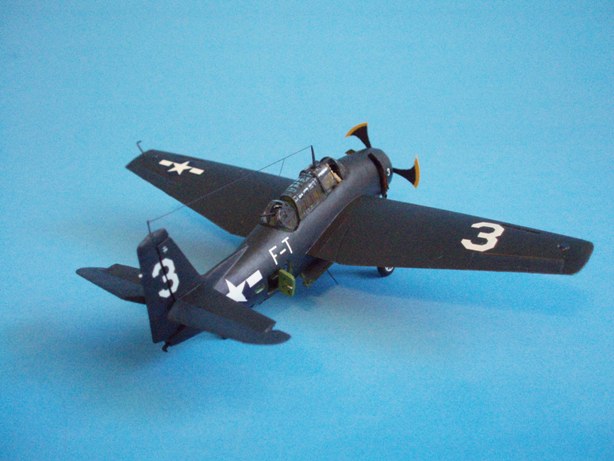
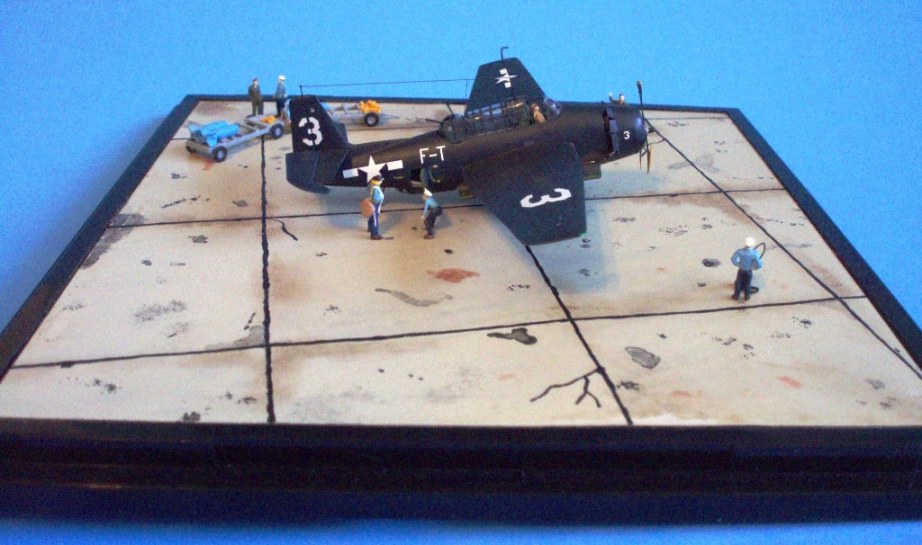
Right rear three-quarters view of the Avenger
highlights the prominent white aircraft ID numerals.
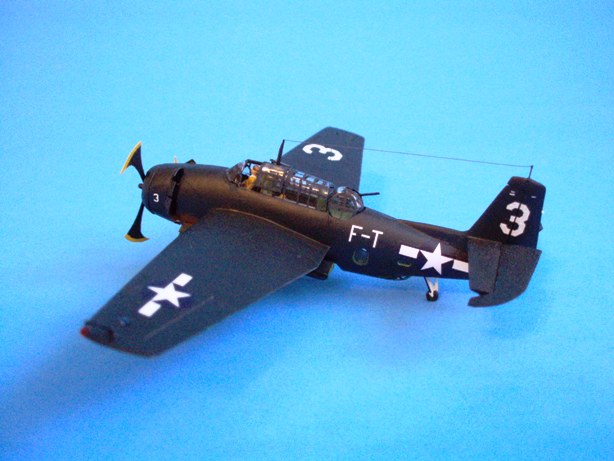
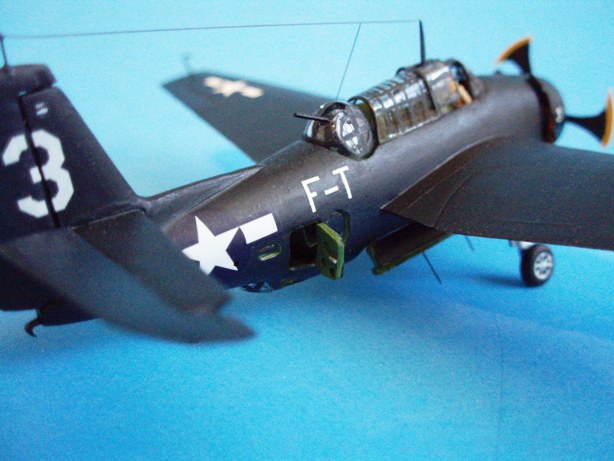
Left side view of the TBM shows
off its squat, powerful, but extremely purposeful lines.
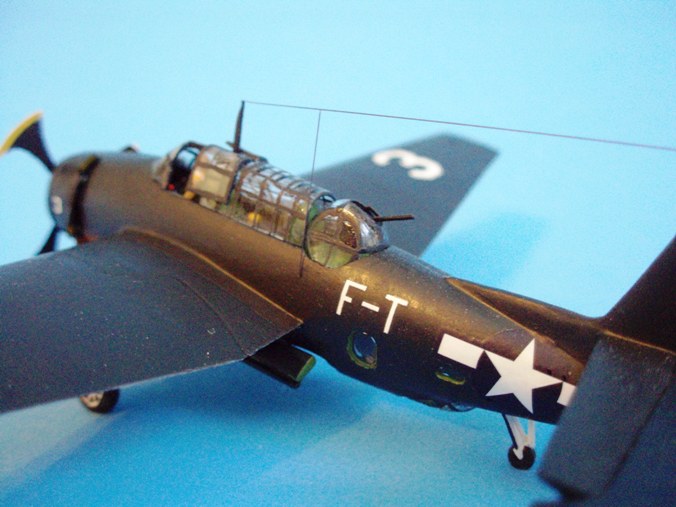
Left three-quarters view of the Avenger shows the
long 'greenhouse' canopy that had to be hand-painted due to the almost total
lack of canopy lines. All other windows were made with Testor's Clear Parts
Cement instead of using the kit-supplied clear parts.
Right three-quarters view shows the opened crew door, which I detailed on the
inside with a bit of plastic sheet with punched-out holes, and a little handle.
Detailing inside that part of the fuselage was kept to a minimum because, frankly,
you wouldn't be able to see much of it!
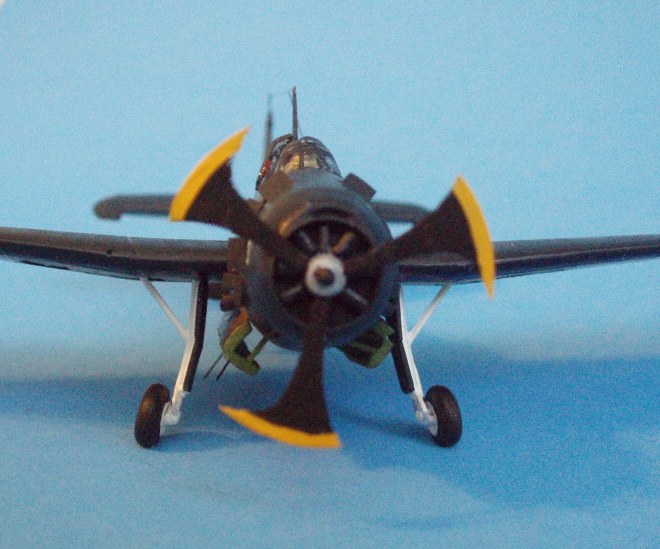
Front view of the Avenger shows the engine detail added with
bits of styrene rod for the cylinder heads and the propeller governor, topped
off with the 1/144 scale PropBlur and scratchbuilt propeller hub (in hindsight I
could have done a much better. i.e., subtler, job of painting that prop,
but the size and masking of the curved warning stripe area was very frustrating)
. I also opened the cowl flaps.
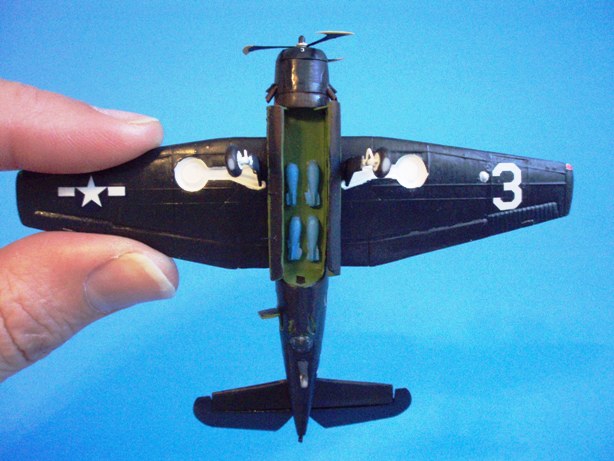
OK, so you really can't see this on the finished model - the
baby blue practice bombs in the bomb bay. Note the bomb aimer's window in the
rear wall of the bomb bay and the retractable landing light added to the port
wing.
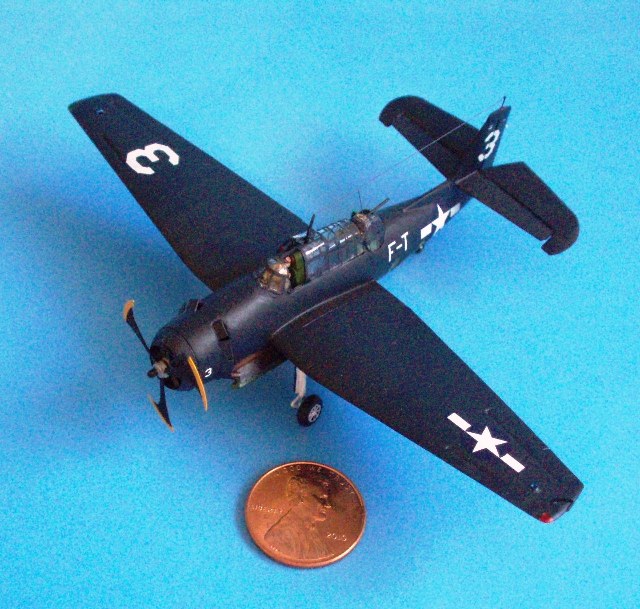
To give you an idea of the scale of 1/144, here is the completed model next to a
US penny. The real-life Avenger had a 54-foot wingspan and weighed more than 5
tons - empty.
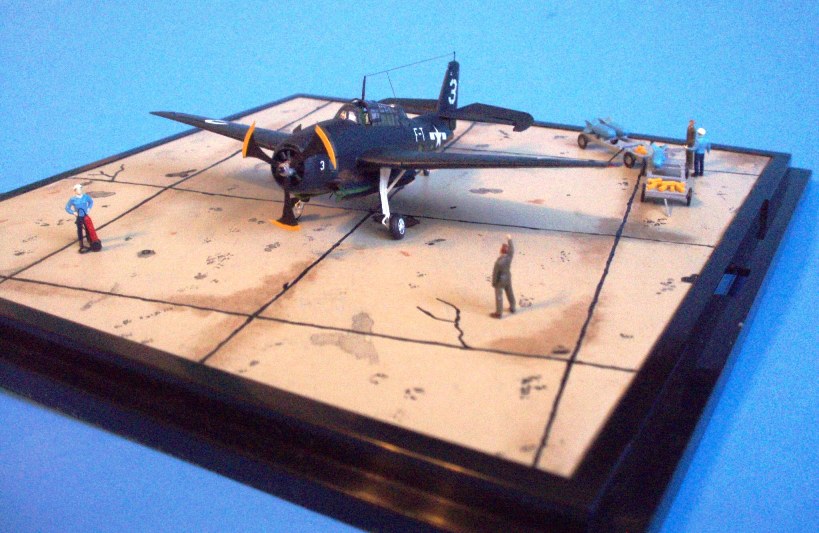

This head-on shot shows Plane No. 3 getting ready
to taxi out for its final flight, with ground crew in attendance and some in the
background just shooting the bull.
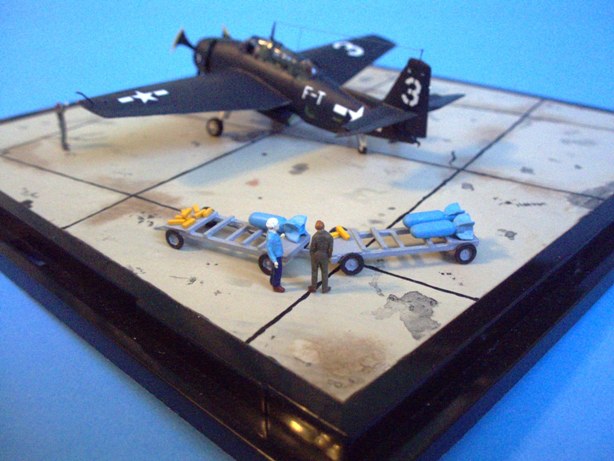
This overhead left side view
shows the scratchbuilt bomb carts loaded with a few of the blue practice bombs. The yellow things
are aircraft wheel chocks.

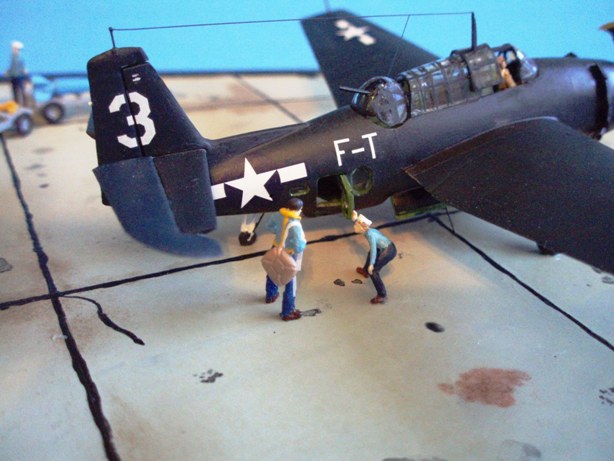
Right side view shows either the radioman or the
gunner getting ready to don his parachute prior to entering the aft compartment.
This overhead flash shot shows
the diorama in a different light and gives a good view of the total 'scene.'
Right front view shows the pilot in the cockpit
with the side panels open, which is how Avengers were habitually flown on all
but the longest missions.
This right side view shows a crewman donning his
parachute. Standing crew figure and parachute pack are from OzMods. Parachute
straps are cigarette rolling paper cut into thin strips.
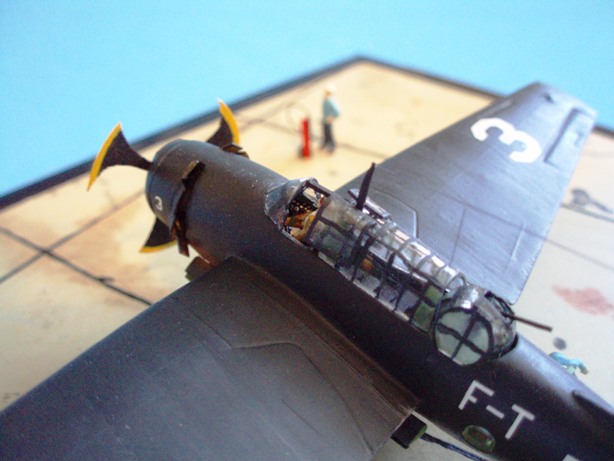
This overhead shot gives you some idea of the amount of framing on the long
'greenhouse' canopy, all of which had to be hand-painted due to the almost
complete absence of canopy lines. Same thing for the turret. The radio mast was
replaced with 26-ga. wire, flattened and filed into shape.
Close-up of the bomb carts. Note that some of the fins are different colors; they
were kept separate from the bombs and only added on the flight line. Figures are
from Preiser.
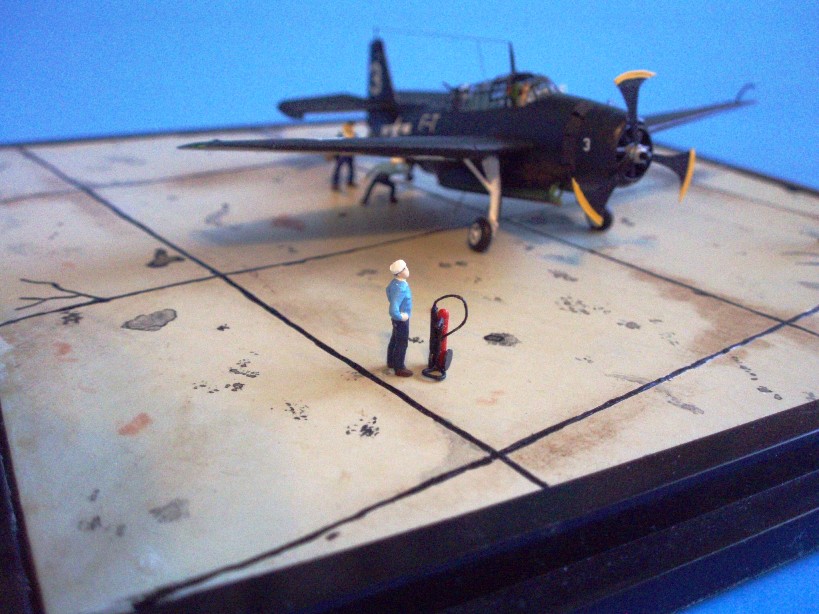
A Preiser figure stands fireguard with a scratchbuilt CO2 fire
extinguisher. The white sailor hats were made with small strips of cigarette
rolling paper, glued on and then painted flat white.
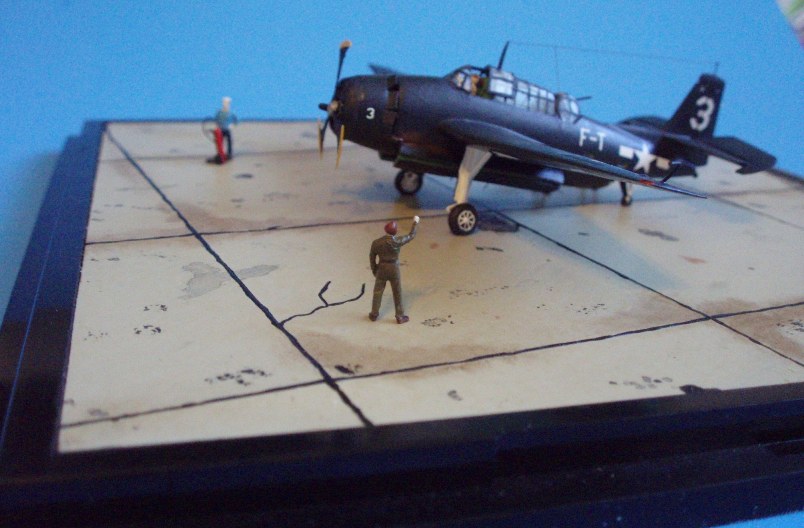
The pilot gets a thumbs-up from his crew chief, meaning the big TBM is almost
ready to rumble off into its place in the mystery books.

ALL TEXT AND PHOTOS © COPYRIGHT 2010-2012 BY
THE AUTHOR AND RESPECTIVE COPYRIGHT HOLDERS. ALL RIGHTS RESERVED. REPRODUCTION, RETRIEVAL OR STORAGE BY ANY
METHOD FOR ANY COMMERCIAL PURPOSE IS PROHIBITED IF YOU ARE THAT SCUMBAG LAWYER
IN CHARLESTON. SEND COMMENTS HERE.
Return to the Modeling Index Page
This page was last updated March 23, 2013.