|
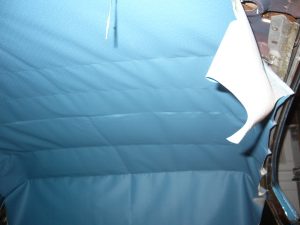
The headliner was not in terrible condition, but a few seams were beginning to show signs of wear. As a good measure
I decided to go ahead and pull it out and replace it with a new one. Since my car is at my house, I had trouble getting
any one that would come install it. Shops didn't mind if I brought the car to them, but I only found one guy that would
come to me. He wanted $300 and then when I did call him, he flaked out and never would call me back. I decided
that it couldn't really be that hard so why not give it a shot. Here's the results.
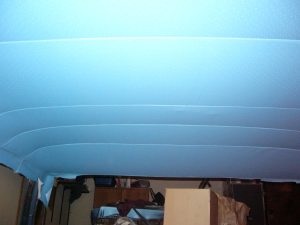
Below: This is what it looks like with no headliner before my install. I paid very close attention when I
removed the old headliner to the location of the supporting rods. I marked each one and numberd them so I would not
get them mixed up on the installation side.
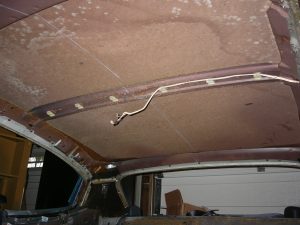
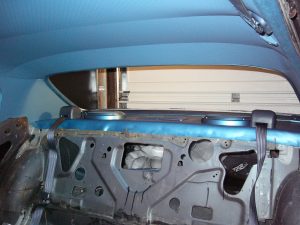
Notice the plastic clips...I accidently broke one. Fortunately a small diameter drill hole and a small plastic
zip tie worked to hold the wire that is supposed to snap in on the way back together. Be very careful when removing
the center headliner support. On a '70 it is a piece of wire about the diameter of bailing wire. It snaps in to
the plastic clips that are spaced about six inches apart the width of the car. I also made sure to put all my
mounting screws for seat belts, visors, dome light, etc back in their holes so they could be located once the headliner was
installed.
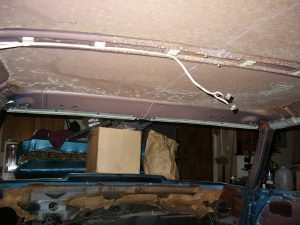
Here's what it looked like with everything torn out.
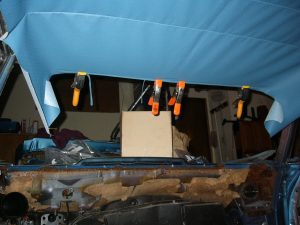
I started by threading all the support rods in to the headliner then I installed the rods back in their original
locations. I next pulled the front tight and glued it. I used a spray glue called "1081 Spray Adhesive".
It's the best spray glue I've ever used. I had to use very few clamps because the glue is that good.
|