 a military force.
Building the U.S.S. Lenawee, APA-195
I've always had a soft spot for the
auxiliaries - the ships that tote the troops and haul the food, fuel,
weapons, ammunition and thousands of other bits that make
up a military force.
The U.S.S. Lenawee was one such ship. Hurriedly
built during World War II, she was expected to last for one
or
 maybe two invasions, because the APAs, the attack transports,
were meant to discharge their soldiers directly onto hostile shores. The Lenawee did last,
though -
through WWII, Korea and Vietnam.
Finally sent to the breaker's yard in
1975, she was sold for $129,089.78 after more than
three decades of service.
Based on the wartime Victory ship hull, Haskell-class attack transports were designed to transport up to 1,500 troops plus all their equipment and supplies, and carried 26 landing craft to deliver the goods. After VJ-Day, most were promptly mothballed and left to quietly rot away. Loose Cannon Productions has a nice 1/700 scale resin and photoetch kit of the Haskell class, and after I opened the box and perused the instructions, I was seized with the desire to:
Painting and Some Detailing
I decided early on that I wasn't going to get
out the dividers to precisely duplicate the camouflage scheme
- which thankfully
involved nothing more than straight lines. The
instructions seemed to match reference photos, and
that was good enough.
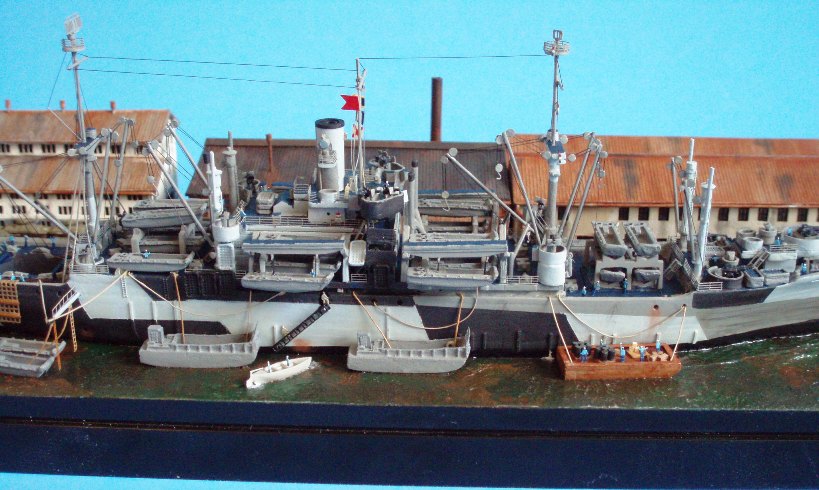
Then came the decision about which of my 9-bazillion shades of gray to use. Research on the excellent Ship Camouflage website killed that idea. Measure 32 calls for two - Light Gray 5-L and Ocean Gray 5-O, along with Dull Black. The 1942 Ocean Gray was a plain old gray, which I had several close matches too, but by early 1943 it had been reformulated to a bluer (maybe even purple?) hue, and the 1943 Light Gray had a definite purple tint, to my eye.
Rats. Wanting to get in the ballpark but unwilling
to buy all new paints, I compromised.
Model Master Navy Aggressor Gray, No. 1794, would do for Ocean Gray, and
I could also use that as the base coat for the entire model. That purplish
light gray, though ... I bit the bullet and ordered Light Gray 5-L, No.
US13, from White
Ensign Models in England. Their Colourcoat series of enamels, while
pricey with the current lousy exchange rate, are precisely
matched to actual
paint chips from the time period, and brush on like a dream.
The Dull Black would mark my first use of Polly
Scale's acrylic Grimy Black, No. 505204 (bought for another purpose, painting
aircraft tires). I belatedly noticed that Measure
32 also requires 'decks and all horizontal surfaces' be painted Deck Blue 20-B.
Again a compromise, using Testors Dark Sea Blue, No. 1172, and
hoping everything would look OK once the final flat clear coat went on. The boot
topping stripe and some of the life rafts would be painted Tamiya acrylic flat black,
No. XF-1, to break things up a little. It was only after I (more or less)
followed the diagram on the instructions that I
discovered it was wrong. The scheme is symmetrical to
both sides, not
different on the port side as the instructions showed. Oh well, chalk that up to
(let's all chant this together) not
enough research!
To simplify things, I painted all the cargo booms Aggressor Gray rather than trying to extend the Light Gray pattern onto some of them. And virtually all of the railings are Aggressor Gray (courtesy of a previous build).
The Loose Cannon hull casting is quite good, it even has some faint plating lines molded on, but you know me, always looking for ways to lengthen the building process! Out came the pin vice and assorted drill bits to open up the anchor hawse holes and various other scuppers and hawse holes along the deck level from the bows on back. There are not many on the Haskell APAs but studying the plans I found on the internet and various photos enabled me to pinpoint their locations. It's these little details that really help give some life to a model, at least to my eye. Plus, that would give all the mooring lines I was planning to add someplace to go once I got to that stage of the diorama.
I used the pin vice with an appropriate bit to basically
ream out the longer oval-shaped holes. Up closed they aren't always perfectly
even, but they look fine at a normal viewing distance.
There
was also the matter of the No. 4 hold aft. I wanted to open it up so I could
show it being loaded. I had done that with my
Kimikawa Maru build, but that was
a plastic kit ... Dave Angelo at Loose Cannon reassured me and out came the
big electric house drill and some larger bits to - slowly! - take away most of the resin.
I put a block of wood under the hull and just drilled straight through, planning to floor it with a thin sheet of styrene after I had the hold all squared up. Then it was a matter of filing and sanding so I had a square hole going straight down from top to bottom. Is this exactly how the hold looks? Well, no. There is another deck, but that would have involved a lot of extra filing and scraping and sweating and probably completely screwing up the hull casting, so ... no. By painting the interior dark gray, I hoped no one would really notice.
The Dockyard and Other Boats
At a tedious point in the assembly process (rigging the cargo booms), I switched to the dockyard, playing around with cardboard templates of the ship, boats and buildings to decide how I wanted everything arranged on the display base. Which naturally involved sawing off one end of the dock section, then having to replicate the pilings with styrene strip on the other end. And finding suitably-colored paint; I settled on Polly Scale acrylic Concrete and Old Concrete (No's. 414317 and 505210) for a weathered appearance. Some liberally-applied powdered pastels in black, brown and rust shades enhanced the decrepit look.
The Loose Cannon buildings went together easily.
I'm sure the process would have been easier still if I hadn't sliced
them down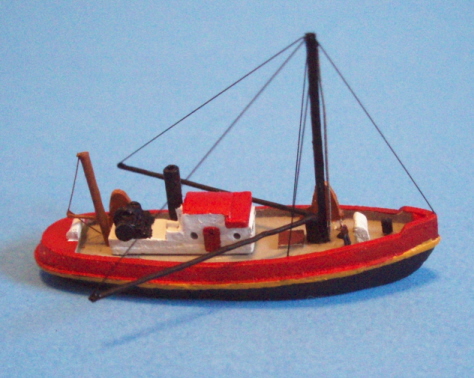 the middle so they'd fit on the dock the way I wanted. I used a T-square to make sure the corners dried at right angles
after gluing. The laser-cut detail on the stick-on paper overlays was
great for giving each building a distinctive look, and I really went to town
with the Rust-All weathering system on some of the 'sheet metal' roofs.
Weathered plastic rod and bent wire 'gutters and downspouts' gave the buildings
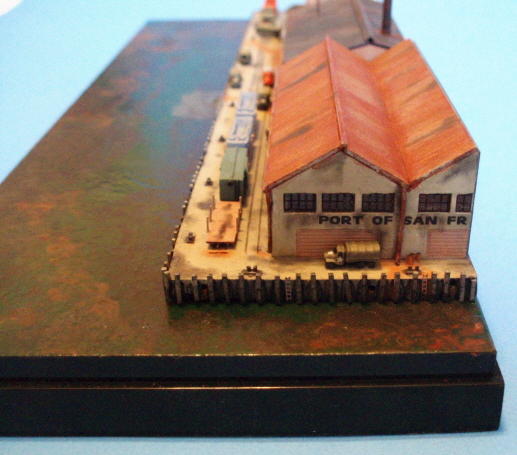
a more detailed look, and a homemade 'PORT OF SAN FR'ancisco decal across the
end warehouses helped clue viewers as to the location. I prefer the Loose Cannon
buildings because 1) You can slice and dice them a lot
easier than the solid resin or photoetch dockyard buildings, and 2) The paper overlays
take paint and weathering powders extremely well.
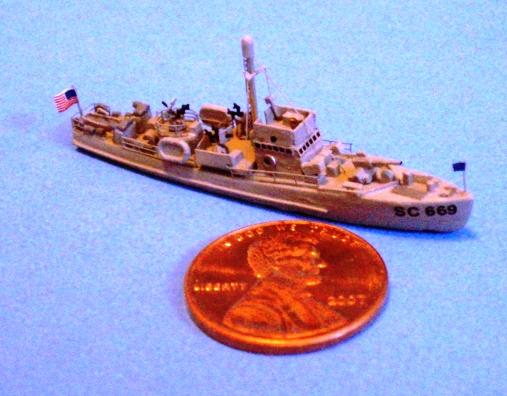
While doing that I, ummmm, got distracted building the smaller boats. Hugh at Loose Cannon had thrown in a fishing trawler as a freebie with the Haskell kit. From Loose Cannon's small combatants kit (No. 75) came a 110-foot sub chaser.
I had a lot of fun
with the trawler, playing around with the colors before settling on a
black lower hull, red upper hull, yellow rubrail
 and white upperworks with a red
roof. Yeow! Plastic rod and wire were used for the masts and net booms, with
stretched sprue to rig everything and a bit of very special tan nylon stocking for the
fishing nets. A couple of photoetch watertight doors and a bit of ladder for the front windows, along with a crewman waving to the Lenawee, finished
things off.
The sub chaser was a single beautifully-detailed casting. All I had to do was clean it up, add the photoetch 20-mm cannons, some railing and a few scratchbuilt bits (a radar dome and photoetch ladder to the mast, along with some rope signal halyards [paintbrush bristles colored with a light brown Sharpie marker]), a few other bits and it was done. The absolute smallest American flag and jack decals from Gold Medal Models flag decals (No. 700-1D) gave SC-669 the required naval look. I picked the hull number at semi-random, mainly because I could make those letters and numbers from White Ensign Models modern Royal Navy aircraft decal sheet (No. D 3502) and I found a photo of SC-669 with black hull letters instead of the more common white ones; I have no idea if SC-669 actually served on the West Coast.
Getting the water a dirty/yucky greenish-brown color involved a lot of fussing and fuming with different shades of watercolor paint, after giving the base an undercoat of Model Master spray can Light Earth No. 1954. I wanted the water to look gross because that's how I remember it from my time living near a major port. Watercolors seemed like they might be easier to blend in a multitude of subtle shades ... and maybe they would be to someone who knew what they were doing. After numerous do-overs, I finally had to call it a day and coat it with semi-gloss clear so it wouldn't smear later. The acrylic gloss gel for the water was added after each vessel was glued to the base, so I could build it up around each one and make it look like they were in the water as opposed to sitting awkwardly on top of it.
Dockyard Details
It's easy to lose track of time when you're doing a multi-part project ... and don't ask me how I know that (Where did I leave the tweezers? Oh, look, a butterfly!). Once the buildings were glued down it was time to inject some life into the scene with photoetch figures and bits of this and that. Most of the figures were painted to resemble US Navy enlisted men (with a few officers standing around doing nothing, as usual), but I did include two civilian painters in white overalls for interest. Then it was just a matter of filling in the scene with, among other things:
The above came from the old Skywave 'Vehicles on Beachhead' set, No. SW-400, which includes the tiny white star decals. The rest of the bits were from the spares box or scratchbuilt:
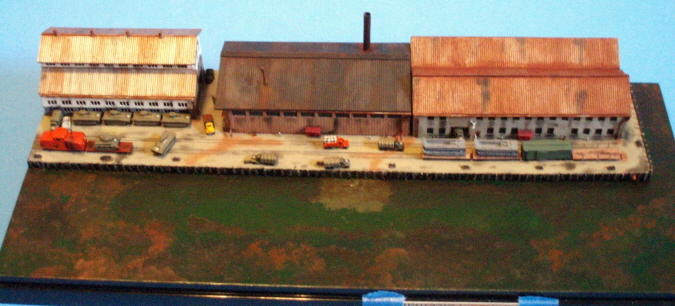
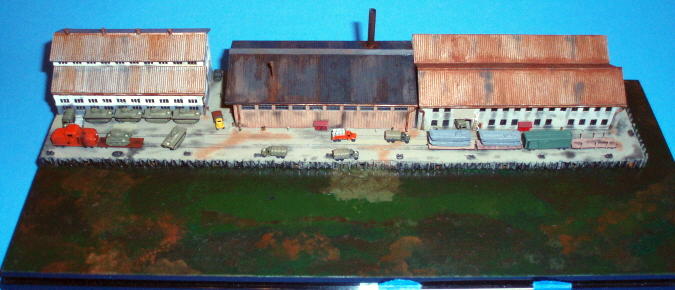
Here are a few photos of the dockyard before I started gluing the figures on:
 |
 |
|
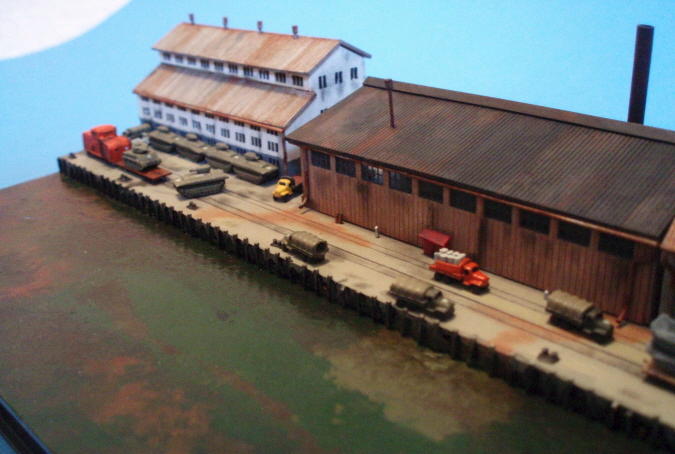
| Overall view of the finished dockyard diorama base, taken without flash. Ignore that light green patch, it's filling in a huge divot in the base. |
Overall view of the finished dockyard diorama base taken with a flash. Different lighting brings out different details. | |
 |
 |
|
| Close-up of the dock area, showing the various trucks and other vehicles, before I started adding the dozens of figures and little tiny bits of "stuff." | Close-up of the end of the base, showing the PORT OF SAN FRancisco decal that gives viewers a location reference. |
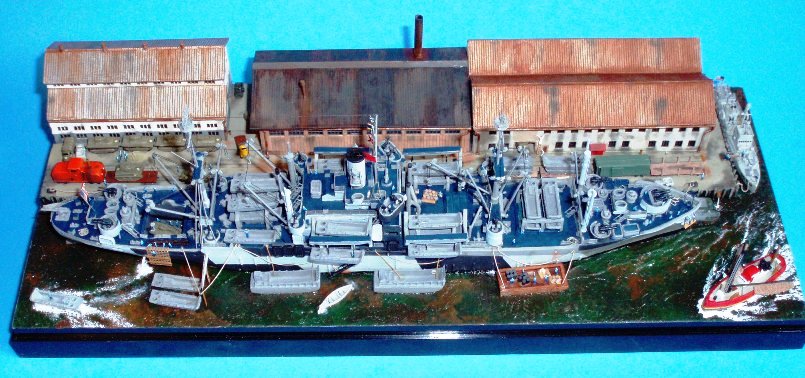
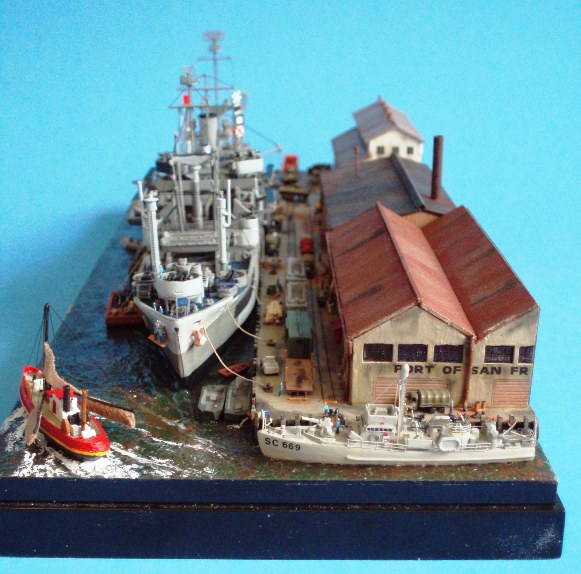
Trying to strike a balance between 'too busy' and 'cluttered enough' for the dockyard was a challenge that saw me toying with pallets of various sized boxes and barrels, dunnage (lumber to us landlubbers) and groupings of photoetch sailors. Photos of wartime dockyards showed an incredible profusion of crates, drums, boxes, barrels, bins, reels, boxcars and just about anything else you could imagine. Since the Lenawee was picking up landing craft, I chose to show some still on railcars waiting their turn to be hoisted aboard. I did not include a dockyard crane in the scene to load the landing craft because I *mumbles* blew my budget buying all the buildings I wanted and didn't want to scratchbuild that too. Here is how things finally came together. Remember that the base measures just 9 1/2 by 4 inches, a very compact space:
 |
 |
|
| Overall flash shot of the finished diorama, from the 'front' of the scene and slightly above it. | A non-flash closer shot of the overall scene, showing a profusion of small craft, some of which belong to the Lenawee and which had to be offloaded so the LVTs could be brought on board. | |
 |
 |
|
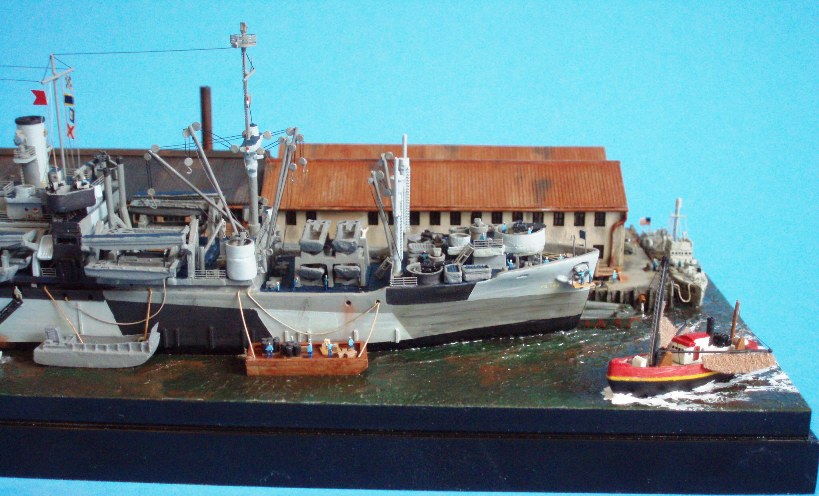
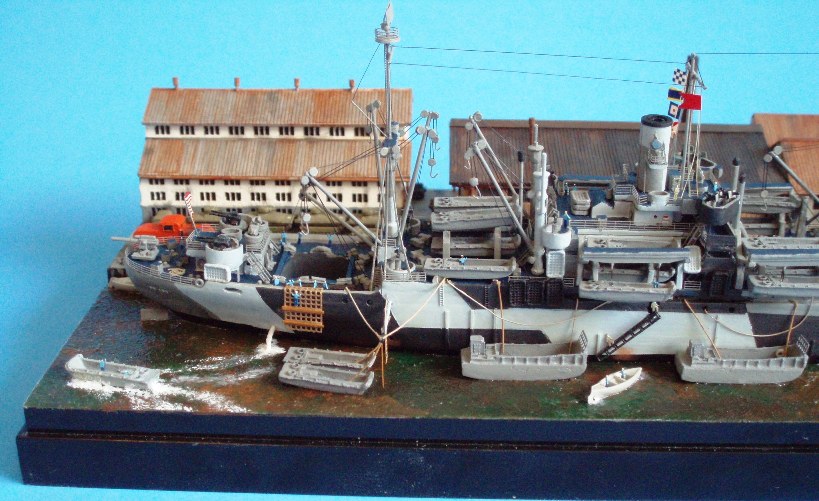
View of the bow, with the fishing trawler passing by, a work barge tied up to the Lenawee and lots of activity going on. |
Center section of the ship, showing the two Landing Craft Medium, normally stowed over the No. 4 hatch, here moored next to the ship so the LVTs can be swung aboard. | |
 |
 |
|
Aft end of the Lenawee, with some sailors working on a debarkation net. The two LCVPs tied to the boat boom normally nest on top of the LCMs on the No. 4 hatch. |
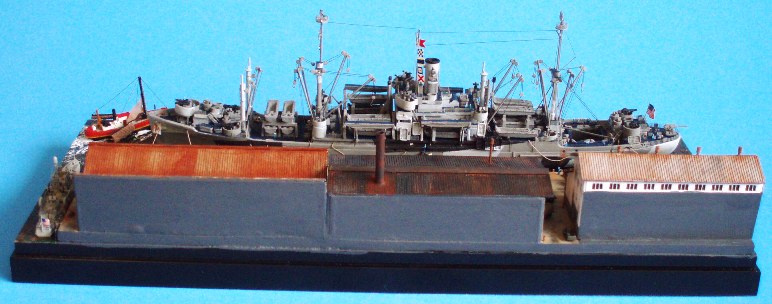
An overall view of the 'back' of the diorama. I don't think it looks weird to have the buildings painted a dark gray, especially since it's my model! | |
 |
 |
|
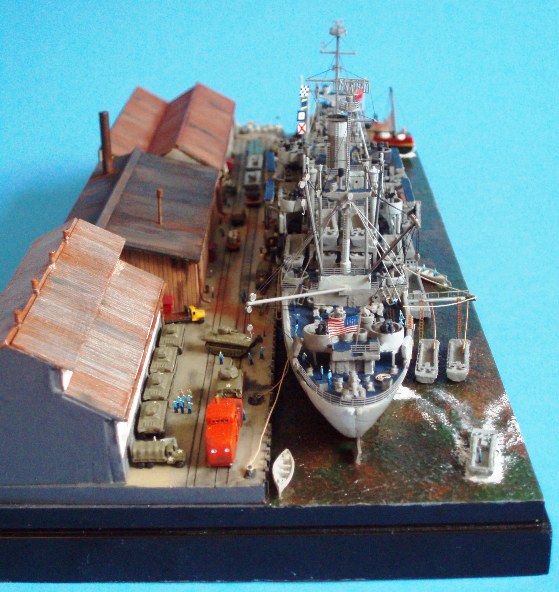
| Stern of the Lenawee, showing the switching engine and its dingy orange color, the railroad tracks set into the pier, and an LCVP from another ship churning by on an errand of some kind. On the pier, sailors are getting ready to load another LVT on board. | This bow view of the Lenawee also shows the SC 669 off, as well as the fishing trawler and some of the railroad rolling stock. The whole scene looks plausible without looking too busy or forced, at least to me. |
And now some detail shots:
|
|
|
|
| Close-up of the flying bridge and masts. The signal flags spell out NDWV, the Lenawee's call sign, while the red 'Baker' flag signifies she is loading dangerous cargo. All the topmasts were made from brass rod and cyanoacrylate glue, rigged with stretched sprue. Signal halyards are paintbrush bristles. | Looking into the No. 4 hold you can see one LVT already there, getting ready to be parked, while on the dock the crew gets ready to load another one. All mooring ropes are painted 30-gauge wire. The scratchbuilt 'switching engine' is a little clunky looking, I admit, but there's only so much you can do in this scale! | |
|
|
|
|
| Close-up of the sub chaser, showing a few of the details added, including a life ring, hose rack, bridge details, searchlight, scratchbuilt mast and stretched sprue rigging. | This view shows action on the bow, with some sailors giving one anchor a touch-up paint job, and the paravane hawsers going through an opening in the bow and down to the mine-clearing rig under the bows. The two landing craft tied to the dock are LCP(R)s, also known as the original Higgins boats, which were included in the kit. | |
|
|
|
|
| Here is a view of the scratchbuilt railroad rolling stock. Wheels were made with my Waldron sub-miniature punch and die kit and dimensions were worked out after internet research on 1940s-era railroad cars. I should have used thinner plastic on the boxcar doors; the ridge along the top of it is a walkway typical for cars from that era. | Looking at the port side of the ship, you can see sailors lugging boxes out of several trucks and up the gangway as the Lenawee gets ready for sea. This helps suggest a lot of activity going on. All cargo boom rigging is stretched sprue and plastic discs made with my Waldron punch and die set. The large hooks on the ends of the booms that were characteristic of the Haskell class are small-diameter wire. | |
|
|
|
|
| The only thing I could think of that looked remotely like fishing net in 1/700 scale was nylon stocking. I'm not sure how accurate the overall rig is, but it looks fairly convincing. | Just for fun, I figured out how far I would have to stand over the model to be 1,500 scale feet above it, took a photo in direct sunlight and converted it to black and white, to see how convincing it might look. Not too shabby, at least in my opinion! |

Some day I may get as good as this guy - Jim Baumann - whose shipyard build I linked to was the inspiration for this project and who me gave several valuable suggestions as I stumbled towards completion of my own puny effort.
Historical Note: U.S.S. Gage, APA-168, the last surviving Haskell-class APA, languished for decades in the reserve fleet, little changed from when she was mothballed in 1947.
Despite strenuous efforts to save her as a museum ship representative of the massive amphibious operations of World War II, her number finally came up in July 2009. The old girl, streaked with rust but still proud of line, was towed from the James River, Va., Reserve Fleet to Brownsville, Texas, for scrapping.
Addition: This model received several awards at the 2012 KVSM contest: Best of Show, Best Diorama and first place, Dioramas - Ship - Related.
Return to the Modeling Index Page
This page was last updated March 31, 2012.