|

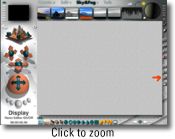
1. Start with a new, empty, Bryce scene. Select the
default, wireframe ground plane and delete it, then turn off the
Underground Wireframe toggle. This creates virtually limitless 3D
space in your Bryce world.
2. To create the feeling of looking out into the cold
vacuum of outer space, we're going to build our model inside of a
giant sphere primitive from the Create Palette.
Click on the Sphere primitive in your Create Palette.
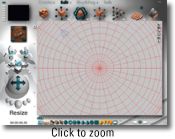
Change to Top view in the Views palette.
In your Edit palette, click and drag on the Resize XYZ icon (be
sure you've got your sphere selected). Be certain to drag from the
center of this icon, so as to resize your object equally along all
axes. Alternately, you may option-drag/alt-drag on a corner point of
the sphere's bounding box for the same result.
Resize the sphere until it overtakes the camera, and the camera
is situated in the approximate center of the enlarged sphere.
In the Attributes dialog box, assign the sphere a color and give
it a family name. For purposes of this tutorial, we will refer to
the sphere as "main sphere."
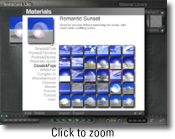
3. This sphere needs a material that is both transparent
and reflective, so as to allow light from the sun to show through
it, yet create ethereal, outer space patterns.
With the main sphere selected, open the Bryce 4 Materials Library
from the Edit palette and select either the "Romantic Sunset" preset
from the Clouds & Fogs library, or "Mr. Bubble" from the Waters
& Liquids library.
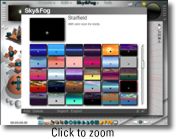
4. In the Views palette, return to Camera View.
Select the Sky Presets Library from the Sky & Fog palette.
Choose either "False Dawn" (my personal favorite) or "Starfield"
from the preset library. I used Starfield for this tutorial because
it has no haze, eliminating the illusion of a horizon (if you choose
"False Dawn", reduce the haze to zero for the same result).
Place the sun anywhere you like within your work window. You may
want to move it out of view for your nebula, but for this tutorial,
I've placed my sun so that I can see its effects through the
material on the main sphere. I can change my mind, of course, as I
build my nebula.
5. Double-click on the Sun Position control to enter the
Sky Lab. Here, you can add stars and comets if you wish, or even add
a halo (or two!) for the sun.
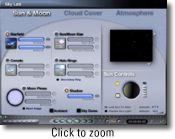
6. Return to Camera View in the Sky & Fog palette.
Under the Custom Sky preview icon, change the solar halo color.
I've used black for this image. Try other colors to see if you
like the effects. Be aware that different materials on the main
sphere will affect the way the light and the sun behave in your
scene. Experiment with the sun color, the halo color and the
materials on the main sphere to get just the right effect for your
scene.
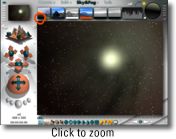
7. To make novas (the cosmic bursts of dying stars) for a
nebula, I use radial lights that reflect off the surface of the main
sphere. These lights will also greatly increase the amount of light
in the image; there are ways to reduce excessive light in a scene,
which I will address shortly. For now, we'll concentrate on making
those novas.


|

;)
;)
;)
;)
;)
;)