|

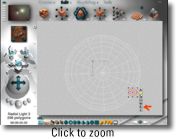
Create a radial light by clicking on the radial light icon in the
Create Palette. From top view, increase the size of the light with
the Resize tool so that you can see it well and to make it easier to
manipulate into position inside your main sphere. Note: this will
not increase the intensity of the light.
Place the light against the inside surface of the main sphere.
From camera view, check the position of the light in your scene.
Using the top view and the left and right views, reposition the
light where you want it in your scene, but keep it inside the main
sphere, just against the inside surface.
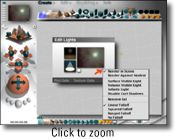
To edit the intensity and color of the light, select the light
and click the "E" next to the light's bounding box. This will bring
up the light editor dialog box.
In this dialog, click the gray triangle under the preview window
and check "render in scene". Experiment with the color and intensity
of the light to create nova-like bursts as it reflects off the
material of the main sphere.
Continue adding as many radial lights to your scene as you like.
If you find that your scene has become too bright, you have
several remedies:
- Open the Skylab in the Sky & Fog palette and check the
disable sunlight option. This can considerably darken your scene,
but still keep the individual novas visible.
- You can simply move your sun out of the scene so that it isn't
in the image, although its light will still influence the way your
scene is developing.
- You can begin putting in a few strategically placed NEGATIVE
lights.
To use negative lights, create a radial light and assign it a
different family color from the "nova" lights. This is important
because you'll want to be able to tell the positive lights from the
negative ones in your wireframe scene.
In the edit dialog for this light, click-drag to the left on the
upper left window to bring the light intensity to a negative value.
I've found that I often have to assign a relatively high negative
value to the light in order for it to work effectively against all
of the other lights in a scene.
You can change the color of your negative light here, too.
Remember, this is a negative light, and whatever color you assign
it, you will be subtracting amounts of that color from your scene.
It takes a bit of practice to use negative lights effectively. But
practice is half the fun!
Nebulae contain giant clouds of gas and dust, which obscure the
light from the stars. To build these giant clouds, create another
sphere, assign it a family color, and a cloud material from the
Materials library of the Edit palette.
I chose "Lint" from the Clouds & Fogs menu, and brought the
ambience, diffusion, and specularity all the way to zero in the
materials editor. This makes the cloud a good, dense black...perfect
for our nebula dust clouds.
Duplicate this sphere as many times as you see fit, and begin
arranging these "dust cloud" spheres in the center of the main
sphere, so that they obscure the nova lights behind them.
I've found that the best place to arrange these dust clouds is
directly in front of the camera, so that the clouds appear to frame
the image. However, I have arranged these clouds further away from
the camera for some interesting, even surprising results. Again,
experimentation is the key. Sometimes it takes only three or four
dust cloud spheres to make the perfect effect.
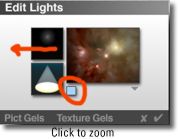
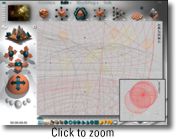
By now your nebula should be taking shape quite nicely. This
image shows the rendering of several radial "nova" lights against
the inner surface of the main sphere; the subtraction of excess
light using negative lights; the placement of dust cloud spheres
close to the camera to give the illusion of dense gasses in my
nebula.
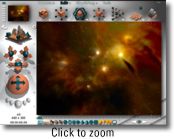
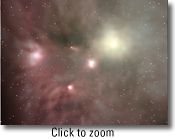
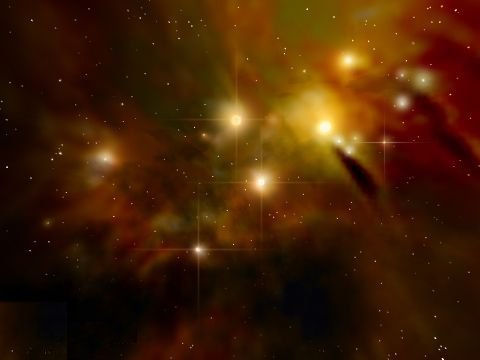
The final image is the finished nebula scene. I added more radial
lights for novas and larger stars, adjusting the negative lights to
reduce the resulting excess brightness. Then I used Painter to add a
few touches to give the image some added interest.
Experiment with the colors of the radial lights you used to make
the novas. Change the sun color or the sun halo color to completely
change the character of your image. Subtract color or light from the
scene with negative lights, experimenting with negative color. Use
the camera controls and the zoom tools to change the field of view
or the camera angle. The possibilities are endless.
Above all, have fun!
Questions? Comments? You may e-mail me at
Brettt@DTNSpeed.Net.

|

;)
;)
;)
;)
;)
;)