A
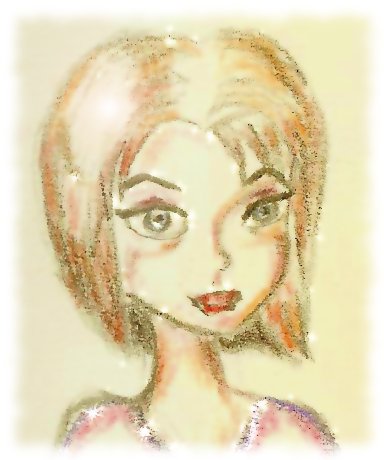
Posh Bob is
cut in the following basic steps. See the photo gallery below. And we
recommend watching the videos that
are posted on page 3.
If a Posh Bob is being created
from long hair, it is best to cut
the length off of the hair straight across one length at a point a bit
longer than the length that you want the front of the hair to be when
it is finished. This will make the following steps easier.
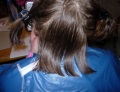
Pin up the sides of the hair from
the back, all the hair above
the ears. It is as if you are making pigtails high up on the back of
the hair, leaving the length on the back hanging down.
The "part" on the back on the hair
formed by pinning it up should
run like an upside down V from ear to ear.
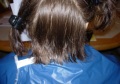
Cut the length of the back to how
short you want it to be. A
suggestion would be to cut it as long as the point where the collar
from a regular t-shirt would be on your neck.
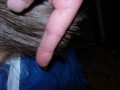
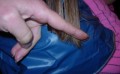
With the hair still pinned up pull
sections of the length out,
with your fingers pointing down at a 45 degree angle. The fingertips
pointing inward.
Slide your fingers out just to the
point where the length on the
bottom slides into your fingers. You don't want to cut the length on
the very bottom any more so let it slide into your fingers just barely,
so it "hides" the hair.
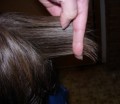
Cut the 45 degree angle and work
around the back of the hair in
sections, using previously cut sections as references. Hair is
remarkably forgiving and it doesn't have to be absolutely exactly
cut,every single piece the same length.
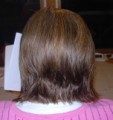
Now remove the pins and comb all
of the hair straight down.
You should know how long that you
want the front of the hair to
be at this point. Chin length? Longer? Just remember that hair
stretches when wet and if it has any body to it will "bounce back" and
become shorter when dry. For example hair cut to chin length when wet
may wind up at cheekbone length when dry! It is always better to be
conservative, you can always make it shorter, but you will have to wait
for it to grow if you wind up with it shorter than you would like.
For chin length plan on having the
front of the hair when wet
being about 2 inches longer than the chin. For semi shoulder length
hair cut it at the shoulder length when wet.
You will want to cut the length of
the sides from the back
towards the front at an angle so that it matches up to the length of
the back that you have cut in step 4.
Move forward cutting keeping in
mind where you want the length of
the front to wind up. Keep combing the hair down and check your
progress. Measure twice and cut once!
Do the other side the same way.
This time you can pull down both
sides of the hair and look at it from the front to make sure it is
even. You can always fine tune by making a second pass matching this
one side to the other side.
Even isn't always even. Some
people have cowlicks in the front of
their hair. You can painstakingly cut the hair even and when it dries
it can bounce back to a point where it looks uneven. You can compensate
for this but, it can be tricky and require some post-cut fine tuning.
Blend it in the back. Go around
the back and blend in the hair
where you have made the 45 degree cut into the rest of the hair. This
is a bit like layering it by using point cutting. You can also use
thinning shears here to blur the sharp lines that have been cut in.
Thinning shears used on only the last half inch or so of the hair will
do the trick.
Strays. Look for those stray
hairs that got missed. Ones that
were tucked up behind the ears, were hiding under the cutting apron
somehow or just got plain missed or cut uneven on the first pass.
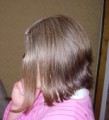
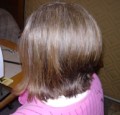
Creating a Posh Bob Photo Gallery
Pictures to go along with some of the steps
for creating a long and slightly angled Posh Bob.
With thicker hair you might want to use thinning shears along the
length. The last half inch to one inch. Don't use them on the very
front length of the hair, the part that would be bangs if combed down
in front from the forehead, it could get pokey and choppy. Start at the
first inch in.
Layers. Sometimes long layers look good in a Posh Bob. This works
best if the long layers progress from longer to short moving back on
the head. Going from no layering in the very front, what would be
bangs, to progressively shorter moving back.
Simple delicate long layers can be made by just using the hair on
top of the head. By pulling the hair straight up in the front, this is
the length, don't cut it. But move back an inch or two past this point.
Cut this slightly shorter than the front, move back. Cut the next
section slightly shorter and so on until you get to the end of the top
where the back of the hair starts. Try to keep the progressive cuts
reasonable. Think of the angle that the sides of the hair has. Having
the front of the top be 8-9 inches and the back of the top be 6 inches
on a rather longish Posh Bob is reasonable.
A long one length bob can easily be turned into an asymmetrical cut to change up the look. See Below
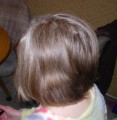
The back of the hair can be cut with an upside down V as shown
below to make the angle carry through from the sides. This creates more
"poshyness" for a lack of better word.

 Posh Bob History