
|
|
Step 1. Start by selecting a large block of material. Try
to find a piece with little or no fractures. This piece of Maury Mt. moss will produce a sphere of around 5 inches.

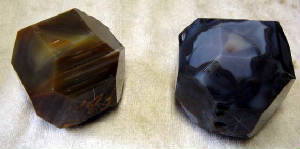
Step 3. Using the center lines, remove the corners until you
have a multi sided ball like these. By this time you have made around 20 saw cuts. The preform should now start
to look slightly ball shaped.
|
|
|
|
|
|
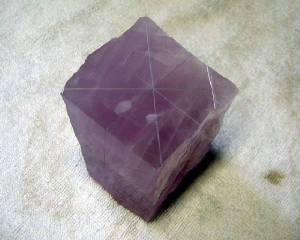
Step 2. Cut the material into a cube using your slab saw. Depending
on the size of your material, cutting a preform can take many hours. Draw an X on three adjacent sides
of the cube to be used in aligning it in the saw for step 3. Removing the corners. Some cutters use sphere preformers,
which are more accurate than my method.
|
| Note the center lines marked for use in the next step. |

|
| This will wear down a stone very fast. Thank goodness for diamond products. |
Step 4. Grind off all the sharp edges and corners. Your preform
should begin to look more and more like a sphere. This is the block of Maury Mt. moss I started with in step 1.
Notice most of the green moss was removed. This was due to fractures and personal preference. I like the red more
than the green.
|
|
|
|
|

|
| It's a dirty, muddy mess that takes many hours each. |
Step 5. Pop it into the sphere machine and start gringing off all the flat spots
until its completely smooth and (hopefully) round. This process can take many hours depending on how hard the material
is and how large the sphere is. Another factor is whether or not you use diamond grinding cups or silicon carbide grit.

Step 6. A buck of rough ground spheres waiting to move on to phase II.
The shear amount of clean up between phases warrents cutting spheres in batches. These are waiting until I have enough
to move on to the next grit. The grits are : course (60 - 90), medium (220), fine (600), then polish with optical
cerium.
|
|
|
|
|
|
|
|
|


