|
Click on pictures to enlarge

Uncrated engine as it arrived, except I removed the Bing
and test fit the Aerocarb. The Aerocarb is actually installed rotated 90 degrees from what it is shown here. Interestingly
a friend’s engine which was shipped at the same time did not have the shrink wrap on it when we opened it up.
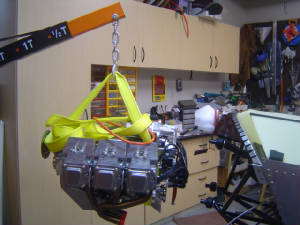
Using a tow
strap wrapped around the underside of the engine and an engine hoist borrowed from a friend I was able
to lift the engine into place. It worked even better with the help of two other builders although I probably could have
done it my self...but why?
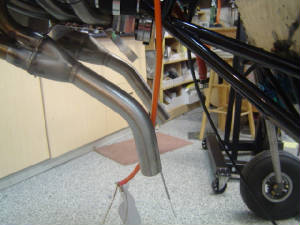
Although a
little difficult to see here. The exhaust pipe in the foreground has a different
angle to it. This is fine if you are building a Sonex with a training wheel but
I’m building a real airplane with a tailwheel. The exhaust will be directed
straight down instead of out the back. I guess most have had this pipe modified
at a muffler shop. Seems to me that most people would prefer it the other way
around and leave it up to the nose gear guys.
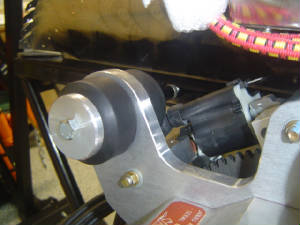
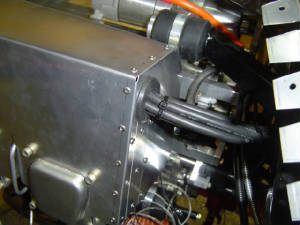
Anyone else
have this problem? The ignition module is bent up against the engine mounting
grommet.

I installed the CHT sensors for the Dynon by drilling a small hole in the cooling fins. Using safety
wire I secured them and ran them toward the rear of the engine and then out through the bottom.
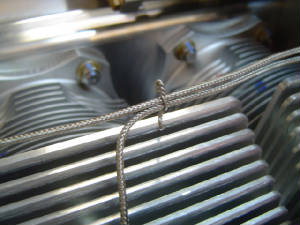
Bend the wire over so that it will not snag or cut anything.
I didn’t
like the way you are required to install the baffles on the 3300 because you have to thread the plug wires through a hole
and then slip the baffle over the cylinder heads. This was difficult and I thought
dangerous as I disconnected the rear plug several times attempting the installation.
My solution is to slot the baffle in the manner shown.
This is what it looks like finished.
|


