Here's a picture of me fixing the wax paper pieces that kept blowing around in the breeze before we put the body on. This was after we rolled the go-kart out so we could lower the body from the ceiling.
The body was stored on a body buck hanger and hanging from my garage ceiling for so long the kids don't know what the garage looked like without these. I have chains holding the buck securely in place, but have a rope system setup for when I want to take it up or down. Here's the group taking the body down off the ceiling and after it's dropped into place on the car. Pretty nice.
A very exciting time. But much more work to be done.
After the body was in place it took several hours of work to get the body centered and bolted down. The front and rear quick jacks (bumper things) seemed to line up and fit OK as did the driver side bolt holes. The passenger side holes in the body were off by 1/4" or so and I had to adjust those which was a bit of a pain. I spent a lot of time getting the middle section of the body adjusted so that it was straight. It probably sat on the body buck a little twisted or something. But by using the hood opening screws, I was able to push the middle into place and hold it down. I don't have any pictures of the body mounting process, but it wouldn't have made for very interesting pictures.
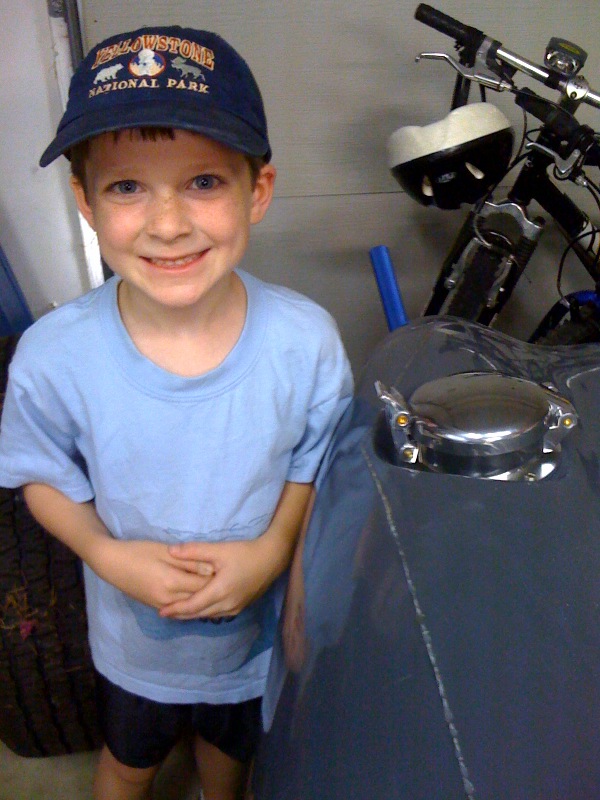
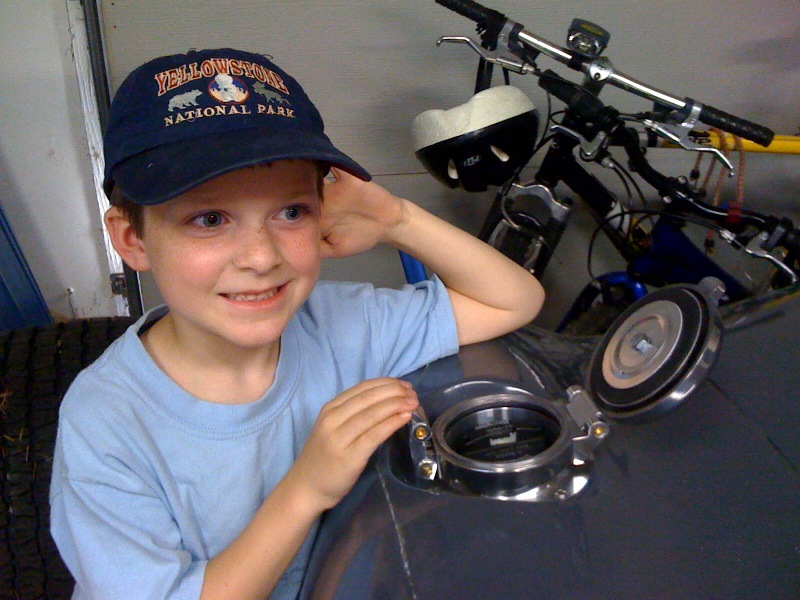
One of the first "trim" pieces to install (after the quick jacks) is the fancy gas cap. I had a great helper who could easily fit in the wheel well and hold the wrench while I put tightened the bolts from the top. This "race" gas cap fits over the stock mustang gas cap (that actually does the sealing), but only after I cut a section out of the handle piece to make room for the bolt you can see sticking out from the top of the cap. But with that simple change it's working just great (and is Darien's favorite part to play with).
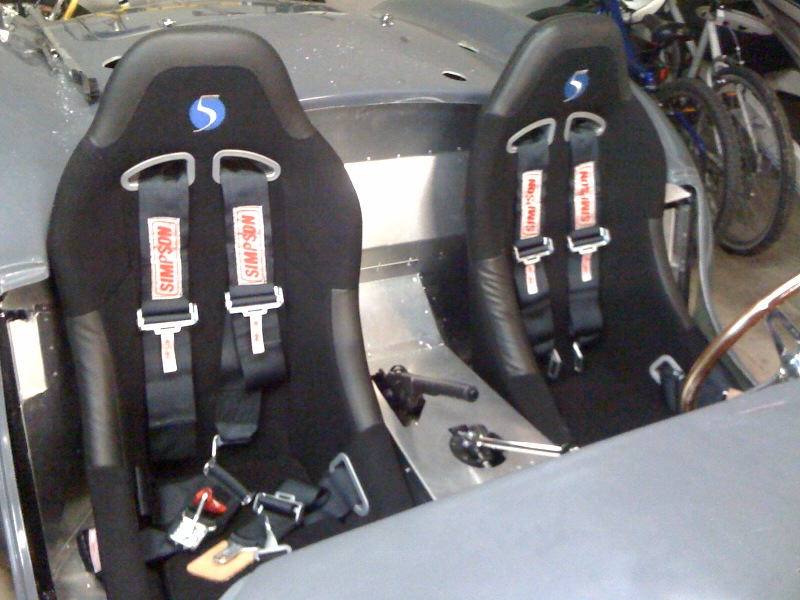
With the body in place I was finally able to bolt the seats into place for the last time. I have special seat brackets that allow for about 4-5" of adjustment and after a bit of fiddling around I was able to find the perfect place where the seats fit with all positions. After that I bolted in the 5 point racing harnesses included with the kit. Darien helped with the seat belt installation and couldn't wait to get into the seats and try out the belts. After putting it on for the first time he said, "It's just like a baby seat" :-).
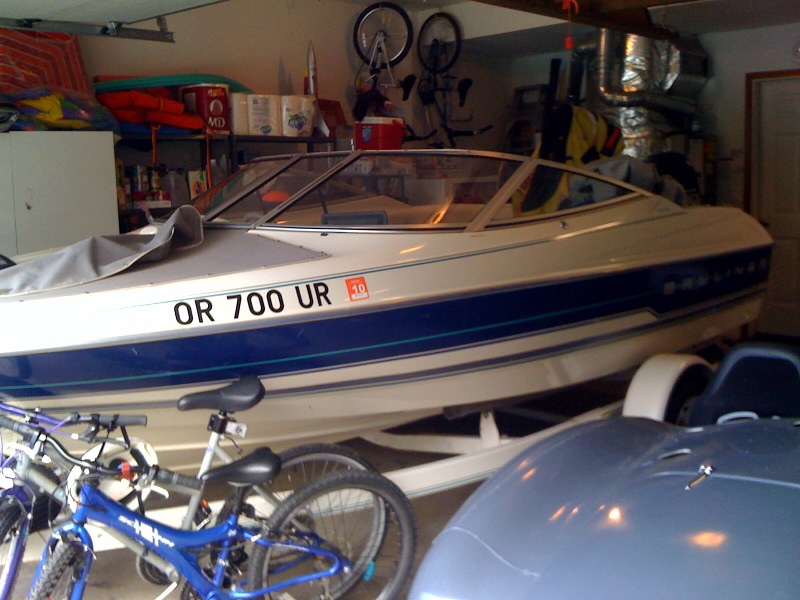
There's one more picture that needs some explaining. One of the reasons progress on the car as been even slower this summer is that we purchased a boat. The family has had many fun times boating this summer (skiing, fishing and just general puttering around). It's reduced the car working time, but the family fun times are well worth it :-).
The trunk is the next step in the body trim process and what a painful one it was. The holes for the hinges were about 1/4" too far back in both the lid and the body. This caused the trunk to hit the body when you opened it only a couple inches. The trunk was also much more "flat" than the body. After researching many possible solutions, what seemed the best was to redrill the hinge holes up that 1/4". This and a bit of rounding of the trunk lid edge seemed to make the trunk so that it could open. I then used a ratcheting tie-down strap and a couple 2x4 chunks to force the trunk to "curve" even more than the body. After leaving it that way for a couple weeks and blasting it some from a radiant heater, it seems to have gotten the trunk into a curve closer, but not quite the same as the body.
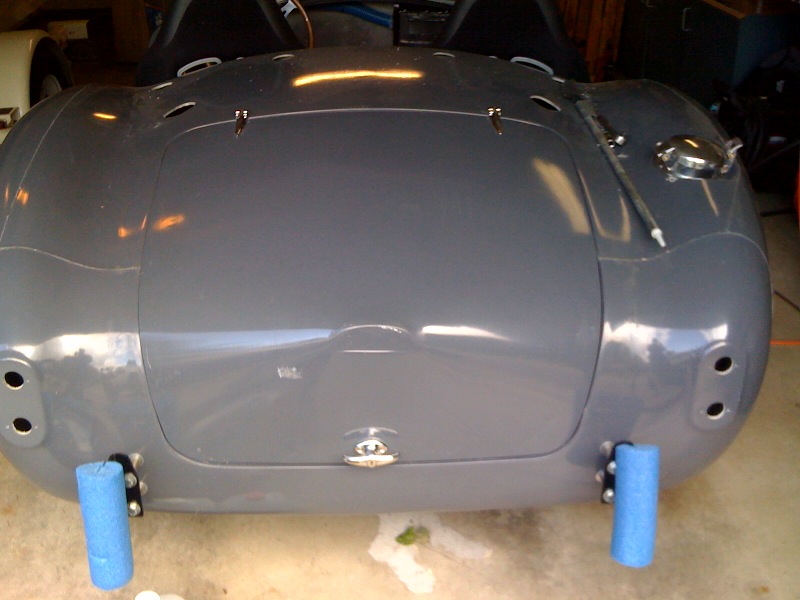
Thinking this might be enough I then went to mount the latch handle and discovered that the pre-drilled holes were off to one side about 1/4". I opened the holes up the right direction and got it centered and working properly. But when I started to look at mounting the license plate light I realized that the "bump" area in the top middle was off to one side by 1/2" and that wasn't something I could fix. After being fed up with this trunk lid I decided to call FFR and email them a couple pictures. They acknowledged that a batch of trunk lids from around the time my kit was manufactured had some issues, so they're sending me out a brand new one. Hopefully this one will fit right in :-).
If you're wondering what those funny blue things are in the picture, those are what I call "shin guards". They're pieces of a swimming "noodle" cut to fit over the quick jacks. If you ever try to walk around in the same garage as a cobra with quick jacks you'll quickly realize why I have these :-).
The "trim" install process seems to have a particular order, based on how things affect the body shape. You have to bolt the body down and put the quick jacks on first. Then the splash panels that fit behind the wheels because of the way they push outward on the body. Only then can you fit the sidepipes and windshield into place. The windshield affects the top curve of the body so only after that is in place can you put in the dash board and finally the doors and hood.
The splash panels are the rearward portion of the wheel wells. They are funny shaped aluminum panels that fit behind each of the wheels. This sounds simple enough, but there are so many variables with body mounting position and things that they are purposely made slightly large so they require quite a bit of trimming and fit trials before they fit in place. The ones in the rear weren't too bad, but the front ones have clearance issues with the exhaust headers running out to the side pipes. They also have the added functionality of "pushing" the inside portion of the wheel well toward the middle of the car a little in order to have sufficient tire clearance.
It turns out that this tire clearance part is very difficult and many builders just give up on that and either put limiters on the steering rack or live with the wheels rubbing during extreme turns. I really don't want to have to make a 12 point turn in the parking lot of a fancy restaurant nor do I relish the idea of everyone staring while this fancy cobra turns into a parking place with a horrible squeal being heard over the sound of the engine. So I spent a lot of time getting this setup so I had full use of the steering without rubbing. It was a bunch of work, but now it's working fine.
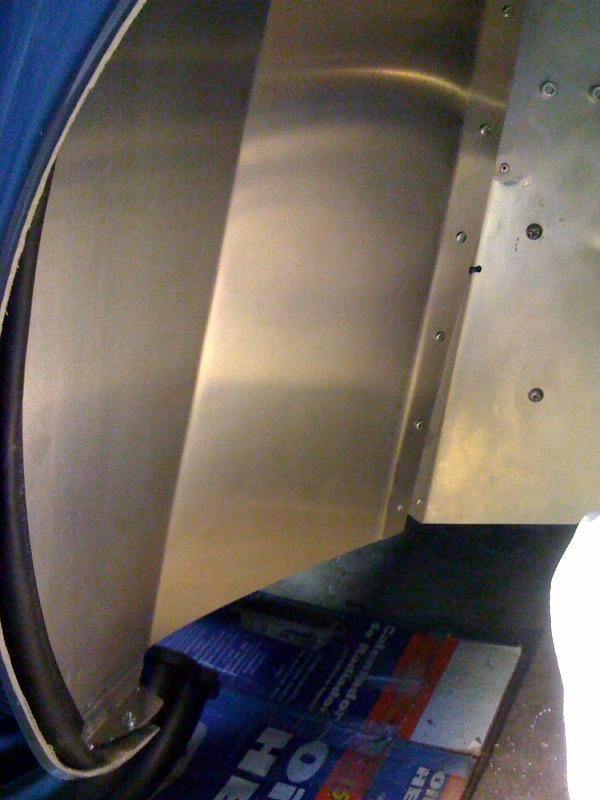
Next up is the windshield. It's not supposed to be that hard, but it turns out that my fancy "hidden" wiper motor mounting area is right in the way of where the bolts need to go for the windshield. I think I'll be able to adjust the motor mount location sufficiently to allow the mount bolt to be in place, but it will require removal of the wiper motor anytime I want to remove the windshield. At this point I've just decided to take out the wiper motor and deal with the problem later :-).
I had to adjust the body holes for the windshield brackets, but that wasn't too bad. There were two very difficult things with the windshield. The first is that the frame is brass and only has a 1.25 threads for each of the 8 screws and to top it off the screws are typically barely too long and press against the edge of the glass when tightened. The secret to this (learned from a youtube video by the Mott build school) is to insert each screw in turn and just snug it up to see if the bracket is tight before the screw bottoms out. If the latter, grind a smidge off the bottom and try again. The other challenge was getting the angel measured correctly on each side so it both looked good and could fit a soft top if I ever wanted to mount one.
After getting the windshield in place, I installed the review mirror as the last item that adjusts the curve of the body over the dash. Then I installed the dash. I had fabricated some under dash panels to give it more strength and a more finished look, but it turns out that these were a total bear to get into place after the dash was installed. I considered installing the panels first and then the dash, but figured I wouldn't be able to get the connectors sorted out. But after trying to get the panels installed after the dash, I believe that next time I'll try the other order :-). Here's a picture showing the windshield, dash and mirror all installed and looking great.
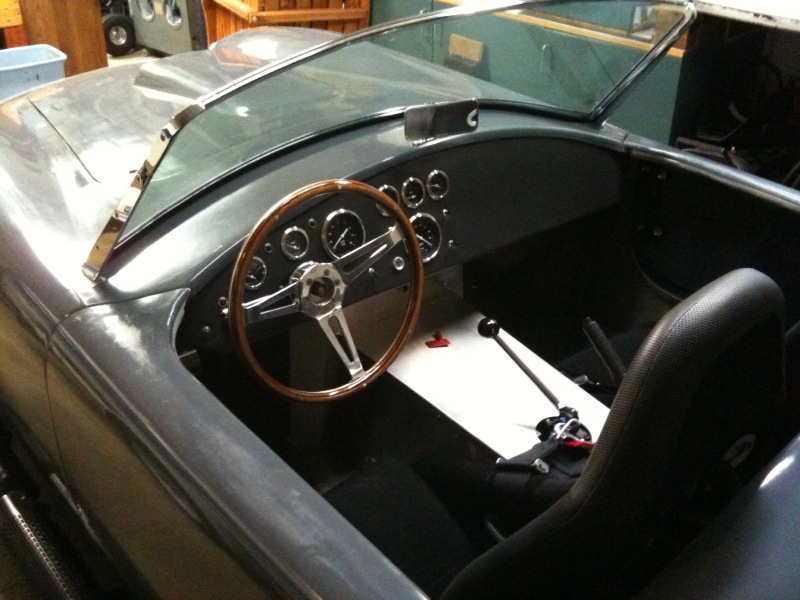
You'll also notice that the doors are installed in this picture. I was expecting serious issues getting the doors installed, but it turned out to go fairly smoothly. It definitely took time to get the latches installed correctly and adjusted along with the hinges, but if you follow the directions for the order of adjusting, it really wasn't as bad as expected.
With all of these piece in place and the dash connected up again, I just couldn't resist taking it for a spin around the block. This time my beautiful and patient wife was able to ride with me and enjoy her first ride in the cobra. My mother-in-law was in town and took a short video and you can see how much we enjoyed the spin.
Go to Page 1 Go to Page 2 Go to Page 3 Go to Page 4 Go to Page 5 Go to Page 6 Go to Page 7 Go to Page 9 Go to Page 10 Go to Page 11 Go to Page 12