|
To make the
ribs I decided to think in more of a small production line requiring 40 sets of ribs (yes I said 40, if
you don’t make a few extra ribs you'll wish you had). To do this I made a Rib Blank template to be used on the
router with a flush carbide bit. This method proved to be better than I could have hope for. In fact if you are
plans building and don’t use this method then stop reading because you're wasting my time. USE IT! I was
able to clamp 4 sheets of .025 aluminum sheet together for every pass over the router. I cut 40 front rib blanks in
less than 2 hours and the same for the rear rib blanks and they all came out perfect!
CONSTRUCTION TIP!
When using the router to cut the aluminum make sure you coat the edges with lots of lubricating wax. This will
keep the pieces from stir welding together and will significantly cut down on the amount of de-burring you will have to do.
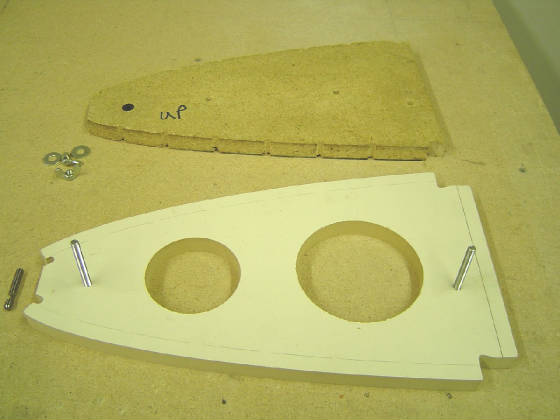
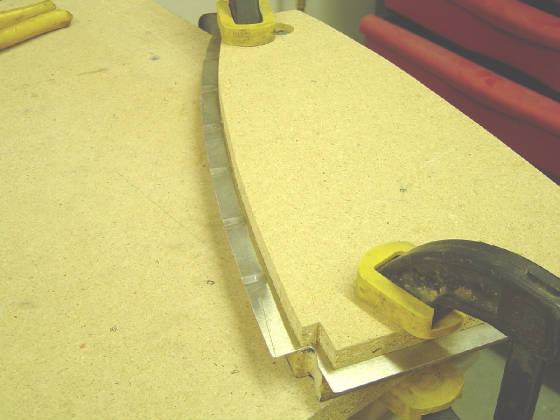
The top piece here is the form block made from press wood.
The bottom is the router rib blank template made from MDF board.
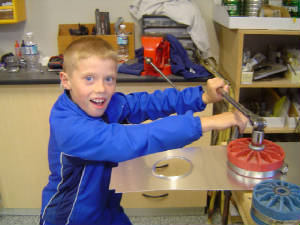
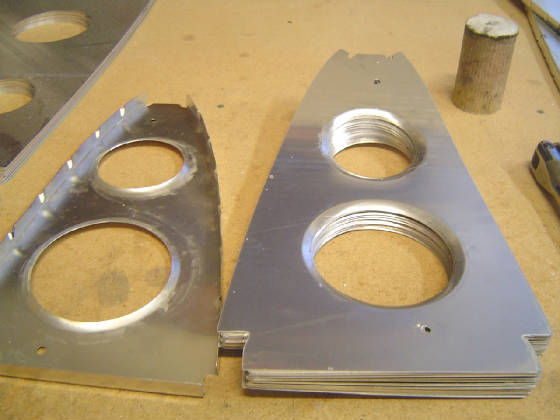
This is how you get all of the flanges completed in the lightning holes. Cheap Labor!
I noticed that
when the flange was applied to the lightening hole after the flanges were formed in the forming block there was a significant
"dishing" that occurred. To reduce this I formed the lightening hole flanges before going to the forming block.
The one on the right is the later, almost a 1/4" difference.
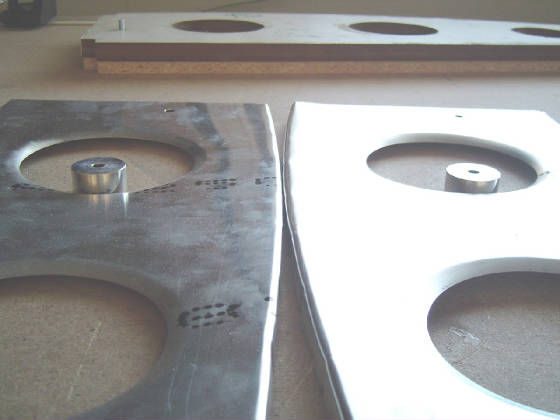
This required a modification to the form block. Using my hole cutter I stepped it out at 1/4" intervals to create
a recess that the flanged lightening hole could fit in.
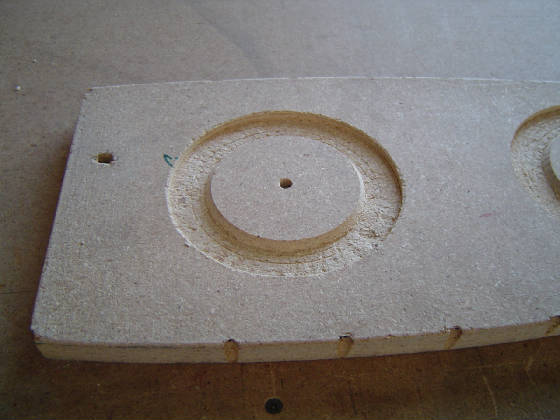
Rib Blank fitted
to form block and the initial fluting completed. Next step is to secure the assembly and bend the flange over using
a plastic tipped hammer. After you pull the rib out of the forming block assembly it will look like a banana.
Then you must straighten it out by using the fluting pliers again.
One down and 39 more to go. Notice how all of the blanks look the same. This is because of the template that
is used to cut them out on the router.
|